paulwong

#

Which is better: PooledConnectionFactory or CachingConnectionFactory?

From here:

The difference between the PooledConnectionFactory and the CachingConnectionFactory is a difference in implementation. Below are some of the characteristics that differ between them:

  • Although both the PooledConnectionFactory and the CachingConnectionFactory state that they each pool connections, sessions and producers, the PooledConnectionFactory does not actually create a cache of multiple producers. It simply uses a singleton pattern to hand out a single cached producer when one is requested. Whereas the CachingConnectionFactory actually creates a cache containing multiple producers and hands out one producer from the cache when one is requested.

  • The PooledConnectionFactory is built on top of the Apache Commons Pool project for pooling JMS sessions. This allows some additional control over the pool because there are features in Commons Pool that are not being used by the PooledConnectionFactory. These additional features include growing the pool size instead of blocking, throwing an exception when the pool is exhausted, etc. You can utilize these features by creating your own Commons Pool GenericObjectPool using your own customized settings and then handing that object to the PooledConnectionFactory via the setPoolFactory method. See the following for additional info: http://commons.apache.org/pool/api-1.4/org/apache/commons/pool/impl/GenericObjectPoolFactory.html

  • The CachingConnectionFactory has the ability to also cache consumers. Just need to take care when using this feature so that you know the consumers are cached according to the rules noted in the blog post.

  • But most importantly, the CachingConnectionFactory will work with any JMS compliant MOM. It only requires a JMS connection factory. This is important if you are using more than one MOM vendor which is very common in enterprise organizations (this is mainly due to legacy and existing projects). The important point is that the CachingConnectionFactory works very well with many different MOM implementations, not only ActiveMQ.

From here:

  • If you have clustered ActiveMQs, and use failover transport it has been reported that CachingConnectionFactory is not a right choice.

  • The problem I’m having is that if one box goes down, we should start sending messages on the other, but it seems to still be using the old connection (every send times out). If I restart the program, it’ll connect again and everything works. Source: Autoreconnect problem with ActiveMQ and CachingConnectionFactory

  • The problem is that cached connections to the failed ActiveMQ was still in use and that created the problem for the user. Now, the choice for this scenario is PooledConnectionFactory.

  • If you’re using ActiveMQ today, and chances are that you may switch to some other broker (JBoss MQ, WebSphere MQ) in future, do not use PooledConnectionFactory, as it tightly couples your code to ActiveMQ.

posted @ 2020-03-19 09:37 paulwong 阅读(425) | 评论 (0)编辑 收藏

Spring Boot Data Mongodb Starter自动配置那些坑

正好做Mongodb主从复制尝试使用Spring Boot Data Mongodb Starter插件链接访问Mongodb数据库集群。

遇到的坑:

  • spring.data.mongodb.host和spring.data.mongodb.port形式不适合集群配置,会报host无法识别异常
  • spring.data.mongodb.uri中经常抛出authentication failed异常


解决办法:

  1.  对于第一个坑,请使用spring.data.mongodb.uri。如果使用了uri,则其余的host/username/password/db/auth-db这些全部无效。
  2.  对于第二个坑,请在spring.data.mongodb.uri中指定replicaSet和authsource,另外记得把所有集群节点服务器地址都列全。
    如果auth-db和db是同一个,则无需加authsource,如果不同,则加authsource=admin


我没有把authsource指定,所以一直报authentication failed异常。然后只好一点点去发掘问题点,最后查到在com.mongodb.ConnectionString类中的createCredentials中

private MongoCredential createCredentials(final Map<String, List<String>> optionsMap, final String userName,
                                              final char[] password) {
        AuthenticationMechanism mechanism = null;
        String authSource = (database == null) ? "admin" : database;
        String gssapiServiceName = null;
        String authMechanismProperties = null;

        for (final String key : AUTH_KEYS) {
            String value = getLastValue(optionsMap, key);

            if (value == null) {
                continue;
            }

            if (key.equals("authmechanism")) {
                mechanism = AuthenticationMechanism.fromMechanismName(value);
            } else if (key.equals("authsource")) {
                authSource = value;
            } else if (key.equals("gssapiservicename")) {
                gssapiServiceName = value;
            } else if (key.equals("authmechanismproperties")) {
                authMechanismProperties = value;
            }
        }


        MongoCredential credential = null;
        if (mechanism != null) {
            switch (mechanism) {
                case GSSAPI:
                    credential = MongoCredential.createGSSAPICredential(userName);
                    if (gssapiServiceName != null) {
                        credential = credential.withMechanismProperty("SERVICE_NAME", gssapiServiceName);
                    }
                    break;
                case PLAIN:
                    credential = MongoCredential.createPlainCredential(userName, authSource, password);
                    break;
                case MONGODB_CR:
                    credential = MongoCredential.createMongoCRCredential(userName, authSource, password);
                    break;
                case MONGODB_X509:
                    credential = MongoCredential.createMongoX509Credential(userName);
                    break;
                case SCRAM_SHA_1:
                    credential = MongoCredential.createScramSha1Credential(userName, authSource, password);
                    break;
                default:
                    throw new UnsupportedOperationException(format("The connection string contains an invalid authentication mechanism'. "
                                                                           + "'%s' is not a supported authentication mechanism",
                            mechanism));
            }
        } else if (userName != null) {
            credential = MongoCredential.createCredential(userName, authSource, password);
        }

        if (credential != null && authMechanismProperties != null) {
            for (String part : authMechanismProperties.split(",")) {
                String[] mechanismPropertyKeyValue = part.split(":");
                if (mechanismPropertyKeyValue.length != 2) {
                    throw new IllegalArgumentException(format("The connection string contains invalid authentication properties. "
                            + "'%s' is not a key value pair", part));
                }
                String key = mechanismPropertyKeyValue[0].trim().toLowerCase();
                String value = mechanismPropertyKeyValue[1].trim();
                if (key.equals("canonicalize_host_name")) {
                    credential = credential.withMechanismProperty(key, Boolean.valueOf(value));
                } else {
                    credential = credential.withMechanismProperty(key, value);
                }
            }
        }
        return credential;
    }


authSource默认会指向我们目标数据的数据库。然而在身份验证机制中我们通常需要指向admin。(非常想报粗口,代码作者在这里脑袋被men挤了么)。所以需要强制指定authSource中指定。具体指定方式如下:


mongodb://{用户名}:{密码}@{host1}:27017,{host2}:27017,{host3}:27017/{目标数据库}?replicaSet={复制集名称}&write=1&readPreference=primary&authsource={授权数据库}

posted @ 2020-03-17 09:39 paulwong 阅读(1963) | 评论 (0)编辑 收藏

SPRING BATCH中STEP如果没加TRANSACTION MANAGER

这时发现如果处理总数足够大时,被处理的ITEMS总数会少于应该处理的总数。

+------------+--------------+-------------+-----------------+------------------+--------------------+----------------+-----------+-------------------------
 | READ_COUNT | FILTER_COUNT | WRITE_COUNT | READ_SKIP_COUNT | WRITE_SKIP_COUNT | PROCESS_SKIP_COUNT | ROLLBACK_COUNT | EXIT_CODE | EXIT_MESSAGE
-+------------+--------------+-------------+-----------------+------------------+--------------------+----------------+-----------+-------------------------
 |          1 |            0 |           1 |               0 |                0 |                  0 |              0 | COMPLETED |
 |      30006 |            0 |       29947 |               0 |               59 |                  0 |             61 | COMPLETED | Waited for 101 results.

如上面的总数是30006,但COMMIT的总数是29947,有59个被跳过了。

因此需在STEP上加TRANSACTION MANAGER.

https://stackoverflow.com/questions/42803941/spring-batch-incorrect-write-skip-count-issue

posted @ 2020-03-16 09:43 paulwong 阅读(611) | 评论 (0)编辑 收藏

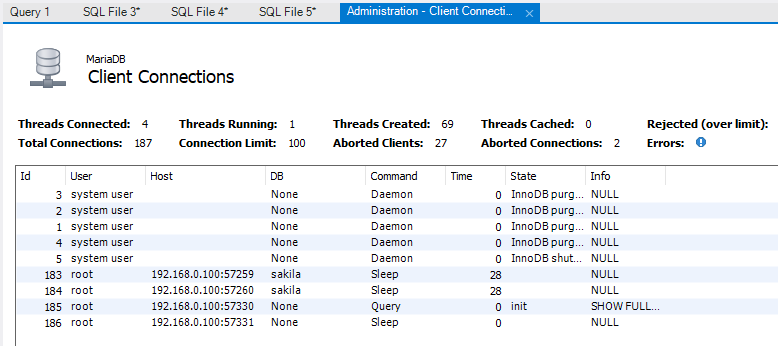
mySQL Error 1040: Too Many Connection


To see how many connections are configured for your DB to use:

select @@max_connections;

To change it:

set global max_connections = 200;

To see how many are connected at the current time:

show processlist;
vi /etc/my.cnf

[mysqld]
max_connections = 500

posted @ 2020-03-10 20:20 paulwong 阅读(305) | 评论 (0)编辑 收藏

5 ways to customize Spring MVC JSON/XML output

https://mostafa-asg.github.io/post/customize-json-xml-spring-mvc-output/

posted @ 2020-03-08 15:55 paulwong 阅读(280) | 评论 (0)编辑 收藏

MongDB连接池参数serverSelectionTimeout、connectTimeout、maxWaitTime和socketTimeout介绍

MongDB Client请求查询数据,需要包括五个阶段:
MongoDB Client需要找到可用的MongoDB Server
MongoDB Client需要和MongoDB Server建立(new)Connection
应用程序处理线程从Connection Pool中获取Connection
数据传输(获取连接后,进行Socket通信,获取数据)
断开Collection
那么,MongoDB Client驱动设置中网络相关等待超时参数serverSelectionTimeout、connectTimeout、maxWaitTime和socketTimeout分别对应上面哪个环节呢?
参数serverSelectionTimeout:对应第1个环节,即MongoDB Client需要找到可用的MongoDB Server所需要的等待时间,                                             MongDB部署的生产一般由多个服务器组成,要么作为一个复制集或者作为一个分片集群,参数                                                     serverSelectionTimeout的值即为多长时间内找不到合适服务器时候就决定放弃的时间间隔;
参数connectTimeout:对应第2个环节,每次创建Connection,对应的网络等待。单位毫秒数, 0表示没有限制;
参数maxWaitTime:对应第3个环节,应用程序处理线程从连接池中获取Collection,对应的网络等待时间。单位毫秒数,0表示                                   不等待,负数表示等待时间不确定;
参数socketTimeout:对应第4个环节,获取Connection后,就有了Socket通信,获取数据,即在MonogoDB Client                                                      和MonogoDB Server的Socket通信过程中的网络等待时间。单位毫秒数,默认配置为0,也就是没有限制,                                  没有超 时限制,系统出了问题也不容易发现,应该根据实际情况,给出合理的超时时间。
 
其他相关参数如下:
connectionsPerHost:对mongo实例来说,每个host允许链接的最大链接数,这些链接空闲时会放入池中,如果链接被耗尽,任何请求链接的操作会被阻塞等待链接可用,推荐配置10
minPoolsSize:当Connection空闲时,Connection Pool中最少Connection保有量;
threadsAllowedToBlockForConnectionMultiplier:每个Connection的可以阻塞等待的线程队列数,它以上面connectionsPerHost值相乘的结果就是阻塞等待的线程队列最大值。如果连接线程排满了队列就会抛出“Out of semaphores to get db”错误。
socketKeepAlive:该标志用于控制socket保持活动的功能,通过防火墙保持连接活着
socketKeepAlive=false
autoConnectRetry:这个控制是否在一个Connection时,系统会自动重试
#true:假如Connection不能建立时,驱动将重试相同的server,有最大的重试次数,默认为15次,这样可以避免一些server因为一些阻塞操作零时down而驱动抛出异常,这个对平滑过度到一个新的master,也是很有用的,注意:当集群为复制集时,驱动将在这段时间里,尝试链接到旧的master上,而不会马上链接到新master上
#false 当在进行socket读写时,不会阻止异常抛出,驱动已经有自动重建破坏链接和重试读操作. 推荐配置false
autoConnectRetry=false
#重新打开链接到相同server的最大毫秒数,推荐配置为0,如果 autoConnectRetry=true,表示时间为15s
#com.jd.mongodbclient2.mongo.JDClientMongo.maxAutoConnectRetryTime=false
#表示当没有手动关闭游标时,是否有一个自动释放游标对象的方法,如果你总是很小心的关闭游标,则可以将其设为false 推荐配置true

https://docs.mongodb.com/manual/reference/connection-string/#connections-connection-options
————————————————
版权声明:本文为CSDN博主「pursuer211」的原创文章,遵循 CC 4.0 BY-SA 版权协议,转载请附上原文出处链接及本声明。
原文链接:https://blog.csdn.net/pursuer211/article/details/82994027

posted @ 2020-03-07 20:58 paulwong 阅读(1324) | 评论 (0)编辑 收藏

使用 Spring Batch 构建企业级批处理应用-2

     摘要: 前言在本系列文章的第 1 部分,我们搭建了一个用户缴费通知的批处理任务。尽管这个简单的应用展现了 Spring Batch 的基本功能,但是它与真实的应用相去甚远。在实际应用中,我们的 Job 可能必须要包含多个 Step,为了提高性能,我们可能需要考虑 Job 的并发问题。Spring Batch 在这些方面又提供了哪些好的特性呢?让我们继续。Step Flow通过前文我们已经知道,Step 是...  阅读全文

posted @ 2020-03-06 13:47 paulwong 阅读(288) | 评论 (0)编辑 收藏

使用 Spring Batch 构建企业级批处理应用-1

     摘要: 引言总述本系列文章旨在通过示例搭建以及特性介绍,详细讲述如何利用 Spring Batch 开发企业批处理应用。本系列文章共分为三部分,第一部分初步介绍了批处理以及 Spring Batch 的相关概念,同时搭建了一个简单的基于 Spring Batch 的批处理应用。第二部分介绍了 Step Flow 以及并发支持。第三部分则主要介绍了 Spring Batch 对任务监控的支持。下面让我们进入...  阅读全文

posted @ 2020-03-06 13:45 paulwong 阅读(420) | 评论 (0)编辑 收藏

MobaXterm注册版

LINUX 的shell神器
https://www.upload.ee/files/11132815/MobaXterm_Pro_Portable_SetuP_v20_fu11.rar.html

posted @ 2020-02-27 17:44 paulwong 阅读(518) | 评论 (0)编辑 收藏

各种获取JVM DUMP的方法

JVM 的线程堆栈 dump 也称 core dump,内容为文本,主要包含当时 JVM 的线程堆栈,堆 dump 也称 heap dump,内容为二进制格式,主要包含当时 JVM 堆内存中的内容。由于各个操作系统、各个 JVM 实现不同,即使同一 JVM 实现,各个版本也有差异,本文描述的方法都基于 64 位 Linux 操作系统环境,Java 8 Oracle HotSpot JVM 实现。

堆栈和堆的内容在定位问题的时候,都是非常重要的信息。线程堆栈 dump 可以了解当时 JVM 中所有线程的运行情况,比如线程的状态和当前正在运行的代码行。堆 dump 可以了解当时堆的使用情况,各个类实例的数量及各个实例所占用的空间大小。

线程堆栈

使用 jstack

jstack 是 JDK 自带的工具,用于 dump 指定进程 ID(PID)的 JVM 的线程堆栈信息。

# 打印堆栈信息到标准输出 jstack PID  
# 打印堆栈信息到标准输出,会打印关于锁的信息 jstack -l PID  
强制打印堆栈信息到标准输出,如果使用 jstack PID 没有响应的情况下(此时 JVM 进程可能挂起),
加 -F 参数 jstack -F PID 

使用 jcmd

jcmd 是 JDK 自带的工具,用于向 JVM 进程发送命令,根据命令的不同,可以代替或部分代替 jstack、jmap 等。可以发送命令 Thread.print 来打印出 JVM 的线程堆栈信息。

# 下面的命令同等于 jstack PID 
jcmd PID Thread.print  

# 同等于 jstack -l PID 
jcmd PID Thread.print -l 

使用 kill -3

kill 可以向特定的进程发送信号(SIGNAL),缺省情况是发送终止(TERM) 的信号 ,即 kill PID 与 kill -15 PID 或 kill -TERM PID 是等价的。JVM 进程会监听 QUIT 信号(其值为 3),当收到这个信号时,会打印出当时的线程堆栈和堆内存使用概要,相比 jstack,此时多了堆内存的使用概要情况。但 jstack 可以指定 -l 参数,打印锁的信息。

kill -3 PID 
# 或 kill -QUIT PID 

-XX:+HeapDumpOnOutOfMemoryError

添加 JVM 参数 -XX:+HeapDumpOnOutOfMemoryError 后,当发生 OOM(OutOfMemory)时,自动堆 dump。缺省情况下,JVM 会创建一个名称为 java_pidPID.hprof 的堆 dump 文件在 JVM 的工作目录下。但可以使用参数 -XX:HeapDumpPath=PATH 来指定 dump 文件的保存位置。

# JVM 发生 OOM 时,会自动在 /var/log/abc 目录下产生堆 dump 文件 java_pidPID.hprof 
java -XX:+HeapDumpOnOutOfMemoryError -XX:HeapDumpPath=/var/log/abc/ 

jmap

jmap 也是 JDK 自带的工具,主要用于获取堆相关的信息。

堆 dump

# 将 JVM 的堆 dump 到指定文件,如果堆中对象较多,需要的时间会较长,子参数 format 只支持 b,
即二进制格式
jmap -dump:format=b,file=FILE_WITH_PATH

# 如果 JVM 进程未响应命令,可以加上参数 -F 尝试
jmap -F -dump:format=b,file=FILE_WITH_PATH

# 可以只 dump 堆中的存活对象,加上 live 子参数,但使用 -F 时不支持 live
jmap -dump:live,format=b,file=FILE_WITH_PATH

获取堆概要信息

# -heap 参数用于查看指定 JVM 进程的堆的信息,包括堆的各个参数的值,堆中新生代、年老代的内存大小、使用率等 
jmap -heap PID  

# 同样,如果 JVM 进程未响应命令,可以加上参数 -F 尝试 
jmap -F -heap PID 

一个实例输出如下:

Attaching to process ID 68322, please wait
Debugger attached successfully.
Server compiler detected.
JVM version is 25.112-b16

using thread-local object allocation.
Parallel GC with 4 thread(s)

Heap Configuration:
   MinHeapFreeRatio         = 0
   MaxHeapFreeRatio         = 100
   MaxHeapSize              = 268435456 (256.0MB)
   NewSize                  = 8388608 (8.0MB)
   MaxNewSize               = 89128960 (85.0MB)
   OldSize                  = 16777216 (16.0MB)
   NewRatio                 = 2
   SurvivorRatio            = 8
   MetaspaceSize            = 21807104 (20.796875MB)
   CompressedClassSpaceSize = 1073741824 (1024.0MB)
   MaxMetaspaceSize         = 17592186044415 MB
   G1HeapRegionSize         = 0 (0.0MB)

Heap Usage:
PS Young Generation
Eden Space:
   capacity = 41943040 (40.0MB)
   used     = 1701504 (1.6226806640625MB)
   free     = 40241536 (38.3773193359375MB)
   4.05670166015625% used
From Space:
   capacity = 4194304 (4.0MB)
   used     = 0 (0.0MB)
   free     = 4194304 (4.0MB)
   0.0% used
To Space:
   capacity = 5242880 (5.0MB)
   used     = 0 (0.0MB)
   free     = 5242880 (5.0MB)
   0.0% used
PS Old Generation
   capacity = 30408704 (29.0MB)
   used     = 12129856 (11.56793212890625MB)
   free     = 18278848 (17.43206787109375MB)
   39.889421134159484% used

16658 interned Strings occupying 1428472 bytes.

获取堆中的类实例统计
# 打印 JVM 堆中的类实例统计信息,以占用内存的大小排序,同样,如果 JVM 未响应命令,也可以使用 -F 参数 
jmap -histo PID  

# 也可以只统计堆中的存活对象,加上 live 子参数,但使用 -F 时不支持 live 
jmap -histo:live PID 

使用 jcmd

# 等同 jmap -dump:live,format=b,file=FILE_WITH_PATH
jcmd PID GC.heap_dump FILE_WITH_PATH

# 等同 jmap -dump:format=b,file=FILE_WITH_PATH
jcmd PID GC.heap_dump -all FILE_WITH_PATH

# 等同 jmap -histo:live PID
jcmd PID GC.class_histogram

# 等同 jmap -histo PID
jcmd PID GC.class_histogram -all

posted @ 2020-02-24 22:03 paulwong 阅读(1258) | 评论 (0)编辑 收藏

仅列出标题
共115页: First 上一页 19 20 21 22 23 24 25 26 27 下一页 Last