Spring Batch Remote Chunk模式下,远程执行JOB时,传输的对象是ChunkRequest/ChunkResponse,无法转成JSON格式传输。
注意此处使用的是SPRING JACKSON,而不是JACKSON。一般是在SPRING INTEGRATIONA框架下转的。
需要自定义Transformer:
JsonToChunkRequestTransformer.java
package com.frandorado.springbatchawsintegrationslave.transformer;
import java.io.IOException;
import java.util.Collection;
import java.util.Map;
import java.util.stream.IntStream;
import org.springframework.batch.core.ExitStatus;
import org.springframework.batch.core.StepContribution;
import org.springframework.batch.core.StepExecution;
import org.springframework.batch.integration.chunk.ChunkRequest;
import org.springframework.beans.factory.annotation.Autowired;
import org.springframework.integration.aws.support.AwsHeaders;
import org.springframework.integration.json.JsonToObjectTransformer;
import org.springframework.messaging.Message;
import org.springframework.stereotype.Component;
import com.amazonaws.services.sqs.AmazonSQSAsync;
import com.fasterxml.jackson.databind.ObjectMapper;
@Component
public class JsonToChunkRequestTransformer extends JsonToObjectTransformer {
private static final String MESSAGE_GROUP_ID_HEADER = "message-group-id";
@Autowired
AmazonSQSAsync amazonSQSAsync;
@Override
protected Object doTransform(Message<?> message) throws Exception {
// ACK
ack(message);
return this.getMessageBuilderFactory().withPayload(buildChunkRequest(message)).setHeader(MESSAGE_GROUP_ID_HEADER, "unique").build();
}
private ChunkRequest buildChunkRequest(Message<?> message) throws IOException {
Map map = new ObjectMapper().readValue(message.getPayload().toString(), Map.class);
Map stepContributionMap = (Map) map.get("stepContribution");
Map exitStatusMap = (Map) stepContributionMap.get("exitStatus");
StepContribution stepContribution = new StepContribution(new StepExecution("null", null));
ExitStatus exitStatus = new ExitStatus((String) exitStatusMap.get("exitCode"), (String) exitStatusMap.get("exitDescription"));
IntStream.range(0, (Integer) stepContributionMap.get("readCount")).forEach(e -> stepContribution.incrementReadCount());
stepContribution.incrementWriteCount((Integer) stepContributionMap.get("writeCount"));
stepContribution.incrementFilterCount((Integer) stepContributionMap.get("filterCount"));
stepContribution.incrementReadSkipCount((Integer) stepContributionMap.get("readSkipCount"));
IntStream.range(0, (Integer) stepContributionMap.get("writeSkipCount")).forEach(e -> stepContribution.incrementWriteSkipCount());
IntStream.range(0, (Integer) stepContributionMap.get("processSkipCount"))
.forEach(e -> stepContribution.incrementProcessSkipCount());
stepContribution.setExitStatus(exitStatus);
return new ChunkRequest((Integer) map.get("sequence"), (Collection) map.get("items"), (Integer) map.get("jobId"), stepContribution);
}
private void ack(Message<?> message) {
String receiptHandle = message.getHeaders().get(AwsHeaders.RECEIPT_HANDLE, String.class);
String queue = message.getHeaders().get(AwsHeaders.QUEUE, String.class);
String queueUrl = amazonSQSAsync.getQueueUrl(queue).getQueueUrl();
amazonSQSAsync.deleteMessage(queueUrl, receiptHandle);
}
}
JsonToChunkResponseTransformer.java
package com.frandorado.springbatchawsintegrationmaster.transformer;
import java.io.IOException;
import java.util.Map;
import org.springframework.batch.core.StepContribution;
import org.springframework.batch.core.StepExecution;
import org.springframework.batch.integration.chunk.ChunkResponse;
import org.springframework.integration.json.JsonToObjectTransformer;
import org.springframework.messaging.Message;
import org.springframework.stereotype.Component;
import com.fasterxml.jackson.databind.ObjectMapper;
@Component
public class JsonToChunkResponseTransformer extends JsonToObjectTransformer {
@Override
protected Object doTransform(Message<?> message) throws Exception {
return buildChunkResponse(message);
}
private ChunkResponse buildChunkResponse(Message<?> message) throws IOException {
Map map = new ObjectMapper().readValue(message.getPayload().toString(), Map.class);
Integer jobId = (Integer) map.get("jobId");
Integer sequence = (Integer) map.get("sequence");
String messageContent = (String) map.get("message");
Boolean status = (Boolean) map.get("successful");
StepContribution stepContribution = new StepContribution(new StepExecution("-", null));
return new ChunkResponse(status, sequence, Long.valueOf(jobId), stepContribution, messageContent);
}
}
还有一种方式,就是如果第三类不支持转JSON,即代码里没有JACKSON的注解,可以采用MIXIN的方式:
StepExecutionJacksonMixIn.java
package org.springframework.cloud.dataflow.rest.client.support;
import com.fasterxml.jackson.annotation.JsonCreator;
import com.fasterxml.jackson.annotation.JsonIgnoreProperties;
import com.fasterxml.jackson.annotation.JsonProperty;
import org.springframework.batch.core.StepExecution;
/**
* Jackson MixIn for {@link StepExecution} de-serialization.
*
* @author Gunnar Hillert
* @since 1.0
*/
@JsonIgnoreProperties({ "jobExecution", "jobParameters", "jobExecutionId", "skipCount", "summary" })
public abstract class StepExecutionJacksonMixIn {
@JsonCreator
StepExecutionJacksonMixIn(@JsonProperty("stepName") String stepName) {
}
}
在配置文件中注册才能使用:
JacksonConfiguration.java
import java.util.Locale;
import java.util.TimeZone;
import org.springframework.batch.core.ExitStatus;
import org.springframework.batch.core.JobExecution;
import org.springframework.batch.core.JobInstance;
import org.springframework.batch.core.JobParameter;
import org.springframework.batch.core.JobParameters;
import org.springframework.batch.core.StepExecution;
import org.springframework.batch.item.ExecutionContext;
import org.springframework.boot.autoconfigure.jackson.Jackson2ObjectMapperBuilderCustomizer;
import org.springframework.context.annotation.Bean;
import org.springframework.context.annotation.Configuration;
import org.springframework.integration.support.json.Jackson2JsonObjectMapper;
import com.fasterxml.jackson.databind.ObjectMapper;
import com.fasterxml.jackson.datatype.jdk8.Jdk8Module;
import com.fasterxml.jackson.datatype.jsr310.JavaTimeModule;
import com.novacredit.bmb.batchmonitor.springbatch.common.batch.jackson.ISO8601DateFormatWithMilliSeconds;
import com.novacredit.bmb.batchmonitor.springbatch.common.batch.jackson.mixin.ExecutionContextJacksonMixIn;
import com.novacredit.bmb.batchmonitor.springbatch.common.batch.jackson.mixin.ExitStatusJacksonMixIn;
import com.novacredit.bmb.batchmonitor.springbatch.common.batch.jackson.mixin.JobExecutionJacksonMixIn;
import com.novacredit.bmb.batchmonitor.springbatch.common.batch.jackson.mixin.JobInstanceJacksonMixIn;
import com.novacredit.bmb.batchmonitor.springbatch.common.batch.jackson.mixin.JobParameterJacksonMixIn;
import com.novacredit.bmb.batchmonitor.springbatch.common.batch.jackson.mixin.JobParametersJacksonMixIn;
import com.novacredit.bmb.batchmonitor.springbatch.common.batch.jackson.mixin.StepExecutionJacksonMixIn;
@Configuration
public class JacksonConfiguration {
@Bean
public Jackson2JsonObjectMapper jackson2JsonObjectMapper(ObjectMapper objectMapper) {
return new Jackson2JsonObjectMapper(objectMapper);
}
@Bean
public Jackson2ObjectMapperBuilderCustomizer dataflowObjectMapperBuilderCustomizer() {
return (builder) -> {
builder.dateFormat(new ISO8601DateFormatWithMilliSeconds(TimeZone.getDefault(), Locale.getDefault(), true));
// apply SCDF Batch Mixins to
// ignore the JobExecution in StepExecution to prevent infinite loop.
// https://github.com/spring-projects/spring-hateoas/issues/333
builder.mixIn(StepExecution.class, StepExecutionJacksonMixIn.class);
builder.mixIn(ExecutionContext.class, ExecutionContextJacksonMixIn.class);
builder.mixIn(JobExecution.class, JobExecutionJacksonMixIn.class);
builder.mixIn(JobParameters.class, JobParametersJacksonMixIn.class);
builder.mixIn(JobParameter.class, JobParameterJacksonMixIn.class);
builder.mixIn(JobInstance.class, JobInstanceJacksonMixIn.class);
// builder.mixIn(StepExecutionHistory.class, StepExecutionHistoryJacksonMixIn.class);
builder.mixIn(ExecutionContext.class, ExecutionContextJacksonMixIn.class);
builder.mixIn(ExitStatus.class, ExitStatusJacksonMixIn.class);
// objectMapper.setDateFormat(new ISO8601DateFormatWithMilliSeconds());
builder.modules(new JavaTimeModule(), new Jdk8Module());
};
}
}
@Bean
public IntegrationFlow flow4Contribution(
ConnectionFactory connectionFactory,
JobProperties jobProperties,
Jackson2JsonObjectMapper jackson2JsonObjectMapper
) {
return IntegrationFlows
.from(request4ContributionMaster())
.enrichHeaders(headerEnricherConfigurer())
.transform(Transformers.toJson(jackson2JsonObjectMapper))
.handle(jmsOutboundGateway4Contribution(connectionFactory, jobProperties))
.transform(Transformers.fromJson(StepExecution.class, jackson2JsonObjectMapper))
.channel(replies4ContributionMaster(null))
.get();
}
https://github.com/spring-cloud/spring-cloud-dataflow/tree/master/spring-cloud-dataflow-rest-client/src/main/java/org/springframework/cloud/dataflow/rest/client/support
https://frandorado.github.io/spring/2019/07/29/spring-batch-aws-series-introduction.html
https://github.com/frandorado/spring-projects/tree/master/spring-batch-aws-integration/spring-batch-aws-integration-master/src/main/java/com/frandorado/springbatchawsintegrationmaster/transformer
https://github.com/frandorado/spring-projects/tree/master/spring-batch-aws-integration/spring-batch-aws-integration-slave/src/main/java/com/frandorado/springbatchawsintegrationslave/transformer
https://github.com/zakyalvan/spring-integration-java-dsl-learnpackage com.jwebs.learn.errorhandling;
import java.util.Random;
import javax.jms.ConnectionFactory;
import org.springframework.beans.factory.annotation.Autowired;
import org.springframework.beans.factory.annotation.Qualifier;
import org.springframework.boot.autoconfigure.SpringBootApplication;
import org.springframework.boot.builder.SpringApplicationBuilder;
import org.springframework.context.ConfigurableApplicationContext;
import org.springframework.context.annotation.Bean;
import org.springframework.integration.annotation.IntegrationComponentScan;
import org.springframework.integration.channel.PublishSubscribeChannel;
import org.springframework.integration.core.MessageSource;
import org.springframework.integration.dsl.IntegrationFlow;
import org.springframework.integration.dsl.IntegrationFlows;
import org.springframework.integration.dsl.core.Pollers;
import org.springframework.integration.dsl.jms.Jms;
import org.springframework.integration.support.MessageBuilder;
import org.springframework.messaging.MessagingException;
/**
* Show how to handle error in spring integration flow.
* Please note, errorChannel in spring integration only applicable to
* error thrown in asynch component.
*
* @author zakyalvan
*/@SpringBootApplication
@IntegrationComponentScan
public class ErrorHandlingApplication {
public static void main(String[] args)
throws Exception {
ConfigurableApplicationContext applicationContext =
new SpringApplicationBuilder(ErrorHandlingApplication.
class)
.web(
false)
.run(args);
Runtime.getRuntime().addShutdownHook(
new Thread(() -> applicationContext.close()));
System.out.println("Pres enter key to exit

");
System.in.read();
System.exit(0);
}
@Autowired
private ConnectionFactory connectionFactory;
@Bean
public MessageSource<Integer> randomIntegerMessageSource() {
return () -> MessageBuilder.withPayload(
new Random().nextInt()).build();
}
@Bean
public IntegrationFlow withErrorFlow() {
return IntegrationFlows.from(randomIntegerMessageSource(), spec -> spec.poller(Pollers.fixedDelay(1000)))
.handle(Jms.outboundGateway(connectionFactory)
.requestDestination("processor.input")
.replyContainer(spec -> spec.sessionTransacted(
true)))
.get();
}
@Autowired
@Qualifier("errorChannel")
private PublishSubscribeChannel errorChannel;
@Bean
public IntegrationFlow errorHandlingFlow() {
return IntegrationFlows.from(errorChannel)
.handle(message -> System.out.println("@@@@@@@@@@@@@@@@@@@@@" + ((MessagingException) message.getPayload()).getFailedMessage().getPayload()))
.get();
}
}
基础设施:条条道路通云端
对于云厂商来说,2019 年是硕果累累的一年。不仅初创公司在使用云计算,那些很注重安全的“保守派”公司(如政府机构、医疗保健机构、银行、保险公司,甚至是美国五角大楼)也在迁移到云端。这种趋势在 2020 年将会继续,大大小小的公司都将(或者至少有计划)迁移到云端。Gartner 公司最近发布了一个数字:

如果你是一个还在考虑要不要迁移到云端的决策者,不妨重新审视一下你的策略。如果你是一个独立开发者,并且还没使用过云基础设施,那么完全可以在 2020 年尝试一下。很多大型的云厂商(如亚马逊、微软、谷歌)都提供了免费的体验机会。谷歌在这方面做得特别大方,它提供了价值 300 美元的一年免费服务。

策划注:阿里、腾讯、华为等国内云厂商同样有免费云服务试用产品。
云平台:亚马逊领头,其他跟上
作为第一大云厂商,亚马逊在 2019 年可谓风生水起。凭借其丰富的产品组合,亚马逊将把它的优势延续到 2020 年。Canalys 发布的 2019 年第三季度报告指出,大型云厂商(AWS、Azure、GCP)占据 56% 的市场份额,其中 AWS 独享 32.6%。

其他云厂商也在努力缩短与 AWS 之间的差距。微软把主要目标转向了大型企业。最近,微软打败了亚马逊,从美国五角大楼拿到了一个 100 亿美元的大单子。这个单子将提升 Azure 的声誉,同时削弱 AWS 的士气。

谷歌一直在推动 CNCF,实现云计算运维的标准化。谷歌的长期目标是让云迁移变得更容易,方便企业从 AWS 迁移到 GCP。IBM 之前斥资 360 亿美元收购了 RedHat,也想要在云计算市场占有一席之地。
在亚太地区,阿里云市场规模超过了 AWS、Azure 的总和,全球排名第三。中国国内腾讯云等企业的增长势头也十分迅猛。
2020 年将出现更多的并购。当然,很多初创公司将会带来新的想法和创新,例如多云服务。因为竞争激烈,这些公司只能从降价和推出更多的创新产品来获取利润。
容器化:Kubernetes 将会更酷
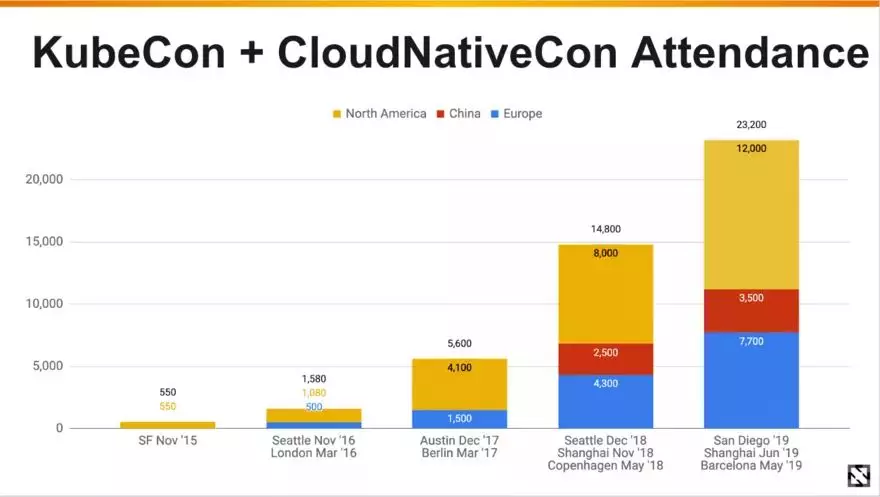
在容器编排领域,虽然一度出现了“三足鼎立”(Kubernetes、Docker Swarm 和 Mesos),但 Kubernetes 最终脱颖而出,成为绝对的赢家。云是一个分布式系统,而 Kubernetes 是它的 OS(分布式的 Linux)。2019 年北美 KubeCon+CloudNativeCon 大会的参会者达到了 12000 名,比 2018 年增长了 50%。以下是过去 4 年参会人数的增长情况。
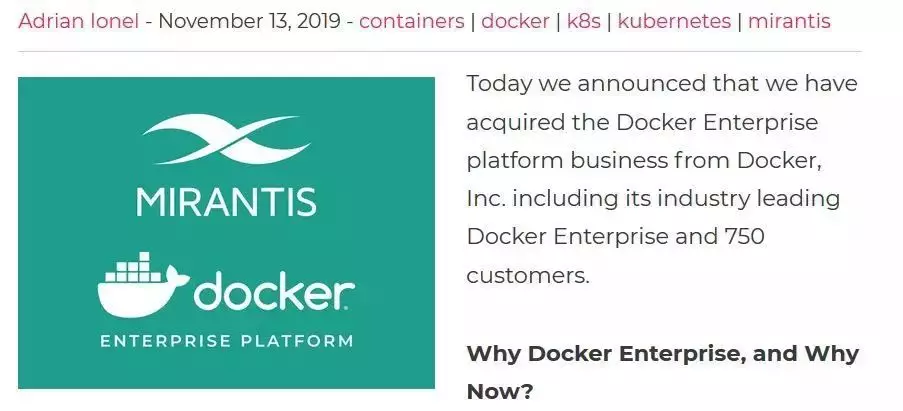
在 2020 年,Kubernetes 不仅不会后退,只会变得越来越强,你完全可以把赌注压在 Kubernetes 身上。另外值得一提的是,Migrantis 最近收购了 Docker Enterprise,不过收购数额不详。
几年前,人们张口闭口说的都是 Docker,而现在换成了 Kubernetes。Docker 在它的全盛时期未能盈利,反而在优势渐退几年之后才尝试变现。这再次说明,在现代技术世界,时机就是一切。
软件架构:微服务将成为主流
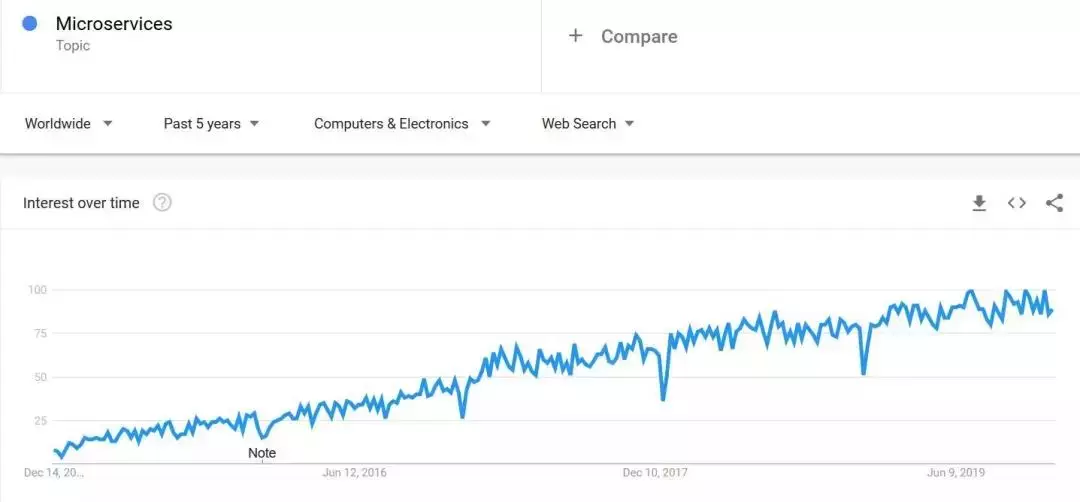
谷歌趋势表明,微服务架构范式在 2019 年持续增长了一整年。
随着软件行业整体逐步迁移到云端,微服务也将成为占主导地位的架构范式。微服务架构崛起的一个主要原因是它与云原生完美契合,可以实现快速的软件开发。我在之前的一篇博文中解释了微服务架构的基本原则及其优势和劣势。
https://towardsdatascience.com/microservice-architecture-a-brief-overview-and-why-you-should-use-it-in-your-next-project-a17b6e19adfd
我假设现在也存在一种回归到单体架构的趋势,因为在很多情况下,微服务架构有点过头了,而且做好微服务架构设计其实很难。微服务架构有哪些好的实践?在之前的另一篇博文中,我也给出了一些大概,希望对读者有用。
https://towardsdatascience.com/effective-microservices-10-best-practices-c6e4ba0c6ee2
编程语言(整体):Python 将吞噬世界
机器学习、数据分析、数据处理、Web 开发、企业软件开发,甚至是拼接黑洞照片,Python 的影子无处不在。
在著名的编程语言排行榜网站 TIOBE 上,Python 位居最流行编程语言第三位,仅次于 Java 和 C 语言。
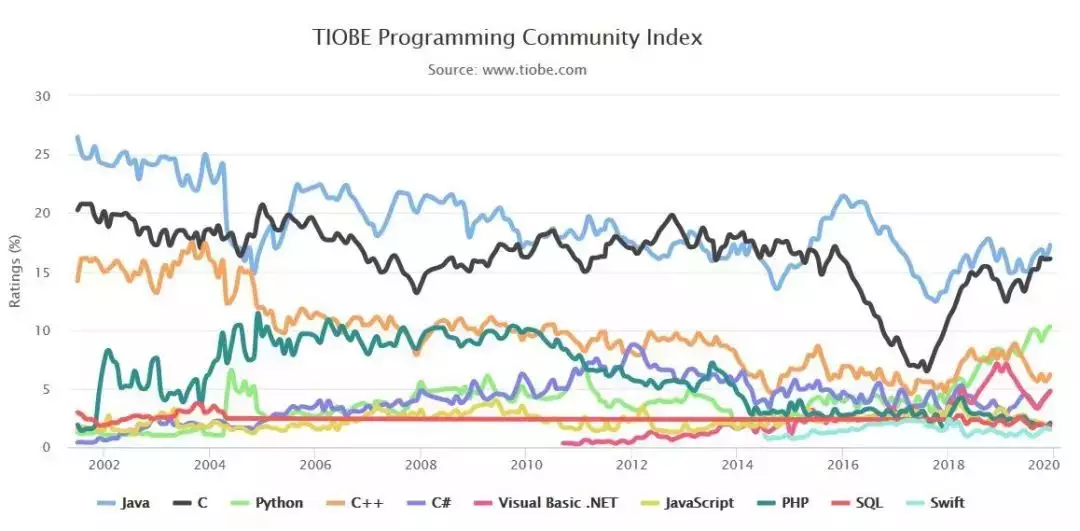
更有意思的是,在 2019 年,Python 的流行度翻了一番(从 5% 到 10%)。
Python 的崛起将在 2020 年延续,并缩短与 Java 和 C 语言之间的差距。另一门无所不在的编程语言 JavaScript 正面临下行的风险。为什么 Python 的势头会如此强劲?因为它的入手门槛低,有一个优秀的社区在支持,并受到数据科学家和新生代开发者的喜爱。
编程语言(企业方面):Java 将占主导
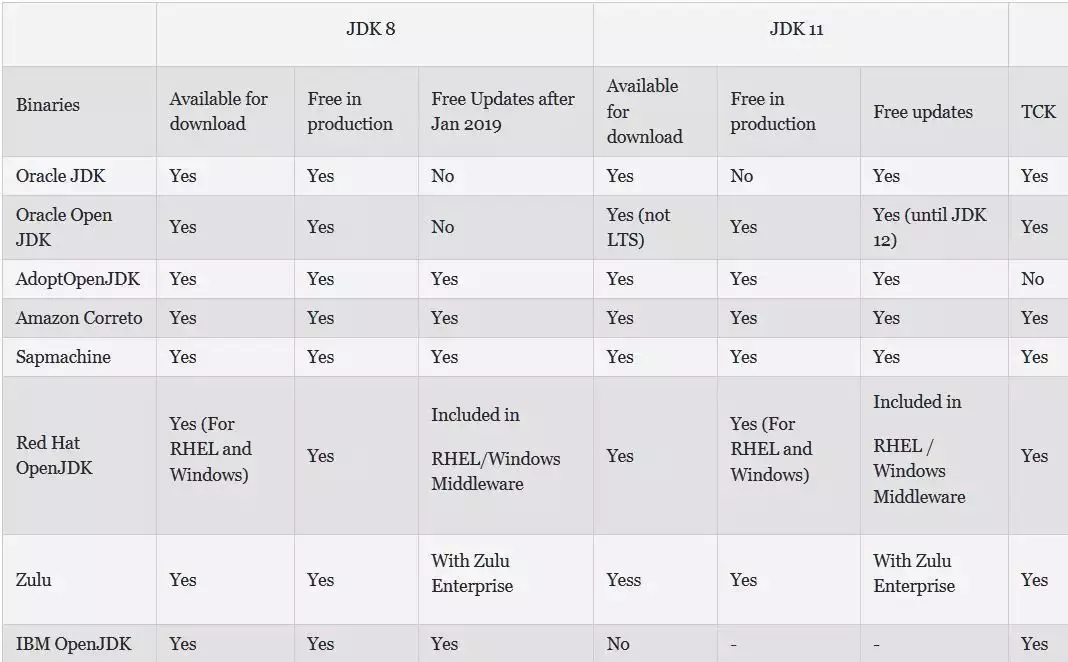
之前的 TIOBE 网站截图显示,Java 仍然是一门占主导地位的编程语言,并将在 2020 年继续保持这种地位。JVM 是 Java 的基石,其他编程语言(如 Kotlin、Scala、Clojure、Groovy)也将 JVM 作为运行时。最近,Oracle 修改了 JVM 的许可协议。
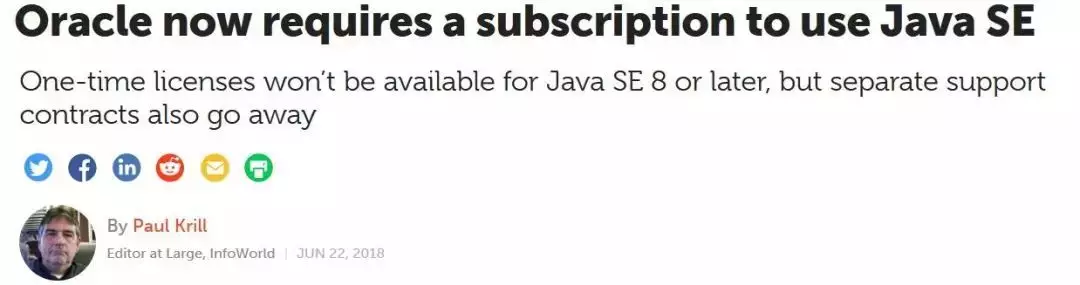
新的许可协议意味着使用 Java、Kotlin、Scala 或其他 JVM 编程语言的公司需要向 Oracle 支付大额费用。所幸的是,OpenJDK 让 JVM 继续免费。另外,还有其他一些公司为 JVM 提供企业支持。
因为体积和速度方面的问题,基于 JVM 的编程语言并不适合用在今天的无服务器环境中。Oracle 正在推动 GraalVM 计划,旨在让 Java 变得更加敏捷和快速,让它更适合用在无服务器环境中。因为除了 Java,没有其他编程语言可以提供企业级的稳定性和可靠性,所以 Java 将在 2020 年继续占主导地位。
企业版 Java:Spring 继续发力
曾几何时,在企业开发领域,Spring 和 JavaEE 之间存在着白热化的竞争。但因为 Oracle 在 JavaEE 方面没有作为,在竞争中惨败,这导致了“MicroProfile”计划的形成,并最终促成了 JakartaEE。
虽然所有的政策和活动都是围绕 JavaEE 展开,但 Spring 事实上已经赢得了这场企业 JVM 之争。2020 年,Spring 将成为 JVM 生态系统的头牌。
有两个正在进展中的项目,它们旨在减小 Java 的体积,让它更适合用在无服务器环境中。
其中一个是 Micronaut(https://micronaut.io/)。

另一个是 Quarkus(https://quarkus.io/)。
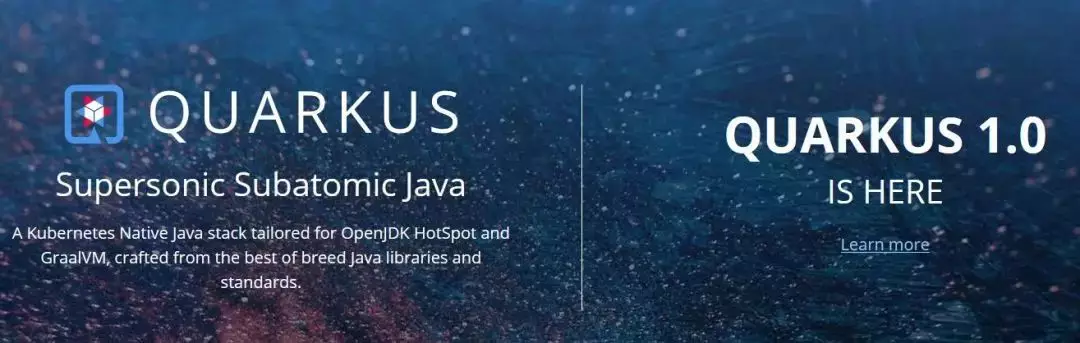
这两个项目都使用了 GraalVM,它们在 2020 年将会得到 Java 社区更多的关注。
编程语言:后起之秀的突破
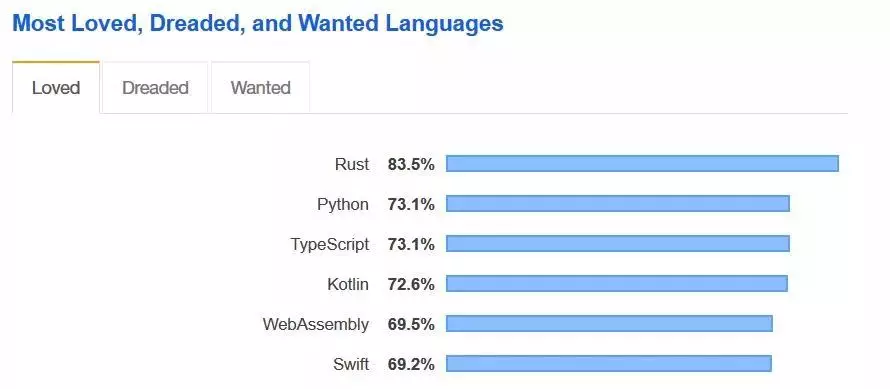
2000 年代,编程语言的发展出现了停滞。大多数人认为没有必要再去开发新的编程语言,Java、C 语言、C++、JavaScript 和 Python 已经可以满足所有的需求。但是,谷歌的 Go 语言为新编程语言大门打开了一扇大门。在过去十年出现了很多有趣的编程语言,比如 Rust、Swift、Kotlin、TypeScript。导致这种情况的一个主要原因是已有的编程语言无法充分利用硬件优势(例如多核、更快的网络、云)。另一个原因是现代编程语言更加关注开发者经济,即实现更快速更容易的开发。在 Stackoverflow 提供的一份开发者报告中,排名靠前的现代编程语言如下所示(Rust 连续 4 年名列第一)。
在之前的一篇博文中,我深入探讨了现代编程语言,对比 Rust 和 Go 语言,并说明了为什么现在是采用这些语言的好时机。
https://towardsdatascience.com/back-to-the-metal-top-3-programming-language-to-develop-big-data-frameworks-in-2019-69a44a36a842
最近,微软宣布他们在探索使用 Rust 来开发更安全的软件。

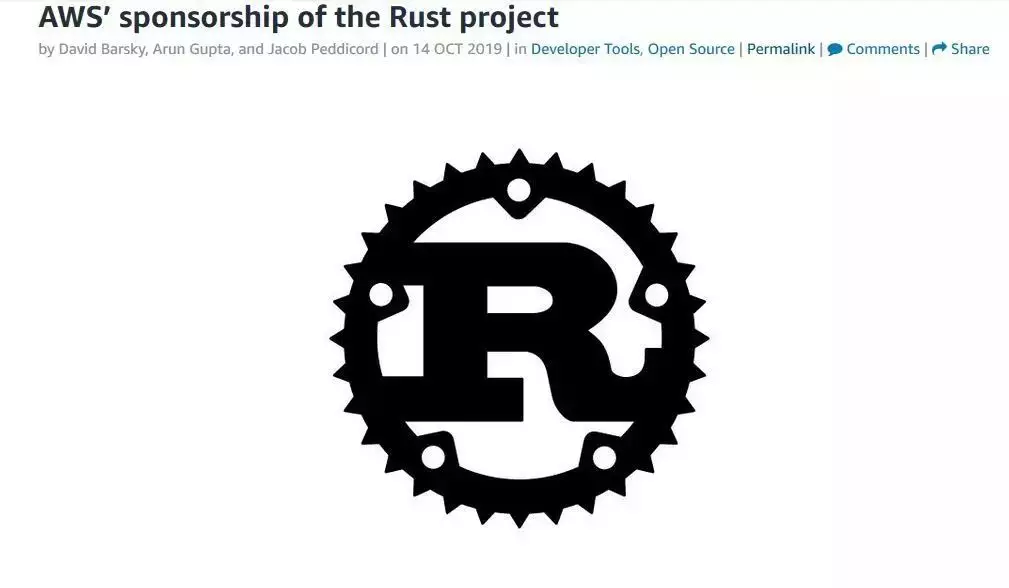
亚马逊最近也宣布要赞助 Rust。
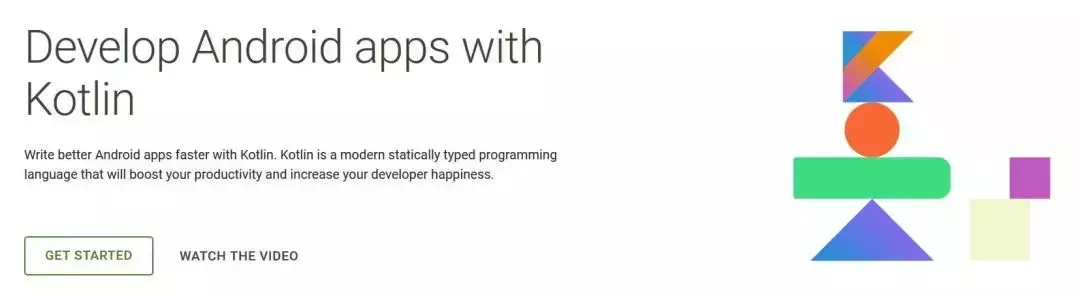
谷歌宣布将 Kotlin 作为 Android 官方开发语言,所以,在 JVM 领域,Kotlin 成了 Java 的主要竞争对手。
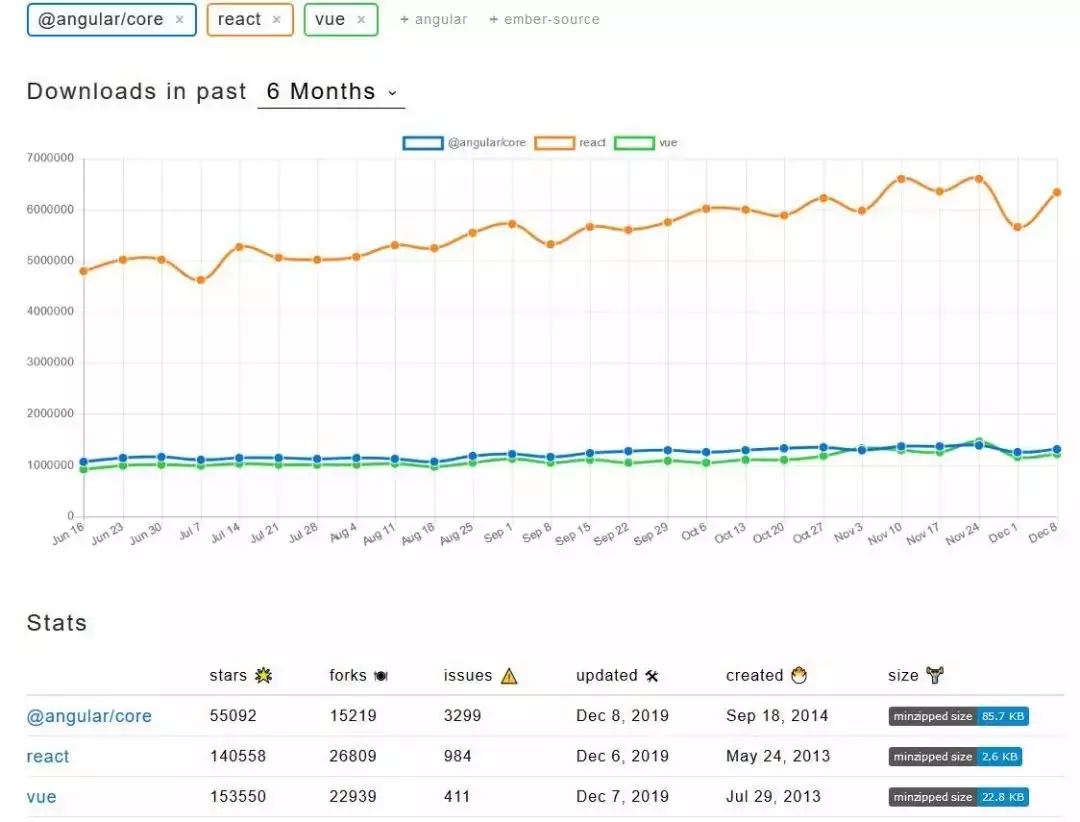
Angular 使用 TypeScript 代替 JavaScript,将其作为主要的编程语言,其他 JavaScript 框架(如 React 和 Vue)也开始为 TypeScript 提供更多的支持。
这种趋势将在 2020 年延续下去,很多巨头公司将会深入了解新一代编程语言(如 Rust、Swift、TypeScript、Kotlin),它们会站出来公开表示支持。
Web:JavaScript 继续占主导地位
曾几何时,JavaScript 并不被认为是一门强大的编程语言。在当时,前端内容主要通过后端框架在服务器端进行渲染。2014 年,AngularJS 的出现改变了这种局面。从那个时候开始,更多的 JavaScript 框架开始涌现(Angular 2+、React、Vue、Meteor),JavaScript 已然成为主流的 Web 开发语言。随着 JavaScript 框架不断创新以及微服务架构的崛起,JavaScript 框架在 2020 年将继续主导前端开发。
JavaScript 框架:React 闪耀
虽然 React 是在 AngularJS 之后出现的,但在过去十年对 Web 开发产生了巨大的影响,这也让 Facebook 在与 Google+ 的竞争中打了一场胜战。React 为前端开发带来了一些新的想法,比如事件溯源、虚拟 DOM、单向数据绑定、基于组件的开发,等等。它对开发者社区产生了重大影响,以至于谷歌放弃了 AngularJS,并借鉴 React 的想法推出了彻底重写的 Angular 2+。React 是目前为止最为流行的 JavaScript 框架,下图显示了相关的 NPM 下载统计信息。
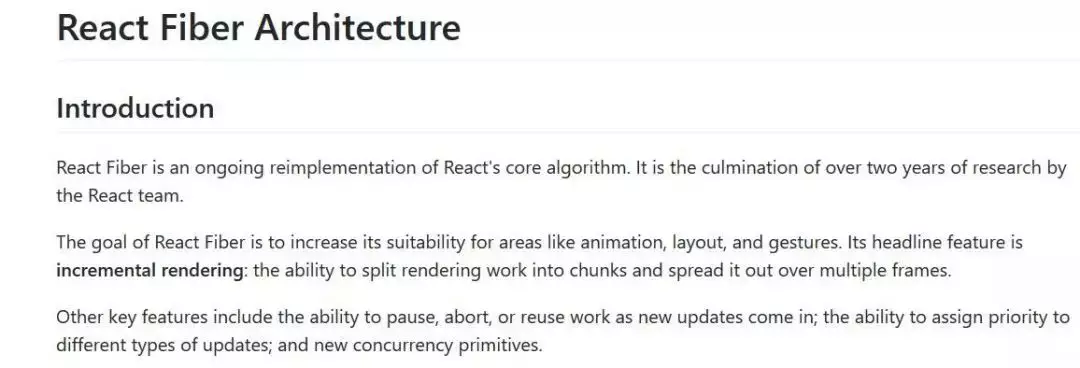
为了获得更好的并发和用户体验,Facebook 宣布完全重写 React 的核心算法,推出了 React-Fiber 项目。
2020 年,React 仍然是你开发新项目的首选 Web 框架。其他框架(如 Angular/Angular 2+ 或 Vue)呢?Angular 仍然是一个不错的 Web 开发框架,特别适合企业开发。我敢肯定谷歌在未来几年会在 Angular 上加大投入。Vue 是另一个非常流行的 Web 框架,由中国的巨头公司阿里巴巴提供支持。如果你已经在使用 Angular 或 Vue,就没必要再迁移到 React 了。
App 开发:原生应用
在移动 App 开发方面,有关混合应用开发的炒作有所消停。混合开发提供了更快的开发速度,因为只需要一个开发团队,而不是多个。但原生应用提供了更好的用户体验和性能。另外,混合应用需要经过调整才能使用一些高级特性。对于企业来说,原生应用仍然是首选的解决方案,这种趋势将在 2020 年延续。Airbnb 在一篇博文中非常详细地说明了为什么他们要放弃混合应用开发平台 React Native。
https://medium.com/airbnb-engineering/sunsetting-react-native-1868ba28e30a
尽管 Facebook 尝试改进 React Native,谷歌也非常努力地推动混合 App 开发平台 Flutter,但它们仍然只适合用于原型、POC、MVP 或轻量级应用的开发。所以,原生应用在 2020 年仍将继续占主导地位。
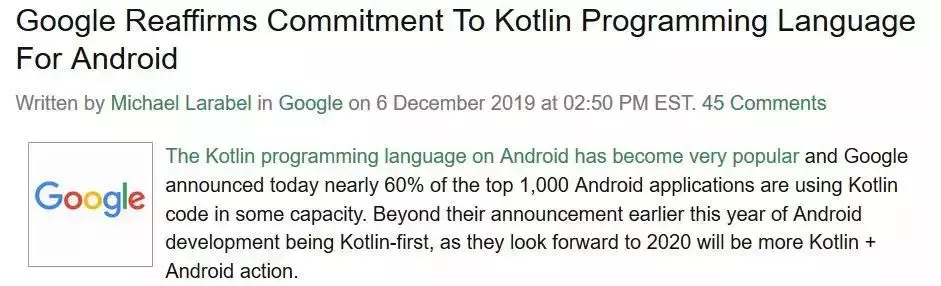
在原生应用开发方面,谷歌和苹果分别将 Kotlin 和 Swift 作为各自平台主要的编程语言。谷歌最近再次重申了对 Kotlin 的支持,这对于 Kotlin 用户来说无疑是个好消息。
混合应用开发:React Native
在很多情况下,混合应用是个不错的选择。在这方面也有很多选择:Xamarin、Inoic、React Native 和 Flutter。Facebook 基于成熟的 React 框架推出了 React Native。就像 React 在 Web 框架领域占据主导地位一样,React Native 在混合应用领域也占据着主导地位,如下图所示。
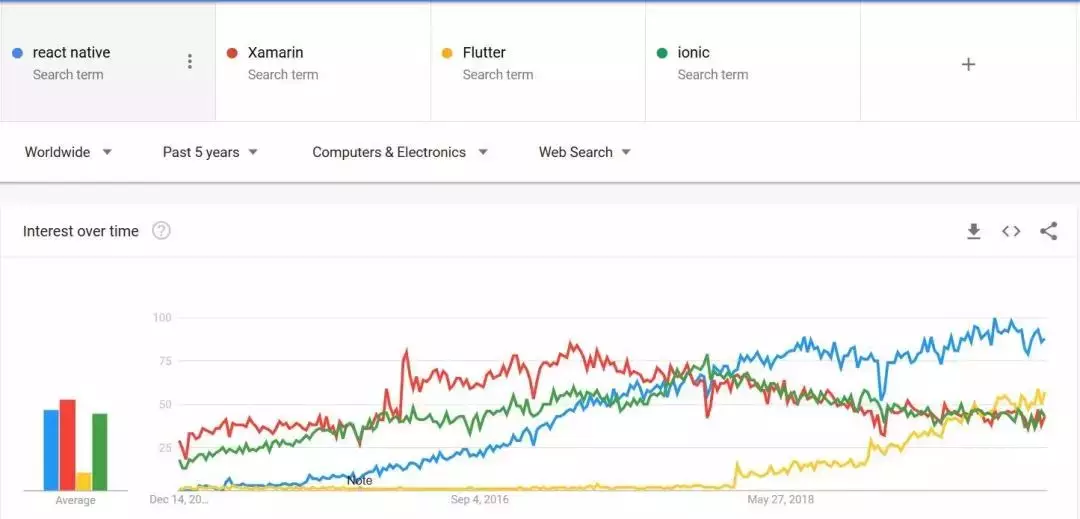
React Native 和 React 有共同的基因,都提供了高度的代码重用性以及“一次开发,到处运行”的能力。React Native 的另一个优势是 Facebook 本身也用它来开发移动应用。谷歌在这个领域起步较晚,但在去年,谷歌的混合应用开发框架 Flutter 获得了不少关注。Flutter 提供了更好的性能,但需要使用另一门不是那么流行的编程语言 Dart。React Native 在 2020 年将继续占主导地位。
API:REST 将占主导地位
REST 是 API 领域事实上的标准,被广泛用在基于 API 的服务间通信上。当然,除了 REST,我们还有其他选择,比如来自谷歌的 gRPC 和来自 Facebook 的 GraphQL。
它们提供了不同的能力。谷歌开发的 gRPC 作为远程过程调用(如 SOAP)的化身,使用 Protobuf 代替 JSON 作为消息格式。Facebook 开发的 GraphQL 作为一个集成层,避免频繁的 REST 调用。gRPC 和 GraphQL 都在各自的领域取得了成功。2020 年,REST 仍然是占主导地位的 API 技术,而 GraphQL 和 gRPC 将作为补充技术。
人工智能:Tensorflow 2.0 将占主导地位
谷歌和 Facebook 也是深度学习 / 神经网络领域的主要玩家。谷歌基于深度学习框架 Theano 推出了 TensorFlow,它很快就成为深度学习 / 神经网络的主要开发库。谷歌还推出了特别设计的 GPU(TPU)来加速 TensorFlow 的计算。
Facebook 在深度学习领域也不甘落后,他们拥有世界上最大的图像和视频数据集合。Facebook 基于另一个深度学习库 Torch 推出了深度学习库 PyTorch。TensorFlow 和 PyTorch 之间有一些区别,前者使用的是静态图进行计算,而 PyTorch 使用的是动态图。使用动态图的好处是可以在运行时纠正自己。另外,PyTorch 对 Python 支持更好,而 Python 是数据科学领域的一门主要编程语言。
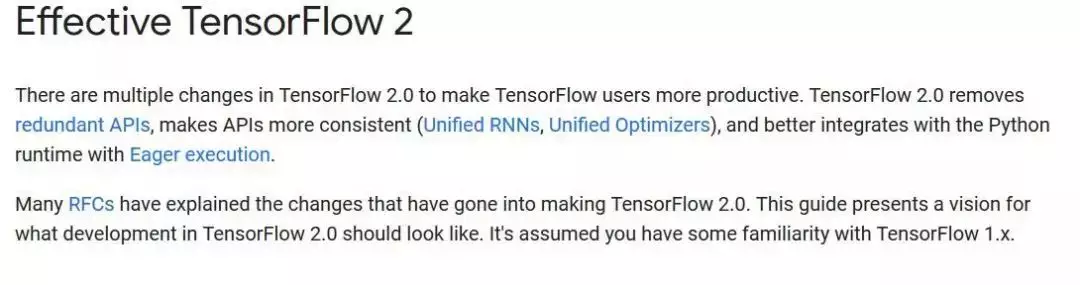
随着 PyTorch 变得越来越流行,谷歌也赶紧在 2019 年 10 月推出了 TensorFlow 2.0,也使用了动态图,对 Python 的支持也更好。
2020 年,TensorFlow 2.0 和 PyTorch 将齐头并进。考虑到 TensorFlow 拥有更大的社区,我估计 TensorFlow 2.0 将成为占主导地位的深度学习库。
数据库:SQL是王者,分布式SQL是王后
在炒作 NoSQL 的日子里,人们嘲笑 SQL,还指出了 SQL 的种种不足。有很多文章说 NoSQL 有多么的好,并将要取代 SQL。但等到炒作的潮水褪去,人们很快就意识到,我们的世界不能没有 SQL。以下是最流行的数据库的排名。
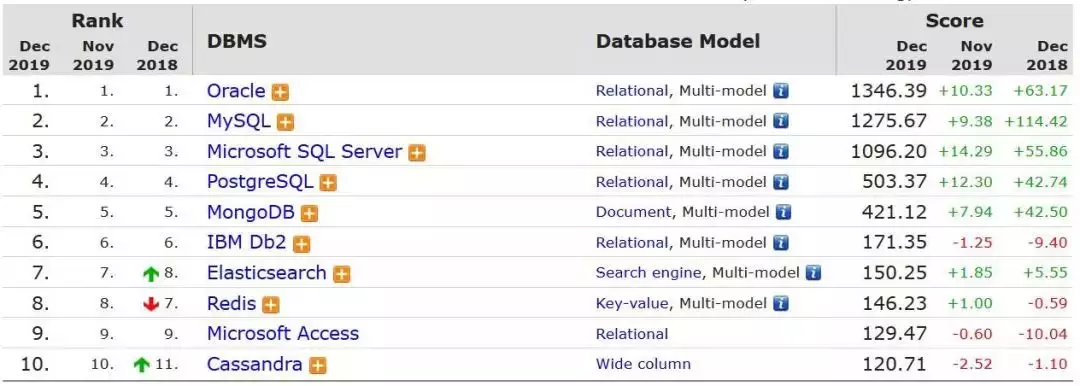
可以看到,SQL 数据库占据了前四名。SQL 之所以占主导地位,是因为它提供了 ACID 事务保证,而 ACID 是业务系统最潜在的需求。NoSQL 数据库提供了横向伸缩能力,但代价是不提供 ACID 保证。
互联网公司一直在寻找“大师级数据库”,也就是既能提供 ACID 保证又能像 NoSQL 那样可横向伸缩的数据库。目前有两个解决方案可以部分满足对“大师级数据库”的要求,一个是亚马逊的 Aurora,一个是谷歌的 Spanner。Aurora 提供了几乎所有的 SQL 功能,但不支持横向写伸缩,而 Spanner 提供了横向写伸缩能力,但对 SQL 支持得不好。
2020 年,但愿这两个数据库能够越走越近,或者有人会带来一个“分布式 SQL”数据库。如果真有人做到了,那一定要给他颁发图灵奖。
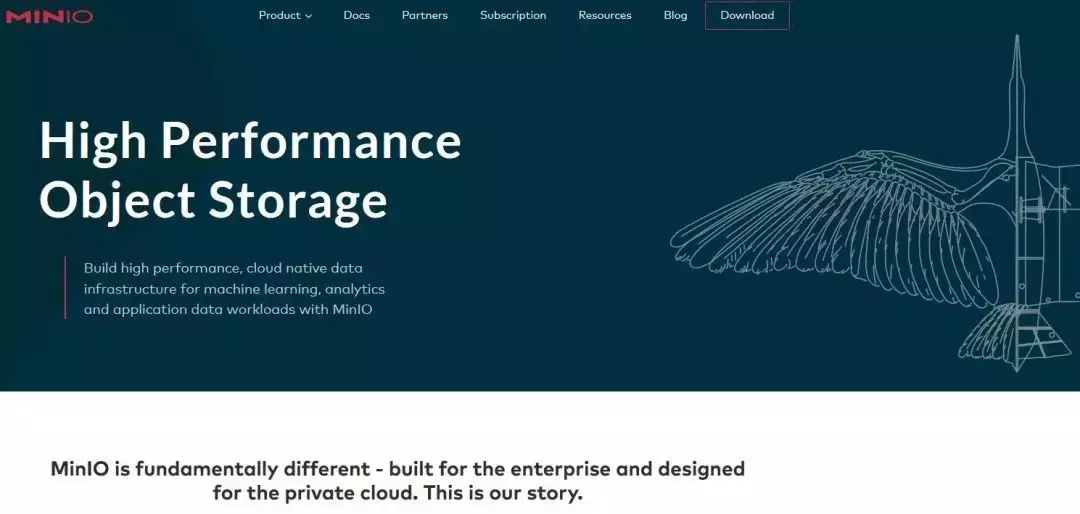
数据湖:MinIO 将要崛起
现代数据平台非常的复杂。企业一般都会有支持 ACID 事务的 OLTP 数据库(SQL),也会有用于数据分析的 OLAP 数据库(NoSQL)。除此之外,它们还有其他各种数据存储系统,比如用于搜索的 Solr、ElasticSearch,用于计算的 Spark。企业基于数据库构建自己的数据平台,将 OLTP 数据库的数据拷贝到数据湖中。各种类型的数据应用程序(比如 OLAP、搜索)将数据湖作为它们的事实来源。
HDFS 原本是事实上的数据湖,直到亚马逊推出了对象存储 S3。S3 可伸缩,价格便宜,很快就成为很多公司事实上的数据湖。使用 S3 唯一的问题是数据平台被紧紧地绑定在亚马逊的 AWS 云平台上。虽然微软 Azure 推出了 Blob Storage,谷歌也有类似的对象存储,但都不是 S3 的对手。
对于很多公司来说,MinIO 或许是它们的救星。MinIO 是一个开源的对象存储,与 S3 兼容,提供了企业级的支持,并专门为云原生环境而构建,提供了与云无关的数据湖。
微软在 Azure Marketplace 是这么描述 MinIO 的:“为 Azure Blog Storage 服务提供与亚马逊 S3 API 兼容的数据访问”。如果谷歌 GCP 和其他云厂商也提供 MinIO,那么我们将会向多云迈出一大步。
大数据批处理:Spark 将继续闪耀
现如今,企业通常需要基于大规模数据执行计算,所以需要分布式的批处理作业。Hadoop 的 Map-Reduce 是第一个分布式批处理平台,后来 Spark 取代了 Hadoop 的地位,成为真正的批处理之王。Spark 是怎样提供了比 Hadoop 更好的性能的?我之前写了另一篇文章,对现代数据平台进行了深入分析。
https://towardsdatascience.com/programming-language-that-rules-the-data-intensive-big-data-fast-data-frameworks-6cd7d5f754b0
Spark 解决了 Hadoop Map-Reduce 的痛点,它将所有东西放在内存中,而不是在完成每一个昂贵的操作之后把数据保存在存储系统中。尽管 Spark 重度使用 CPU 和 JVM 来执行批处理作业,但这并不妨碍它成为 2020 年批处理框架之王。我希望有人能够使用 Rust 开发出一个更加高效的批处理框架,取代 Spark,并为企业省下大量的云资源费用。
大数据流式处理:Flink 是未来
几年前,实现实时的流式处理几乎是不可能的事情。一些微批次处理框架(比如 Spark Streaming)可以提供“几近”实时的流式处理能力。不过,Flink 改变了这一状况,它提供了实时的流式处理能力。
2019 年之前,Flink 未能得到足够的关注,因为它无法撼动 Spark。直到 2019 年 1 月份,中国巨头公司阿里巴巴收购了 Data Artisan(Flink 背后的公司)。

在 2020 年,企业如果想要进行实时流式处理,Flink 应该是不二之选。不过,跟 Spark 一样,Flink 同样重度依赖 CPU 和 JVM,并且需要使用大量的云资源。
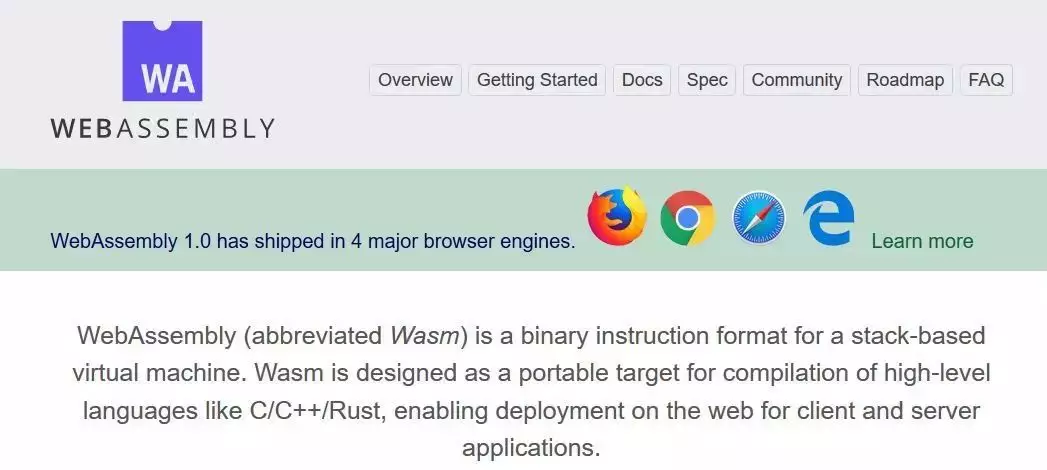
字节码:WebAssembly将被广泛采用
我从 JavaScript 作者 Brandon Eich 的一次访谈中知道了 WebAssembly 这个东西。现代 JavaScript(ES5 之后的版本)是一门优秀的编程语言,但与其他编程语言一样,都有自己的局限性。最大的局限性是 JavaScript 引擎在执行 JavaScript 时需要读取、解析和处理“抽象语法树”。另一个问题是 JavaScript 的单线程模型无法充分利用现代硬件(如多核 CPU 或 GPU)。正因为这些原因,很多计算密集型的应用程序(如游戏、3D 图像)无法运行在浏览器中。
一些公司(由 Mozilla 带领)开发了 WebAssembly,一种底层字节码格式,让任何一门编程语言都可以在浏览器中运行。目前发布的 WebAssembly 版本可以支持 C++、Rust 等。
WebAssembly 让计算密集型应用程序(比如游戏和 AutoCAD)可以在浏览器中运行。不过,WebAssembly 的目标不仅限于此,它还要让应用程序可以在浏览器之外运行。WebAssembly 可以被用在以下这些“浏览器外”的场景中。
- 移动设备上的混合原生应用。
- 没有冷启动问题的无服务器计算。
- 在服务器端执行不受信任的代码。
我预测,2020 年将是 WebAssembly 取得突破的一年,很多巨头公司(包括云厂商)和社区将会拥抱 WebAssembly。
代码:低代码 / 无代码将更进一步
快速的数字化和工业 4.0 革命意味着软件开发者的供需缺口巨大。由于缺乏开发人员,很多企业无法实现它们的想法。为了降低进入软件开发的门槛,可以尝试无代码(No Code)或低代码(Low Code)软件开发,也就是所谓的 LCNC(Low-Code No-Code)。它已经在 2019 年取得了一些成功。

LCNC 的目标是让没有编程经验的人也能开发软件,只要他们想要实现自己的想法。
虽然我对在正式环境中使用 LCNC 框架仍然心存疑虑,但它为其他公司奠定了良好的基础,像亚马逊和谷歌这样的公司可以基于这个基础构建出有用的产品,就像 AWS Lambda 的蓬勃发展是以谷歌 App Engine 为基础。
2020 年,LCNC 将会获得更多关注。