2007年5月25日
#
删除 ActiveX 控件,请按照相应部分中的步骤操作。
Internet Explorer 3.0、3.01 和 3.02
- 单击“开始”,指向“设置”,单击“控制面板”,双击“添加/删除程序”,然后单击“安装/卸载”选项卡。
- 如果您要删除的 ActiveX 控件出现在安装的程序列表中,请单击该 ActiveX 控件,单击“添加/删除”,然后按照屏幕上的说明操作。如果该 ActiveX 控件没有出现在安装的程序列表中,则继续执行下一步。
- 单击“开始”,单击“运行”,在“打开”框中键入下列行,然后单击“确定”:
regsvr32 drive:\windows\occache\filename.ocx /u
注意:drive 是 Windows 文件夹所在的驱动器号,windows 是安装 Windows 的文件夹名,而 filename.ocx 是您想要删除的 ActiveX 控件。
注意:如果您不知道要删除的 ActiveX 控件 (.ocx) 的文件名,则可以通过查看安装或使用 ActiveX 控件的网页的超文本标记语言 (HTML) 源文件来确定该文件名。要查看一个网页的 HTML 源文件,请右键单击该网页的空白区域,然后单击“查看源文件”。
- 在 Windows 资源管理器或 Windows NT 资源管理器中,单击 Windows\Occache 文件夹中的 .ocx 文件,然后单击“文件”菜单上的“删除”。
Occache 是在 Internet Explorer 3.x 的所有版本中安装有 ActiveX 控件的文件夹的名称。Regsvr32.exe 文件是由 Internet Explorer 安装的,并且可用于注册和删除 ActiveX 控件的注册表项。
Internet Explorer 4.x 或更高版本(所有平台)
Internet Explorer 4.x 或更高版本,包括 Occache.dll 文件,该文件可用于使用“shell 文件夹”枚举、更新和安全地卸载 ActiveX 控件。
- 单击“开始”,指向“设置”,单击“控制面板”,双击“添加/删除程序”,然后单击“安装/卸载”选项卡。
- 如果您要删除的 ActiveX 控件出现在安装的程序列表中,请单击该 ActiveX 控件,单击“添加/删除”,然后按照屏幕上的说明操作。如果该 ActiveX 控件没有出现在安装的程序列表中,则继续执行下一步。
- 在 Windows 资源管理器或 Windows NT 资源管理器中,双击 Windows\Downloaded Program Files 文件夹或 Winnt\Downloaded Program Files 文件夹,右键单击您想要删除的 ActiveX 控件,然后单击“删除”。
- 在系统提示您是否删除该 ActiveX 控件后,单击“是”。
重要说明:如果您运行的是 Internet Explorer 4.0,则不应删除以下 ActiveX 控件:
- DirectAnimation Java Classes
- Internet Explorer Classes for Java
- Microsoft XML Parser for Java
- Win32 Classes
Internet Explorer 5.0 或更高版本不要求 Downloaded Program Files 文件中的这些组件。
删除 ActiveX 控件时出现的错误消息
在您尝试使用 Occache shell 文件夹删除一个 ActiveX 控件时,可能显示以下错误消息之一:
- 共享冲突 这些程序文件当前正由一个或多个程序使用。请关闭一些程序,然后重试。您可能需要重新启动 Windows。
- 组件删除 即将删除 Windows 系统 DLL:(<path\filename>)。是否删除?
共享冲突:
如果您要尝试删除的 ActiveX 控件当前在内存中由 Internet Explorer 或“活动桌面”组件加载,则显示此错误消息。
要解决此错误消息,请按照下列步骤操作:
- 关闭所有打开的 Internet Explorer 窗口。
- 禁用“活动桌面”。为此,请右键单击桌面上的空白区域,指向“活动桌面”,然后单击“查看网页”以清除该复选标记。
- 按照本文中前面部分的“Internet Explorer 4.0 或更高版本”部分中介绍的步骤,删除该 ActiveX 控件。
注意:您最好在删除 ActiveX 控件前重新启动 Windows。
组件删除:
仅当您要删除的 ActiveX 控件向已注册的 Occache 文件夹以外的文件夹(例如,Windows\System 或 Winnt\System32)安装文件时,该消息才出现在 4.01 Service Pack 1 (SP1) 之前的 Internet Explorer 4 版本中。Occache 不是总能确定这些文件是否正由其程序共享。
如果您确定消息中显示的一个或多个文件未由 Windows 或其他程序使用,请单击“是”。否则,单击“否”。
注意:在 Internet Explorer 4.01 SP1 和更高版本中,Occache 不删除(或提示您删除)注册的 Occache 文件夹之外的相关文件。
支持多个 Occache 文件夹
Internet Explorer 4.0 和更高版本支持多个 Occache 文件夹。Occache 文件夹的列表位于以下注册表项中:
HKEY_LOCAL_MACHINE\SOFTWARE\Microsoft\Windows\CurrentVersion\Internet Settings\ActiveX Cache
默认情况下,Internet Explorer 4.0 和更高版本使用 Windows\Downloaded Program Files 或 Winnt\Downloaded Program Files 文件夹。如果是从 Internet Explorer 3.x 升级的,则 Occache 和 Downloaded Program Files 文件夹可能都存在。在此情况下,所有新的 ActiveX 控件都安装在 Downloaded Program Files 文件夹中,但以前安装的 ActiveX 控件仍在 Occache 文件夹中工作。当您在 Windows 资源管理器、Windows NT 资源管理器或“我的电脑”中打开 Occache 或 Downloaded Program Files 文件夹时,将显示所有 ActiveX 控件,而与该 ActiveX 控件的文件所在的文件夹无关。在此情况下,注册表项中将出现以下字符串值:
"0"="C:\\WINDOWS\\OCCACHE"
"1"="C:\\WINDOWS\\Downloaded Program Files"
有关 ActiveX 控件的其他信息,请参见 Microsoft 知识库中的以下文章:
154544 (http://support.microsoft.com/kb/154544/LN/ ) ActiveX 技术说明
有关 Internet Explorer 在发生冲突(例如,如果文件已存在)时如何下载 ActiveX 控件的信息,请参见 Microsoft 知识库中的以下文章:
196150 (http://support.microsoft.com/kb/196150/LN/ ) INFO:为什么会在代码下载期间创建 CONFLICT 目录
a very cool pdf to word converter:http://www.pdftoword.com
摘要:
<head>
<body>
<table class="dataintable" id='table22'>
<tbody><tr>
&nb...
阅读全文
http://www.ej-technologies.com/products/exe4j/overview.html
window.open(....);
this.focus(); self.opener = this; self.close();
There are two javascript ways to view web site in full screen mode in IE:
1. window.open('http://www.sina.com.cn','','fullscreen')
Note: If view the page remotely, this way will ineffective, and you can use the second one instead.
2. var wsh=new ActiveXObject("wscript.shell");
wsh.run("iexplore -k http://www.google.com");
问题描述:使用ie6导出excel表正常,但是在IE7 下总是报错:“ Automation server can't create
object javascript”。
1. In Internet Explorer > Tools > Internet Options > Security > Custom Level
2. Enabling or prompting "Initializing and Script Activex controls not marked as safe"
3.IE7对环境的设置特别严格,常用到的有两部分,一个是安全里面的“internet”设置,一个是“信任站点”的设置。
1>需要把站点加入信任站点列表;
2>设置“信任站点”项的“自定义级别”,启用“对未标记为可安全执行 ActiveX控件初始化并执行脚本”即可。
|
|
#2
|
|
|
The children of a TabNavigator aren't
created until they're needed. In your case, only the contents of the
first tab are actually created, because they're part of what's needed
when the TabNavigator is first displayed. The contents of the second tab
won't be instantiated until they need to be displayed, which is when
the second tab is clicked on. That's why that error is being thrown
until you click on the second tab. This process of only instantiating
components as they are needed is called deferred instantiation.
To force the contents of the other tabs to be instantiated, try changing
the creationPolicy property of the TabNavigator to be "all". This will
cause all of the different tabs to be instantiated, regardless of having
been clicked on.
In the Flex docs, check out Container.creationPolicy for more details.
ActionScript Code:
<mx:TabNavigator creationPolicy="all">
|
W3C DOM Compatibility - CSS
From: http://www.quirksmode.org/dom/w3c_css.html#access
From:http://martybugs.net/articles/print.cgi
Web Page Printability With CSS
author: Martin
"mpot" Pot
date: 7 January 2005
Introduction
This article describes how to use CSS media types to make your website
much more
printer-friendly.
An overview of CSS media types is given, and sample HTML and CSS code is
provided,
detailing how to implement CSS media types for improving printability.
Why?
Most webpages do not print very well, with large amounts of the printed
page being wasted with
banners, navigation menus, advertising, and other unnecessary content.
When attempting to print out the main text of a webpage, you often have
to resort to
copying the text into Word or another editor, and then printing it.
Some websites make use of a link at the bottom of the page, linking to a
"printable version"
of the same page. However, this requires additional effort on the part
of the web developer.
There is a much easier way to make your pages print better, and that's
via the use of
CSS media types.
For example, all content on
MartyBugs.Net
has been designed to be
printer-friendly.
When printing pages from this site
using a modern browser, elements such as the left menu column and the
right column (where used)
will be hidden, thus ensuring there's more room on the printed page for
the main content.

|
|
page as displayed on a 1024x768 screen
|
The image above shows how one of the pages on this website would be
displayed on a
computer screen, at a resolution of 1024x768.

|
|

|
printed page,
no print optimisation
|
|
printed page,
optimised for printing
|
The left image above shows how the same page will look when printed, if
all the page content is printed.
Notice how little room there is in the centre of the page for the main
content.
The right image above shows the same page, but the navigation and other
content on the left and right
hand sides of the page is not printed. CSS media types have been used
to hide this content when
the page is printed.
CSS Media Types
The primary aim of the CSS media types is to allow the web-page author
to define different styles for
a page, depending on the media being used to display the page.
CSS 2.1 supports numerous media types, including
all (suitable for all devices),
screen (computer screens),
print (pages viewed on-screen in print-preview mode and printed
pages).
Other less-common media types are also supported, such as braille,
embossed, handheld, projection,
speech, etc, but we won't be discussing any of these.
CSS media types are defined using the rule in
your CSS style-sheet,
or in your in-line CSS style definitions.
For example, to define different font sizes for the
print
and
screen media types, as well as a common
line-height to be used for both,
the CSS definition is as follows:
  @media print {

body { font-size: 10pt }

}

@media screen {

body { font-size: 13px }

}

@media screen, print {

body { line-height: 1.2 }

}
The CSS media types allow you to specify different CSS properties for
any element, so it will be
displayed differently on the screen than when printed.
For the purposes of this article, the only thing we're interested in is
to hide some page elements
when the page is printed.
Refer to the
W3C CSS
2.1 Media Definitions
for more details on CSS media types.
Using CSS Media Types
The web pages on this website are all generated on-the-fly, using
server-side Perl templates.
All pages have a number of common elements, namely:
- a banner across the top
- navigation menu on the left side
- main content in the centre
- advertising and other content on the right side
- footer across the bottom
When someone prints out a page from this website, CSS media types are
used to hide a number
of elements on the page, including the navigation menu, advertising, and
the navigation content
in the footer.
To provide a working demonstration of how CSS media types can be used in
this way, a demonstration
web page was coded, using tables to define the banner area across the
top of the page, with
a column down the left-hand side for the navigation menu, a column down
the right-hand side
for other content, and a footer across the bottom of the page.
This layout is one of the most commonly used page layouts on the
internet at the present - hence
my choice to use it as an example.

the example page
Firstly, we define the CSS styles for the page:
  <style type="text/css">

@media print {

.noprint { display: none; }

}

</style>
Note that the CSS styles can also be defined using a separate CSS file,
but example page has the CSS
defined in-line for simplicity (and to keep the example to a single
file).
The above CSS definition is defining a style called
noprint,
and will only
be applied to printed content. Setting the
display
property to
none means any content using this CSS style
will not be displayed
when printed, but will be displayed for all other media types.
There are a number of components on this page that we don't want
printed, namely the columns on the
left-hand side and on the right-hand side.
The
noprint style is applied to the table
cells holding this content,
thus ensuring they won't be visible when the page is printed.
<table border='1' cellpadding='4' cellspacing='0' width='100%' >

<tr height='60'><td colspan='3'>

banner place-holder

</td></tr>

<tr><td width='150' valign='top' class='noprint'>

left-side content place-holder

</td><td>

<b>main content</b>

[snip!]

</td><td width='150' valign='top' class='noprint'>

right-side content place-holder

</td></tr><tr><td colspan='3'>

footer content place-holder

</td></tr>

</table>
This will result in the columns on the left and right-hand sides being
hidden when the page
is printed, thus providing more space on the printed page for the
content itself.
Note that this style needs to be applied to the table cells themselves,
and not just to the content
in these table cells, else the (empty) cells will still show up on the
printed copy.
Testing Your CSS
The easiest way to test CSS styles for print media is to use a web
browser which has print preview
capabilities.
The print preview will give you a fairly accurate representation of how
the page will look
when it is printed, and is a much more efficient way to test your media
styles, rather than
actually printing out pages on a printer.
Most popular web browsers should support print preview functionality.
The
FireFox
browser has print preview functionality, although it lacks any
zoom/unzoom capabilities.
As an alternative to using print preview, you can print the web page to a
PDF file.
There are numerous (costly, freeware, and anywhere in between) software
packages for
doing this.
I recommend using the freeware and open-source
PDFCreator,
which is
a Windows printer driver which allows you to create PDFs from any
Windows application, just by
selecting the PDFCreator driver as the virtual printer from that
application.
Also be sure to use the
W3C's
free
CSS
Validation Service to
check your CSS definitions.
References
http://support.microsoft.com/kb/973904
Let me fix it myself
To unregister the mswrd632 converter yourself, edit the registry as follows:
- Click Start, click Run, type regedit, and then click OK.
- Locate and then click the following registry subkey:
- For 32-bit versions of Windows:
HKEY_LOCAL_MACHINE\SOFTWARE\Microsoft\Shared Tools\Text Converters\Import\MSWord6.wpc
- For 64-bit versions of Windows:
HKEY_LOCAL_MACHINE\SOFTWARE\Wow6432Node\Microsoft\Shared Tools\Text Converters\Import\MSWord6.wpc
- On the Edit menu, click Delete.
- Click Yes.
- Exit Registry Editor.
This change will effectively unregister the converter and disable it for third-party applications and for Microsoft Office. Microsoft Office will use its own text converters to open these kinds of files.
The user was running Office 2007 and getting this error. After doing some research, we came across a few possible solutions. In this post, I’ll list them out here.
Method 1 – Unregister Text Converter
Basically, in Windows XP SP2 and above and Windows Server 2003 SP1 and above, if you have a plain text file or another kind of file that is not a Microsoft Word file, but has a .doc extension, you will get this error.
This can also happen if you are opening a really old document created by Word for Windows 6.0 or Word 97 documents. In this case, you can disable the mswrd632 converter so you don’t get this error. The files will then be opened by the Microsoft Office text converters.
You can unregister this converter by going to Start, then run and typing regedit. Then navigate to the following key:
HKEY_LOCAL_MACHINE\SOFTWARE\Microsoft\Shared Tools\Text Converters\Import\MSWord6.wpc

Right-click on the MSWord6.wpc key in the left hand pane and choose Delete. If you have a Word 97 document, you should still be able to open it in Word 2003 or 2007. However, you will not be able to open these files in WordPad anymore. You’ll get an error like:
Cannot load Word for Windows 6.0 files
If you really have to use WordPad to open Word 6.0/95 files, you can re-enable the Word 6.0/95 for Windows and Macintosh to RFT converter. Open the registry and go to the following keys:
For 32-bit versions of Windows
HKEY_LOCAL_MACHINE\Software\Microsoft\Windows\CurrentVersion\ Applets\Wordpad
For Microsoft Windows on Windows 64 (WOW) mode
HKEY_LOCAL_MACHINE\Software\Wow6432Node\Microsoft\Windows\ CurrentVersion\Applets\Wordpad
If the Wordpad key is not there in the left-hand pane, create it. After that, create a new DWORD value in the right-pane called AllowConversion and give it a value of 1.
Method 2 – Copy the MSWrd632.wpc File
The other way to solve this issue is to copy the MSWrd632.wpc file from another computer to the computer having problems.
The only issue with this is that it is less secure and makes your computer vulnerable to a possible security hack, so don’t do this unless you really have to or that computer is not connected to the Internet.
You can usually find this file in the following path:
C:\Program Files\Common Files\Microsoft Shared\TextConv\
That’s about it! If you are still having this problem, post a comment here and I’ll try to help! Enjoy!
详解COM Add In的LoadBehavior及其妙用
http://blog.csdn.net/v_jzho/archive/2007/10/06/1813080.aspx
基于Visual Studio 2003/2005的Office插件开发FAQ
http://blog.csdn.net/tonyqus/archive/2007/02/24/1513256.aspx
There are several ways to deploy an assembly into the global assembly
cache:
1) Use an installer designed to work with the global assembly cache. This
is the preferred option for installing assemblies into the global assembly
cache
2) Use a developer tool called the Global Assembly Cache tool (Gacutil.exe)
provided by the .NET Framework SDK.
3) Use Windows Explorer to drag and drop assemblies into the cache.
4) use install shield. (注意:installshield里只有msi等几个类型的项目支持这个)
From:http://bytes.com/topic/net/answers/109942-deploy-assembly-gac
http://www.microsoft.com/downloads/details.aspx?familyid=59DAEBAA-BED4-4282-A28C-B864D8BFA513&displaylang=en
http://msdn.microsoft.com/en-us/library/15s06t57(VS.80).aspx
The 'AllOtherFiles' is an entry automatically created when you check the GlobalAssemblyCache predefined folder. After you add in your file(s), perform the following steps:
1. Right-click "Destination Computer"
2. Check "Show Components"
3. Expand the [GlobalAssemblyCache] tree.
4. Delete the "AllOtherFiles" entry.
正则表达式(regular expression)
关键字:
正则表达式,Regular Expression
作者:笑容
发表于:2004年05月03日
最后更新:2005年01月17日
19:54
版权声明:使用创作公用版权协议
引用地址:<a
href="http://oo8h.51.net/docs/regular_expression.htm">正则表达式(regular
expression)</a>
NAV: 笑容的八小时外 / 笑容的八小时外资料索引
如何创建一个网站 (HOW TO:
Initiate a website) Red Hat Enterprise
Linux 介绍
前言
正则表达式是烦琐的,但是强大的,学会之后的应用会让你除了提高效率外,会给你带来绝对的成就感。只要认真去阅读这些资料,加上应用的时候进行一定的参考,掌握正则表达式不是问题。
索引
1._引子
2._正则表达式的历史
3._正则表达式定义
3.1_普通字符
3.2_非打印字符
3.3_特殊字符
3.4_限定符
3.5_定位符
3.6_选择
3.7_后向引用
4._各种操作符的运算优先级
5._全部符号解释
6._部分例子
7._正则表达式匹配规则
7.1_基本模式匹配
7.2_字符簇
7.3_确定重复出现
目前,正则表达式已经在很多软件中得到广泛的应用,包括*nix(Linux,
Unix等),HP等操作系统,PHP,C#,Java等开发环境,以及很多的应用软件中,都可以看到正则表达式的影子。
正则表达式的使用,可以通过简单的办法来实现强大的功能。为了简单有效而又不失强大,造成了正则表达式代码的难度较大,学习起来也不是很容易,所以需要付出一些努力才行,入门之后参照一定的参考,使用起来还是比较简单有效的。
例子: ^.+@.+""..+$
这样的代码曾经多次把我自己给吓退过。可能很多人也是被这样的代码给吓跑的吧。继续阅读本文将让你也可以自由应用这样的代码。
注意:这里的第7部分跟前面的内容看起来似乎有些重复,目的是把前面表格里的部分重新描述了一次,目的是让这些内容更容易理解。
正则表达式的“祖先”可以一直上溯至对人类神经系统如何工作的早期研究。Warren
McCulloch 和 Walter Pitts 这两位神经生理学家研究出一种数学方式来描述这些神经网络。
1956 年, 一位叫 Stephen Kleene 的数学家在 McCulloch 和 Pitts
早期工作的基础上,发表了一篇标题为“神经网事件的表示法”的论文,引入了正则表达式的概念。正则表达式就是用来描述他称为“正则集的代数”的表达式,因此采用“正则表达式”这个术语。
随后,发现可以将这一工作应用于使用 Ken Thompson 的计算搜索算法的一些早期研究,Ken Thompson 是 Unix
的主要发明人。正则表达式的第一个实用应用程序就是 Unix 中的 qed 编辑器。
如他们所说,剩下的就是众所周知的历史了。从那时起直至现在正则表达式都是基于文本的编辑器和搜索工具中的一个重要部分。
正则表达式(regular
expression)描述了一种字符串匹配的模式,可以用来检查一个串是否含有某种子串、将匹配的子串做替换或者从某个串中取出符合某个条件的子串等。
- 列目录时, dir *.txt或ls
*.txt中的*.txt就不是一个正则表达式,因为这里*与正则式的*的含义是不同的。
正则表达式是由普通字符(例如字符 a 到
z)以及特殊字符(称为元字符)组成的文字模式。正则表达式作为一个模板,将某个字符模式与所搜索的字符串进行匹配。
由所有那些未显式指定为元字符的打印和非打印字符组成。这包括所有的大写和小写字母字符,所有数字,所有标点符号以及一些符号。
| 字符 |
含义 |
| "cx |
匹配由x指明的控制字符。例如, "cM 匹配一个 Control-M 或回车符。x 的值必须为 A-Z
或 a-z 之一。否则,将 c 视为一个原义的 'c' 字符。 |
| "f |
匹配一个换页符。等价于 "x0c 和 "cL。 |
| "n |
匹配一个换行符。等价于 "x0a 和 "cJ。 |
| "r |
匹配一个回车符。等价于 "x0d 和 "cM。 |
| "s |
匹配任何空白字符,包括空格、制表符、换页符等等。等价于 [ "f"n"r"t"v]。 |
| "S |
匹配任何非空白字符。等价于 [^ "f"n"r"t"v]。 |
| "t |
匹配一个制表符。等价于 "x09 和 "cI。 |
| "v |
匹配一个垂直制表符。等价于 "x0b 和
"cK。 |
所谓特殊字符,就是一些有特殊含义的字符,如上面说的"*.txt"中的*,简单的说就是表示任何字符串的意思。如果要查找文件名中有*的文件,则需要对*进行转义,即在其前加一个"。ls
"*.txt。正则表达式有以下特殊字符。
| 特别字符 |
说明 |
| $ |
匹配输入字符串的结尾位置。如果设置了 RegExp 对象的 Multiline 属性,则 $ 也匹配
'"n' 或 '"r'。要匹配 $ 字符本身,请使用 "$。 |
| ( ) |
标记一个子表达式的开始和结束位置。子表达式可以获取供以后使用。要匹配这些字符,请使用 "( 和
")。 |
| * |
匹配前面的子表达式零次或多次。要匹配 * 字符,请使用 "*。 |
| + |
匹配前面的子表达式一次或多次。要匹配 + 字符,请使用 "+。 |
| . |
匹配除换行符 "n之外的任何单字符。要匹配 .,请使用 "。 |
| [ |
标记一个中括号表达式的开始。要匹配 [,请使用 "[。 |
| ? |
匹配前面的子表达式零次或一次,或指明一个非贪婪限定符。要匹配 ? 字符,请使用
"?。 |
| " |
将下一个字符标记为或特殊字符、或原义字符、或向后引用、或八进制转义符。例如, 'n' 匹配字符
'n'。'"n' 匹配换行符。序列 '""' 匹配 """,而 '"(' 则匹配 "("。 |
| ^ |
匹配输入字符串的开始位置,除非在方括号表达式中使用,此时它表示不接受该字符集合。要匹配 ^
字符本身,请使用 "^。 |
| { |
标记限定符表达式的开始。要匹配 {,请使用 "{。 |
| | |
指明两项之间的一个选择。要匹配 |,请使用 "|。 |
- 构造正则表达式的方法和创建数学表达式的方法一样。也就是用多种元字符与操作符将小的表达式结合在一起来创建更大的表达式。正则表达式的组件可以是单个的字符、字符集合、字符范围、字符间的选择或者所有这些组件的任意组合。
限定符用来指定正则表达式的一个给定组件必须要出现多少次才能满足匹配。有*或+或?或{n}或{n,}或{n,m}共6种。
*、+和?限定符都是贪婪的,因为它们会尽可能多的匹配文字,只有在它们的后面加上一个?就可以实现非贪婪或最小匹配。
正则表达式的限定符有:
| 字符 |
描述 |
| * |
匹配前面的子表达式零次或多次。例如,zo* 能匹配 "z" 以及 "zoo"。*
等价于{0,}。 |
| + |
匹配前面的子表达式一次或多次。例如,'zo+' 能匹配 "zo" 以及 "zoo",但不能匹配
"z"。+ 等价于 {1,}。 |
| ? |
匹配前面的子表达式零次或一次。例如,"do(es)?" 可以匹配 "do" 或 "does"
中的"do" 。? 等价于 {0,1}。 |
| {n} |
n 是一个非负整数。匹配确定的 n 次。例如,'o{2}' 不能匹配 "Bob" 中的
'o',但是能匹配 "food" 中的两个 o。 |
| {n,} |
n 是一个非负整数。至少匹配n 次。例如,'o{2,}' 不能匹配 "Bob" 中的 'o',但能匹配
"foooood" 中的所有 o。'o{1,}' 等价于 'o+'。'o{0,}' 则等价于 'o*'。 |
| {n,m} |
m 和 n 均为非负整数,其中n <= m。最少匹配 n 次且最多匹配 m
次。例如,"o{1,3}" 将匹配 "fooooood" 中的前三个 o。'o{0,1}' 等价于
'o?'。请注意在逗号和两个数之间不能有空格。 |
用来描述字符串或单词的边界,^和$分别指字符串的开始与结束,"b描述单词的前或后边界,"B表示非单词边界。
不能对定位符使用限定符。
用圆括号将所有选择项括起来,相邻的选择项之间用|分隔。但用圆括号会有一个副作用,是相关的匹配会被缓存,此时可用?:放在第一个选项前来消除这种副作用。
其中?:是非捕获元之一,还有两个非捕获元是?=和?!,这两个还有更多的含义,前者为正向预查,在任何开始匹配圆括号内的正则表达式模式的位置来匹配搜索字符串,后者为负向预查,在任何开始不匹配该正则表达式模式的位置来匹配搜索字符串。
对一个正则表达式模式或部分模式两边添加圆括号将导致相关匹配存储到一个临时缓冲区中,所捕获的每个子匹配都按照在正则表达式模式中从左至右所遇到的内容存储。存储子匹配的缓冲区编号从
1 开始,连续编号直至最大 99 个子表达式。每个缓冲区都可以使用 '"n' 访问,其中 n
为一个标识特定缓冲区的一位或两位十进制数。
可以使用非捕获元字符 '?:', '?=', or '?!' 来忽略对相关匹配的保存。
相同优先级的从左到右进行运算,不同优先级的运算先高后低。各种操作符的优先级从高到低如下:
| 操作符 |
描述 |
| " |
转义符 |
| (), (?:), (?=), [] |
圆括号和方括号 |
| *, +, ?, {n}, {n,}, {n,m} |
限定符 |
| ^, $, "anymetacharacter |
位置和顺序 |
| | |
“或”操作 |
| 字符 |
描述 |
| " |
将下一个字符标记为一个特殊字符、或一个原义字符、或一个 向后引用、或一个八进制转义符。例如,'n'
匹配字符 "n"。'"n' 匹配一个换行符。序列 '""' 匹配 """ 而 ""(" 则匹配 "("。 |
| ^ |
匹配输入字符串的开始位置。如果设置了 RegExp 对象的 Multiline 属性,^ 也匹配
'"n' 或 '"r' 之后的位置。 |
| $ |
匹配输入字符串的结束位置。如果设置了RegExp 对象的 Multiline 属性,$ 也匹配 '"n'
或 '"r' 之前的位置。 |
| * |
匹配前面的子表达式零次或多次。例如,zo* 能匹配 "z" 以及 "zoo"。*
等价于{0,}。 |
| + |
匹配前面的子表达式一次或多次。例如,'zo+' 能匹配 "zo" 以及 "zoo",但不能匹配
"z"。+ 等价于 {1,}。 |
| ? |
匹配前面的子表达式零次或一次。例如,"do(es)?" 可以匹配 "do" 或 "does"
中的"do" 。? 等价于 {0,1}。 |
| {n} |
n 是一个非负整数。匹配确定的 n 次。例如,'o{2}' 不能匹配 "Bob" 中的
'o',但是能匹配 "food" 中的两个 o。 |
| {n,} |
n 是一个非负整数。至少匹配n 次。例如,'o{2,}' 不能匹配 "Bob" 中的 'o',但能匹配
"foooood" 中的所有 o。'o{1,}' 等价于 'o+'。'o{0,}' 则等价于 'o*'。 |
| {n,m} |
m 和 n 均为非负整数,其中n <= m。最少匹配 n 次且最多匹配 m
次。例如,"o{1,3}" 将匹配 "fooooood" 中的前三个 o。'o{0,1}' 等价于
'o?'。请注意在逗号和两个数之间不能有空格。 |
| ? |
当该字符紧跟在任何一个其他限制符 (*, +, ?, {n}, {n,}, {n,m})
后面时,匹配模式是非贪婪的。非贪婪模式尽可能少的匹配所搜索的字符串,而默认的贪婪模式则尽可能多的匹配所搜索的字符串。例如,对于字符串 "oooo",'o+?'
将匹配单个 "o",而 'o+' 将匹配所有 'o'。 |
| . |
匹配除 ""n" 之外的任何单个字符。要匹配包括 '"n' 在内的任何字符,请使用象 '[."n]'
的模式。 |
| (pattern) |
匹配 pattern 并获取这一匹配。所获取的匹配可以从产生的 Matches
集合得到,在VBScript 中使用 SubMatches 集合,在JScript 中则使用 $0…$9 属性。要匹配圆括号字符,请使用 '"(' 或
'")'。 |
| (?:pattern) |
匹配 pattern 但不获取匹配结果,也就是说这是一个非获取匹配,不进行存储供以后使用。这在使用
"或" 字符 (|) 来组合一个模式的各个部分是很有用。例如, 'industr(?:y|ies) 就是一个比 'industry|industries'
更简略的表达式。 |
| (?=pattern) |
正向预查,在任何匹配 pattern
的字符串开始处匹配查找字符串。这是一个非获取匹配,也就是说,该匹配不需要获取供以后使用。例如,'Windows (?=95|98|NT|2000)' 能匹配
"Windows 2000" 中的 "Windows" ,但不能匹配 "Windows 3.1" 中的
"Windows"。预查不消耗字符,也就是说,在一个匹配发生后,在最后一次匹配之后立即开始下一次匹配的搜索,而不是从包含预查的字符之后开始。 |
| (?!pattern) |
负向预查,在任何不匹配 pattern
的字符串开始处匹配查找字符串。这是一个非获取匹配,也就是说,该匹配不需要获取供以后使用。例如'Windows (?!95|98|NT|2000)' 能匹配
"Windows 3.1" 中的 "Windows",但不能匹配 "Windows 2000" 中的
"Windows"。预查不消耗字符,也就是说,在一个匹配发生后,在最后一次匹配之后立即开始下一次匹配的搜索,而不是从包含预查的字符之后开始 |
| x|y |
匹配 x 或 y。例如,'z|food' 能匹配 "z" 或 "food"。'(z|f)ood' 则匹配
"zood" 或 "food"。 |
| [xyz] |
字符集合。匹配所包含的任意一个字符。例如, '[abc]' 可以匹配 "plain" 中的
'a'。 |
| [^xyz] |
负值字符集合。匹配未包含的任意字符。例如, '[^abc]' 可以匹配 "plain"
中的'p'。 |
| [a-z] |
字符范围。匹配指定范围内的任意字符。例如,'[a-z]' 可以匹配 'a' 到 'z'
范围内的任意小写字母字符。 |
| [^a-z] |
负值字符范围。匹配任何不在指定范围内的任意字符。例如,'[^a-z]' 可以匹配任何不在 'a' 到
'z' 范围内的任意字符。 |
| "b |
匹配一个单词边界,也就是指单词和空格间的位置。例如, 'er"b' 可以匹配"never" 中的
'er',但不能匹配 "verb" 中的 'er'。 |
| "B |
匹配非单词边界。'er"B' 能匹配 "verb" 中的 'er',但不能匹配 "never" 中的
'er'。 |
| "cx |
匹配由 x 指明的控制字符。例如, "cM 匹配一个 Control-M 或回车符。x 的值必须为
A-Z 或 a-z 之一。否则,将 c 视为一个原义的 'c' 字符。 |
| "d |
匹配一个数字字符。等价于 [0-9]。 |
| "D |
匹配一个非数字字符。等价于 [^0-9]。 |
| "f |
匹配一个换页符。等价于 "x0c 和 "cL。 |
| "n |
匹配一个换行符。等价于 "x0a 和 "cJ。 |
| "r |
匹配一个回车符。等价于 "x0d 和 "cM。 |
| "s |
匹配任何空白字符,包括空格、制表符、换页符等等。等价于 [ "f"n"r"t"v]。 |
| "S |
匹配任何非空白字符。等价于 [^ "f"n"r"t"v]。 |
| "t |
匹配一个制表符。等价于 "x09 和 "cI。 |
| "v |
匹配一个垂直制表符。等价于 "x0b 和 "cK。 |
| "w |
匹配包括下划线的任何单词字符。等价于'[A-Za-z0-9_]'。 |
| "W |
匹配任何非单词字符。等价于 '[^A-Za-z0-9_]'。 |
| "xn |
匹配 n,其中 n 为十六进制转义值。十六进制转义值必须为确定的两个数字长。例如,'"x41' 匹配
"A"。'"x041' 则等价于 '"x04' & "1"。正则表达式中可以使用 ASCII 编码。. |
| "num |
匹配 num,其中 num 是一个正整数。对所获取的匹配的引用。例如,'(.)"1'
匹配两个连续的相同字符。 |
| "n |
标识一个八进制转义值或一个向后引用。如果 "n 之前至少 n 个获取的子表达式,则 n
为向后引用。否则,如果 n 为八进制数字 (0-7),则 n 为一个八进制转义值。 |
| "nm |
标识一个八进制转义值或一个向后引用。如果 "nm 之前至少有 nm 个获得子表达式,则 nm
为向后引用。如果 "nm 之前至少有 n 个获取,则 n 为一个后跟文字 m 的向后引用。如果前面的条件都不满足,若 n 和 m 均为八进制数字 (0-7),则
"nm 将匹配八进制转义值 nm。 |
| "nml |
如果 n 为八进制数字 (0-3),且 m 和 l 均为八进制数字 (0-7),则匹配八进制转义值
nml。 |
| "un |
匹配 n,其中 n 是一个用四个十六进制数字表示的 Unicode 字符。例如, "u00A9
匹配版权符号 (?)。 |
| 正则表达式 |
说明 |
| /"b([a-z]+) "1"b/gi |
一个单词连续出现的位置 |
| /("w+):"/"/([^/:]+)(:"d*)?([^# ]*)/ |
将一个URL解析为协议、域、端口及相对路径 |
| /^(?:Chapter|Section) [1-9][0-9]{0,1}$/ |
定位章节的位置 |
| /[-a-z]/ |
A至z共26个字母再加一个-号。 |
| /ter"b/ |
可匹配chapter,而不能terminal |
| /"Bapt/ |
可匹配chapter,而不能aptitude |
| /Windows(?=95 |98 |NT )/ |
可匹配Windows95或Windows98或WindowsNT,当找到一个匹配后,从Windows后面开始进行下一次的检索匹配。 |
7.1
基本模式匹配
一切从最基本的开始。模式,是正规表达式最基本的元素,它们是一组描述字符串特征的字符。模式可以很简单,由普通的字符串组成,也可以非常复杂,往往用特殊的字符表示一个范围内的字符、重复出现,或表示上下文。例如:
^once
这个模式包含一个特殊的字符^,表示该模式只匹配那些以once开头的字符串。例如该模式与字符串"once upon a time"匹配,与"There
once was a man from NewYork"不匹配。正如如^符号表示开头一样,$符号用来匹配那些以给定模式结尾的字符串。
bucket$
这个模式与"Who kept all of this cash in a
bucket"匹配,与"buckets"不匹配。字符^和$同时使用时,表示精确匹配(字符串与模式一样)。例如:
^bucket$
只匹配字符串"bucket"。如果一个模式不包括^和$,那么它与任何包含该模式的字符串匹配。例如:模式
once
与字符串
There once was a man from NewYork
Who kept all of his cash in a
bucket.
是匹配的。
在该模式中的字母(o-n-c-e)是字面的字符,也就是说,他们表示该字母本身,数字也是一样的。其他一些稍微复杂的字符,如标点符号和白字符(空格、制表符等),要用到转义序列。所有的转义序列都用反斜杠(")打头。制表符的转义序列是:"t。所以如果我们要检测一个字符串是否以制表符开头,可以用这个模式:
^"t
类似的,用"n表示“新行”,"r表示回车。其他的特殊符号,可以用在前面加上反斜杠,如反斜杠本身用""表示,句号.用".表示,以此类推。
7.2
字符簇
在INTERNET的程序中,正规表达式通常用来验证用户的输入。当用户提交一个FORM以后,要判断输入的电话号码、地址、EMAIL地址、信用卡号码等是否有效,用普通的基于字面的字符是不够的。
所以要用一种更自由的描述我们要的模式的办法,它就是字符簇。要建立一个表示所有元音字符的字符簇,就把所有的元音字符放在一个方括号里:
[AaEeIiOoUu]
这个模式与任何元音字符匹配,但只能表示一个字符。用连字号可以表示一个字符的范围,如:
[a-z] //匹配所有的小写字母
[A-Z] //匹配所有的大写字母
[a-zA-Z] //匹配所有的字母
[0-9]
//匹配所有的数字
[0-9"."-] //匹配所有的数字,句号和减号
[ "f"r"t"n] //匹配所有的白字符
同样的,这些也只表示一个字符,这是一个非常重要的。如果要匹配一个由一个小写字母和一位数字组成的字符串,比如"z2"、"t6"或"g7",但不是"ab2"、"r2d3"
或"b52"的话,用这个模式:
^[a-z][0-9]$
尽管[a-z]代表26个字母的范围,但在这里它只能与第一个字符是小写字母的字符串匹配。
前面曾经提到^表示字符串的开头,但它还有另外一个含义。当在一组方括号里使用^是,它表示“非”或“排除”的意思,常常用来剔除某个字符。还用前面的例子,我们要求第一个字符不能是数字:
^[^0-9][0-9]$
这个模式与"&5"、"g7"及"-2"是匹配的,但与"12"、"66"是不匹配的。下面是几个排除特定字符的例子:
[^a-z] //除了小写字母以外的所有字符
[^"""/"^] //除了(")(/)(^)之外的所有字符
[^"""']
//除了双引号(")和单引号(')之外的所有字符
特殊字符"."
(点,句号)在正规表达式中用来表示除了“新行”之外的所有字符。所以模式"^.5$"与任何两个字符的、以数字5结尾和以其他非“新行”字符开头的字符串匹配。模式"."可以匹配任何字符串,除了空串和只包括一个“新行”的字符串。
PHP的正规表达式有一些内置的通用字符簇,列表如下:
字符簇 含义
[[:alpha:]] 任何字母
[[:digit:]] 任何数字
[[:alnum:]] 任何字母和数字
[[:space:]] 任何白字符
[[:upper:]] 任何大写字母
[[:lower:]] 任何小写字母
[[:punct:]] 任何标点符号
[[:xdigit:]] 任何16进制的数字,相当于[0-9a-fA-F]
7.3
确定重复出现
到现在为止,你已经知道如何去匹配一个字母或数字,但更多的情况下,可能要匹配一个单词或一组数字。一个单词有若干个字母组成,一组数字有若干个单数组成。跟在字符或字符簇后面的花括号({})用来确定前面的内容的重复出现的次数。
字符簇 含义
^[a-zA-Z_]$ 所有的字母和下划线
^[[:alpha:]]{3}$ 所有的3个字母的单词
^a$ 字母a
^a{4}$ aaaa
^a{2,4}$ aa,aaa或aaaa
^a{1,3}$ a,aa或aaa
^a{2,}$
包含多于两个a的字符串
^a{2,} 如:aardvark和aaab,但apple不行
a{2,}
如:baad和aaa,但Nantucket不行
"t{2} 两个制表符
.{2} 所有的两个字符
这些例子描述了花括号的三种不同的用法。一个数字,{x}的意思是“前面的字符或字符簇只出现x次”;一个数字加逗号,{x,}的意思是“前面的内容出现x或更多的次数”;两个用逗号分隔的数字,{x,y}表示“前面的内容至少出现x次,但不超过y次”。我们可以把模式扩展到更多的单词或数字:
^[a-zA-Z0-9_]{1,}$ //所有包含一个以上的字母、数字或下划线的字符串
^[0-9]{1,}$ //所有的正数
^"-{0,1}[0-9]{1,}$ //所有的整数
^"-{0,1}[0-9]{0,}".{0,1}[0-9]{0,}$ //所有的小数
最后一个例子不太好理解,是吗?这么看吧:与所有以一个可选的负号("-{0,1})开头(^)、跟着0个或更多的数字([0-9]{0,})、和一个可选的小数点(".{0,1})再跟上0个或多个数字([0-9]{0,}),并且没有其他任何东西($)。下面你将知道能够使用的更为简单的方法。
特殊字符"?"与{0,1}是相等的,它们都代表着:“0个或1个前面的内容”或“前面的内容是可选的”。所以刚才的例子可以简化为:
^"-?[0-9]{0,}".?[0-9]{0,}$
特殊字符"*"与{0,}是相等的,它们都代表着“0个或多个前面的内容”。最后,字符"+"与
{1,}是相等的,表示“1个或多个前面的内容”,所以上面的4个例子可以写成:
^[a-zA-Z0-9_]+$ //所有包含一个以上的字母、数字或下划线的字符串
^[0-9]+$ //所有的正数
^"-?[0-9]+$
//所有的整数
^"-?[0-9]*".?[0-9]*$ //所有的小数
当然这并不能从技术上降低正规表达式的复杂性,但可以使它们更容易阅读。
参考文献:
JScript 和 VBScript 正则表达式
微软MSDN上的例子(英文):
- Scanning for HREFS
- Provides an example that searches an input string and prints
out all the href="..." values and their locations in the string.
- Changing Date Formats
- Provides an example that replaces dates of the form mm/dd/yy
with dates of the form dd-mm-yy.
- Extracting URL Information
- Provides an example that extracts a protocol and port number
from a string containing a URL. For example,
"http://www.contoso.com:8080/letters/readme.html" returns "http:8080".
- Cleaning an Input String
- provides an example that strips invalid non-alphanumeric
characters from a string.
- Confirming Valid E-Mail Format
- Provides an example that you can use to verify that a string is
in valid e-mail format
|
正则表达式(regular
expression)对象包含一个正则表达式模式(pattern)。它具有用正则表达式模式去匹配或代替一个串(string)中特定字符(或字符集合)的属性(properties)和方法(methods)。
要为一个单独的正则表达式添加属性,可以使用正则表达式构造函数(constructor
function),无论何时被调用的预设置的正则表达式拥有静态的属性(the predefined RegExp object has static
properties that are set whenever any regular expression is used,
我不知道我翻得对不对,将原文列出,请自行翻译)。
- 创建:
一个文本格式或正则表达式构造函数
文本格式: /pattern/flags
正则表达式构造函数: new
RegExp("pattern"[,"flags"]);
- 参数说明:
pattern -- 一个正则表达式文本
flags -- 如果存在,将是以下值:
g: 全局匹配
i:
忽略大小写
gi: 以上组合
[注意] 文本格式的参数不用引号,而在用构造函数时的参数需要引号。如:/ab+c/i new
RegExp("ab+c","i")是实现一样的功能。在构造函数中,一些特殊字符需要进行转意(在特殊字符前加""")。如:re = new
RegExp("""w+")
正则表达式中的特殊字符
| 字符 |
含意 |
| " |
做为转意,即通常在"""后面的字符不按原来意义解释,如/b/匹配字符"b",当b前面加了反斜杆后/"b/,转意为匹配一个单词的边界。
-或-
对正则表达式功能字符的还原,如"*"匹配它前面元字符0次或多次,/a*/将匹配a,aa,aaa,加了"""后,/a"*/将只匹配"a*"。
|
| ^ |
匹配一个输入或一行的开头,/^a/匹配"an A",而不匹配"An a" |
| $ |
匹配一个输入或一行的结尾,/a$/匹配"An a",而不匹配"an A" |
| * |
匹配前面元字符0次或多次,/ba*/将匹配b,ba,baa,baaa |
| + |
匹配前面元字符1次或多次,/ba*/将匹配ba,baa,baaa |
| ? |
匹配前面元字符0次或1次,/ba*/将匹配b,ba |
| (x) |
匹配x保存x在名为$1...$9的变量中 |
| x|y |
匹配x或y |
| {n} |
精确匹配n次 |
| {n,} |
匹配n次以上 |
| {n,m} |
匹配n-m次 |
| [xyz] |
字符集(character set),匹配这个集合中的任一一个字符(或元字符) |
| [^xyz] |
不匹配这个集合中的任何一个字符 |
| ["b] |
匹配一个退格符 |
| "b |
匹配一个单词的边界 |
| "B |
匹配一个单词的非边界 |
| "cX |
这儿,X是一个控制符,/"cM/匹配Ctrl-M |
| "d |
匹配一个字数字符,/"d/ = /[0-9]/ |
| "D |
匹配一个非字数字符,/"D/ = /[^0-9]/ |
| "n |
匹配一个换行符 |
| "r |
匹配一个回车符 |
| "s |
匹配一个空白字符,包括"n,"r,"f,"t,"v等 |
| "S |
匹配一个非空白字符,等于/[^"n"f"r"t"v]/ |
| "t |
匹配一个制表符 |
| "v |
匹配一个重直制表符 |
| "w |
匹配一个可以组成单词的字符(alphanumeric,这是我的意译,含数字),包括下划线,如["w]匹配"$5.98"中的5,等于[a-zA-Z0-9]
|
| "W |
匹配一个不可以组成单词的字符,如["W]匹配"$5.98"中的$,等于[^a-zA-Z0-9]。 |
|
说了这么多了,我们来看一些正则表达式的实际应用的例子:
E-mail地址验证:
function test_email(strEmail) {
var myReg =
/^[_a-z0-9]+@([_a-z0-9]+".)+[a-z0-9]{2,3}$/;
if(myReg.test(strEmail))
return true;
return false;
}
HTML代码的屏蔽
function
mask_HTMLCode(strInput) {
var myReg = /<("w+)>/;
return
strInput.replace(myReg, "<$1>");
}
正则表达式对象的属性及方法
预定义的正则表达式拥有有以下静态属性:input, multiline,
lastMatch, lastParen, leftContext,
rightContext和$1到$9。其中input和multiline可以预设置。其他属性的值在执行过exec或test方法后被根据不同条件赋以不同的值。许多属性同时拥有长和短(perl风格)的两个名字,并且,这两个名字指向同一个值。(JavaScript模拟perl的正则表达式)
正则表达式对象的属性
| 属性 |
含义 |
| $1...$9 |
如果它(们)存在,是匹配到的子串 |
| $_ |
参见input |
| $* |
参见multiline |
| $& |
参见lastMatch |
| $+ |
参见lastParen |
| $` |
参见leftContext |
| $' |
参见rightContext |
| constructor |
创建一个对象的一个特殊的函数原型 |
| global |
是否在整个串中匹配(bool型) |
| ignoreCase |
匹配时是否忽略大小写(bool型) |
| input |
被匹配的串 |
| lastIndex |
最后一次匹配的索引 |
| lastParen |
最后一个括号括起来的子串 |
| leftContext |
最近一次匹配以左的子串 |
| multiline |
是否进行多行匹配(bool型) |
| prototype |
允许附加属性给对象 |
| rightContext |
最近一次匹配以右的子串 |
| source |
正则表达式模式 |
| lastIndex |
最后一次匹配的索引
|
|
正则表达式对象的方法
| 方法 |
含义 |
| compile |
正则表达式比较 |
| exec |
执行查找 |
| test |
进行匹配 |
| toSource |
返回特定对象的定义(literal representing),其值可用来创建一个新的对象。重载Object.toSource方法得到的。
|
| toString |
返回特定对象的串。重载Object.toString方法得到的。 |
| valueOf |
返回特定对象的原始值。重载Object.valueOf方法得到 |
|
例子
<script language = "JavaScript">
var myReg = /(w+)s(w+)/;
var
str = "John Smith";
var newstr = str.replace(myReg, "$2, $1");
document.write(newstr);
</script>
将输出"Smith, John"
〓简介〓
字符意义:对于字符,通常表示按字面意义,指出接着的字符为特殊字符,不作解释。
例如:/b/匹配字符'b',通过在b
前面加一个反斜杠,也就是/b/,则该字符变成特殊字符,表示匹配一个单词的分界线。或者:对于几个字符,通常说明是特殊的,指出紧接着的字符不是特殊的,而应该按字面解释。例如:*是一个特殊字符,匹配任意个字符(包括0个字符);例如:/a*/意味匹配0个或多个a。为了匹配字面上的*,在a前面加一个反斜杠;例如:/a*/匹配'a*'。
〓正文〓
字符
意义:对于字符,通常表示按字面意义,指出接着的字符为特殊字符,不作解释。
例如:/b/匹配字符'b',通过在b
前面加一个反斜杠,也就是/b/,则该字符变成特殊字符,表示
匹配一个单词的分界线。
或者:
对于几个字符,通常说明是特殊的,指出紧接着的字符不是特殊的,而应该按字面解释。
例如:*是一个特殊字符,匹配任意个字符(包括0个字符);例如:/a*/意味匹配0个或多个a。
为了匹配字面上的*,在a前面加一个反斜杠;例如:/a*/匹配'a*'。
字符^
意义:表示匹配的字符必须在最前边。
例如:/^A/不匹配"an A,"中的'A',但匹配"An A."中最前面的'A'。
字符$
意义:与^类似,匹配最末的字符。
例如:/t$/不匹配"eater"中的't',但匹配"eat"中的't'。
字符*
意义:匹配*前面的字符0次或n次。
例如:/bo*/匹配"A ghost booooed"中的'boooo'或"A bird
warbled"中的'b',但不匹配"A goat g
runted"中的任何字符。
字符+
意义:匹配+号前面的字符1次或n次。等价于{1,}。
例如:/a+/匹配"candy"中的'a'和"caaaaaaandy."中的所有'a'。
字符?
意义:匹配?前面的字符0次或1次。
例如:/e?le?/匹配"angel"中的'el'和"angle."中的'le'。
字符.
意义:(小数点)匹配除换行符外的所有单个的字符。
例如:/.n/匹配"nay, an apple is on the
tree"中的'an'和'on',但不匹配'nay'。
字符(x)
意义:匹配'x'并记录匹配的值。
例如:/(foo)/匹配和记录"foo
bar."中的'foo'。匹配子串能被结果数组中的素[1], ..., [n] 返
回,或被RegExp对象的属性$1, ..., $9返回。
字符x|y
意义:匹配'x'或者'y'。
例如:/green|red/匹配"green apple"中的'green'和"red
apple."中的'red'。
字符{n}
意义:这里的n是一个正整数。匹配前面的n个字符。
例如:/a{2}/不匹配"candy,"中的'a',但匹配"caandy,"
中的所有'a'和"caaandy."中前面的两个
'a'。
字符{n,}
意义:这里的n是一个正整数。匹配至少n个前面的字符。
例如:/a{2,}不匹配"candy"中的'a',但匹配"caandy"中的所有'a'和"caaaaaaandy."中的所有'a'
字符{n,m}
意义:这里的n和m都是正整数。匹配至少n个最多m个前面的字符。
例如:/a{1,3}/不匹配"cndy"中的任何字符,但匹配 "candy,"中的'a',"caandy," 中的前面两个
'a'和"caaaaaaandy"中前面的三个'a',注意:即使"caaaaaaandy" 中有很多个'a',但只匹配前面的三
个'a'即"aaa"。
字符[xyz]
意义:一字符列表,匹配列出中的任一字符。你可以通过连字符-指出一个字符范围。
例如:[abcd]跟[a-c]一样。它们匹配"brisket"中的'b'和"ache"中的'c'。
字符[^xyz]
意义:一字符补集,也就是说,它匹配除了列出的字符外的所有东西。 你可以使用连字符-指出一
字符范围。
例如:[^abc]和[^a-c]等价,它们最早匹配"brisket"中的'r'和"chop."中的'h'。
字符[b]
意义:匹配一个空格(不要与b混淆)
字符b
意义:匹配一个单词的分界线,比如一个空格(不要与[b]混淆)
例如:/bnw/匹配"noonday"中的'no',/wyb/匹配"possibly yesterday."中的'ly'。
字符B
意义:匹配一个单词的非分界线
例如:/wBn/匹配"noonday"中的'on',/yBw/匹配"possibly
yesterday."中的'ye'。
字符cX
意义:这里的X是一个控制字符。匹配一个字符串的控制字符。
例如:/cM/匹配一个字符串中的control-M。
字符d
意义:匹配一个数字,等价于[0-9]。
例如:/d/或/[0-9]/匹配"B2 is the suite
number."中的'2'。
字符D
意义:匹配任何的非数字,等价于[^0-9]。
例如:/D/或/[^0-9]/匹配"B2 is the suite
number."中的'B'。
字符f
意义:匹配一个表单符
字符n
意义:匹配一个换行符
字符r
意义:匹配一个回车符
字符s
意义:匹配一个单个white空格符,包括空格,tab,form feed,换行符,等价于[ fnrtv]。
例如:/sw*/匹配"foo bar."中的' bar'。
字符S
意义:匹配除white空格符以外的一个单个的字符,等价于[^ fnrtv]。
例如:/S/w*匹配"foo
bar."中的'foo'。
字符t
意义:匹配一个制表符
字符v
意义:匹配一个顶头制表符
字符w
意义:匹配所有的数字和字母以及下划线,等价于[A-Za-z0-9_]。
例如:/w/匹配"apple,"中的'a',"$5.28,"中的'5'和"3D."中的'3'。
字符W
意义:匹配除数字、字母外及下划线外的其它字符,等价于[^A-Za-z0-9_]。
例如:/W/或者/[^$A-Za-z0-9_]/匹配"50%."中的'%'。
字符n
意义:这里的n是一个正整数。匹配一个正则表达式的最后一个子串的n的值(计数左圆括号)。
例如:/apple(,)sorange1/匹配"apple, orange, cherry, peach."中的'apple, orange',下面
有一个更加完整的例子。
注意:如果左圆括号中的数字比n指定的数字还小,则n取下一行的八进制escape作为描述。
字符ooctal和xhex
意义:这里的ooctal是一个八进制的escape值,而xhex是一个十六进制的escape值,允许在一个正则表达式中嵌入ASCII码。
内存模型 (memory model)
内存模型描述的是程序中各变量(实例域、静态域和数组元素)之间的关系,以及在实际计算机系统中将变量存储到内存和从内存取出变量这样的低层细节.
不同平台间的处理器架构将直接影响内存模型的结构.
在C或C++中, 可以利用不同操作平台下的内存模型来编写并发程序. 但是, 这带给开发人员的是, 更高的学习成本.
相比之下, java利用了自身虚拟机的优势, 使内存模型不束缚于具体的处理器架构, 真正实现了跨平台.
(针对hotspot jvm, jrockit等不同的jvm, 内存模型也会不相同)
内存模型的特征:
a, Visibility 可视性 (多核,多线程间数据的共享)
b, Ordering 有序性 (对内存进行的操作应该是有序的)
java 内存模型
(
java memory model
)
根据Java Language Specification中的说明, jvm系统中存在一个主内存(Main Memory或Java Heap Memory),Java中所有变量都储存在主存中,对于所有线程都是共享的。
每条线程都有自己的工作内存(Working Memory),工作内存中保存的是主存中某些变量的拷贝,线程对所有变量的操作都是在工作内存中进行,线程之间无法相互直接访问,变量传递均需要通过主存完成。

其中, 工作内存里的变量, 在多核处理器下, 将大部分储存于处理器高速缓存中, 高速缓存在不经过内存时, 也是不可见的.
jmm怎么体现 可视性(Visibility) ?
在jmm中, 通过并发线程修改变量值, 必须将线程变量同步回主存后, 其他线程才能访问到.
jmm怎么体现 有序性(Ordering) ?
通过java提供的同步机制或volatile关键字, 来保证内存的访问顺序.
缓存一致性(cache coherency)
什么是缓存一致性?
它是一种管理多处理器系统的高速缓存区结构,其可以保证数据在高速缓存区到内存的传输中不会丢失或重复。(来自wikipedia)
举例理解:
假如有一个处理器有一个更新了的变量值位于其缓存中,但还没有被写入主内存,这样别的处理器就可能会看不到这个更新的值.
解决缓存一致性的方法?
a, 顺序一致性模型:
要求某处理器对所改变的变量值立即进行传播, 并确保该值被所有处理器接受后, 才能继续执行其他指令.
b, 释放一致性模型: (类似jmm cache coherency)
允许处理器将改变的变量值延迟到释放锁时才进行传播.
jmm缓存一致性模型 - "happens-before ordering(先行发生排序)"
一般情况下的示例程序:
x = 0;
y = 0;
i = 0;
j = 0;
// thread A
y = 1;
x = 1;
// thread B
i = x;
j = y;
在如上程序中, 如果线程A,B在无保障情况下运行, 那么i,j各会是什么值呢?
答案是, 不确定. (00,01,10,11都有可能出现)
这里没有使用java同步机制, 所以 jmm 有序性和可视性 都无法得到保障.
happens-before ordering(
先行发生排序)
如何避免这种情况?
排序原则已经做到:
a,
在程序顺序中,
线程中的每一个操作, 发生在当前操作后面将要出现的每一个操作之前.
b, 对象监视器的解锁发生在等待获取对象锁的线程之前.
c, 对volitile关键字修饰的变量写入操作, 发生在对该变量的读取之前.
d,
对一个线程的 Thread.start() 调用 发生在启动的线程中的所有操作之前.
e, 线程中的所有操作 发生在从这个线程的 Thread.join()成功返回的所有其他线程之前.
为了实现
happends-before ordering原则, java及jdk提供的工具:
a, synchronized关键字
b, volatile关键字
c, final变量
d, java.util.concurrent.locks包(since jdk 1.5)
e, java.util.concurrent.atmoic包(since jdk 1.5)
...
使用了happens-before ordering的例子:

![]()
(1) 获取对象监视器的锁(lock)
(2) 清空工作内存数据, 从主存复制变量到当前工作内存, 即同步数据 (read and load)
(3) 执行代码,改变共享变量值 (use and assign)
(4) 将工作内存数据刷回主存 (store and write)
(5) 释放对象监视器的锁 (unlock)
注意: 其中4,5两步是同时进行的.
这边最核心的就是第二步, 他同步了主内存,即前一个线程对变量改动的结果,可以被当前线程获知!(利用了happens-before ordering原则)
对比之前的例子
如果多个线程同时执行一段未经锁保护的代码段,很有可能某条线程已经改动了变量的值,但是其他线程却无法看到这个改动,依然在旧的变量值上进行运算,最终导致不可预料的运算结果。
经典j2ee设计模式Double-Checked Locking失效问题
双重检查锁定失效问题,一直是JMM无法避免的缺陷之一.了解DCL失效问题, 可以帮助我们深入JMM运行原理.
要展示DCL失效问题, 首先要理解一个重要概念- 延迟加载(lazy loading).
非单例的单线程延迟加载示例:
class Foo
{
private Resource res = null;
public Resource getResource()
{
// 普通的延迟加载
if (res == null)
res = new Resource();
return res;
}
}
非单例的
多线程延迟加载示例:
Class Foo
{
Private Resource res = null;
Public synchronized
Resource getResource()
{
// 获取实例操作使用同步方式, 性能不高
If (res == null) res = new Resource();
return res;
}
}
非单例的
DCL多线程延迟加载示例:
Class Foo
{
Private Resource res = null;
Public Resource getResource()
{
If (res == null)
{
//只有在第一次初始化时,才使用同步方式.
synchronized(this)
{
if(res == null)
{
res = new Resource();
}
}
}
return res;
}
}
Double-Checked Locking看起来是非常完美的。但是很遗憾,根据Java的语言规范,上面的代码是不可靠的。
出现上述问题, 最重要的2个原因如下:
1, 编译器优化了程序指令, 以加快cpu处理速度.
2, 多核cpu动态调整指令顺序, 以加快并行运算能力.
问题出现的顺序:
1, 线程A, 发现对象未实例化, 准备开始实例化
2, 由于编译器优化了程序指令, 允许对象在构造函数未调用完前, 将
共享变量的引用指向
部分构造的对象, 虽然对象未完全实例化, 但已经不为null了.
3, 线程B, 发现部分构造的对象已不是null, 则直接返回了该对象.
不过, 一些著名的开源框架, 包括jive,lenya等也都在使用DCL模式, 且未见一些极端异常.
说明, DCL失效问题的出现率还是比较低的.
接下来就是性能与稳定之间的选择了?
DCL的替代
Initialize-On-Demand
:
public class Foo {
// 似有静态内部类, 只有当有引用时, 该类才会被装载
private static class LazyFoo {
public static Foo foo = new Foo();
}
public static Foo getInstance() {
return LazyFoo.foo;
}
}
维基百科的DCL解释:
http://en.wikipedia.org/wiki/Double-checked_locking
DCL的完美解决方案:
http://www.theserverside.com/patterns/thread.tss?thread_id=39606
总结:
多线程编程, 针对有写操作的变量, 必须 保证其所有引用点与主存中数据一致(考虑采用同步或volatile)
.
Executor 提供了管理终止的方法,以及可为跟踪一个或多个异步任务执行状况而生成 Future 的方法。
可以关闭 ExecutorService,这将导致其停止接受新任务。关闭后,执行程序将最后终止,这时没有任务在执行,也没有任务在等待执行,并且无法提交新任务。
通过创建并返回一个可用于取消执行和/或等待完成的 Future,方法 submit 扩展了基本方法 Executor.execute(java.lang.Runnable)。方法 invokeAny 和 invokeAll 是批量执行的最常用形式,它们执行任务集合,然后等待至少一个,或全部任务完成(可使用 ExecutorCompletionService 类来编写这些方法的自定义变体)。
Executors 类提供了用于此包中所提供的执行程序服务的工厂方法。
用法示例
下面给出了一个网络服务的简单结构,这里线程池中的线程作为传入的请求。它使用了预先配置的
Executors.newFixedThreadPool(int) 工厂方法:
 class NetworkService {

private final ServerSocket serverSocket;

private final ExecutorService pool;


public NetworkService(int port, int poolSize) throws IOException {

serverSocket = new ServerSocket(port);

pool = Executors.newFixedThreadPool(poolSize);

}


public void serve() {

try {

for (;;) {

pool.execute(new Handler(serverSocket.accept()));

}

} catch (IOException ex) {

pool.shutdown();

}

}

}


class Handler implements Runnable {

private final Socket socket;

Handler(Socket socket) { this.socket = socket; }

public void run() {

// read and service request

}

}
压缩不仅仅可以提高用户的下载速度,同时还可以加密代码,下面说下一个常用的js压缩方法:
首先使用dojo的工具shrinksafe(http://shrinksafe.dojotoolkit.org/)压缩一下,dojo的这个
工具会去掉注释,他的压缩不是简单的替换变量,而是利用了mozilla的一个工具,对js解析后才压缩,确保压缩后的代码不会出错。
dojo压缩后,并不会减少太多,下一步可以使用http://javascriptcompressor.com/这个站点进行更高层次的压缩,可惜只能登陆这个站点再压缩,只能将你的js代码复制的他的文本框,然后等他的压缩输出
经过这2步,你的js会变得既安全,文件又小
关于JSP页面中的pageEncoding和contentType两种属性的区别:
pageEncoding是jsp文件本身的编码
contentType的charset是指服务器发送给客户端时的内容编码
JSP要经过两次的“编码”,第一阶段会用pageEncoding,第二阶段会用utf-8至utf-8,第三阶段就是由Tomcat出来的网页,
用的是contentType。Phontol.com
第一阶段是jsp编译成.java,它会根据pageEncoding的设定读取jsp,结果是由指定的编码方案翻译成统一的UTF-8
JAVA源码(即.java),如果pageEncoding设定错了,或没有设定,出来的就是中文乱码。Phontol.com
第二阶段是由JAVAC的JAVA源码至java
byteCode的编译,不论JSP编写时候用的是什么编码方案,经过这个阶段的结果全部是UTF-8的encoding的java源码。Phontol.com
JAVAC用UTF-8的encoding读取java源码,编译成UTF-8
encoding的二进制码(即.class),这是JVM对常数字串在二进制码(java encoding)内表达的规范。Phontol.com
第三阶段是Tomcat(或其的application
container)载入和执行阶段二的来的JAVA二进制码,输出的结果,也就是在客户端见到的,这时隐藏在阶段一和阶段二的参数contentType就发挥了功效
contentType的設定.
pageEncoding 和contentType的预设都是 ISO8859-1. 而随便设定了其中一个,
另一个就跟着一样了(TOMCAT4.1.27是如此). 但这不是绝对的, 这要看各自JSPC的处理方式.
而pageEncoding不等于contentType, 更有利亚洲区的文字 CJKV系JSP网页的开发和展示, (例pageEncoding=GB2312
不等于 contentType=utf-8)。
在Tomcat中如果在jsp中设定了pageEncoding,则contentType也跟着设定成相同的编码了,但是在resion中就不是,resin中还会用默认的,这点通过查看编译后的类servlet java文件就可以看到这一点,而问题恰恰就出在这里,所以,在jsp中,如果是在resin下最好还是明确的单独设定这2个属性。
jsp文件不像.java,.java在被编译器读入的时候默认采用的是操作系统所设定的locale所对应的编码,比如中国大陆就是GBK,台湾就是BIG5或者MS950。Phontol.com而一般我们不管是在记事本还是在ue中写代码,如果没有经过特别转码的话,写出来的都是本地编码格式的内容。Phontol.com所以编译器采用的方法刚好可以让虚拟机得到正确的资料。Phontol.com
但是jsp文件不是这样,它没有这个默认转码过程,但是指定了pageEncoding就可以实现正确转码了。Phontol.com
举个例子:
<%@ page contentType="text/html;charset=utf-8" %>
|
大都会打印出乱码,因为输入的“你好”是gbk的,但是服务器是否正确抓到“你好”不得而知。Phontol.com
但是如果更改为
<%@ page contentType="text/html;charset=utf-8" pageEncoding="GBK"%>
|
这样就服务器一定会是正确抓到“你好”了。Phontol.com
首先,在linux上安装perl-Mail-Sendmail-0.79-1.0.rh9.rf.noarch.rpm
perl 代码如下:
#!/usr/bin/perl
use Mail::Sendmail;
$delay = 1;
$f_list="list.txt";
$line = 0;#skip the column title line
my $subject="xxx";
open(FILE,$f_list) || die "Can not open list file\n";
while(<FILE>){
chomp;
$line=$line+1;
next if($line==1);
($email,$passwd,$username,$yonghuming) = split(/,/);
%mail = (
from => 'xxx@xxx.com',
to => $email,
subject => $subject,
'content-type' => 'text/html; charset="gbk"',
);
$mail{body} = <<END_OF_BODY;
<!DOCTYPE HTML PUBLIC "-//W3C//DTD HTML 4.01 Transitional//EN"
"http://www.w3.org/TR/html4/loose.dtd">
<html>
<head>
<meta http-equiv="Content-Type" content="text/html; charset=gbk">
<title>个人邮箱登陆</title>
<style type="text/css">
<!--
body {
margin-left: 0px;
margin-top: 0px;
margin-right: 0px;
margin-bottom: 0px;
}
-->
</style>
<link href="images/css.css" rel="stylesheet" type="text/css">
<style type="text/css">
<!--
.style1 {font-size: 13px}
.style3 {color: #0066CC}
.style4 {color: #FF0000}
-->
</style>
</head>
<body>
<table width="60%" border="0" align="center" cellpadding="0" cellspacing="0">
<tr>
<td height="10" valign="bottom"><hr width="100%" size="10" color="#3399FF">test</td>
</tr>
</table>
</body>
</html>
END_OF_BODY
sendmail(%mail) || print "Error: $Mail::Sendmail::error\n";
sleep($delay);
}
close(FILE);
list file 内容格式:
xx@163.com,xdf.com,xxx,xxx
在firefox3下Components.classes 是不允许直接调用的,需要加上如下那句粗体的语句才可以
<script>
netscape.security.PrivilegeManager.enablePrivilege('UniversalXPConnect');
var prefs = Components.classes['@mozilla.org/preferences-service;1'].getService(Components.interfaces.nsIPrefBranch);
prefs.setBoolPref("dom.allow_scripts_to_close_windows", true);
</script>
在chomal.manifest里如下设定,注意黄色部分,很关键
content sample chrome/content/
xpcnativewrappers=no
overlay chrome://browser/content/browser.xul chrome://sample/content/sample.xul
调用方式:
window.content.document.getElementById('sssddd').onclick();
参考如下连接
http://developer.mozilla.org/En/Safely_accessing_content_DOM_from_chrome
xpcnativewrappers
http://developer.mozilla.org/en/Chrome_Registration
<style type="text/css" media="all">
div,img{margin: 0;padding: 0;border: 0;}
#content{width: 303px;height: 404px;background: #F63;color: #000;font: 12px Arial,Helvetica,sans-serif;position: relative;}
#content div{position: absolute;left: 0;bottom: 0;}
</style>
</head>
<body>
<div id="content">
<div>底端对齐 </div>
</div>
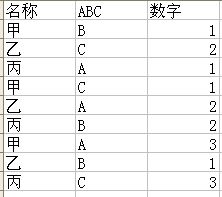

select max(a.num) A,max(b.num) B,max(c.num) C,tttt.name from tttt
left join (select * from tttt where abc='C') c on c.abc=tttt.abc and c.name=tttt.name
left join (select * from tttt where abc='B') b on b.abc=tttt.abc and b.name=tttt.name
left join (select * from tttt where abc='A') a on a.abc=tttt.abc and a.name=tttt.name
group by name
很多朋友在深入的接触 JAVA 语言后就会发现这样两个词:反射 (Reflection) 和内省 (Introspector) ,经常搞不清楚这到底是怎么回事,在什么场合下应用以及如何使用?今天把这二者放在一起介绍,因为它们二者是相辅相成的。
反射
相对而言,反射比内省更容易理解一点。用一句比较白的话来概括,反射就是让你可以通过名称来得到对象 ( 类,属性,方法 ) 的技术。例如我们可以通过类名来生成一个类的实例;知道了方法名,就可以调用这个方法;知道了属性名就可以访问这个属性的值。
还是写两个例子让大家更直观的了解反射的使用方法:
引用
//通过类名来构造一个类的实例
Class cls_str = Class.forName( "java.lang.String" );
// 上面这句很眼熟,因为使用过 JDBC 访问数据库的人都用过 J
Object str = cls_str.newInstance();
// 相当于 String str = new String();
//通过方法名来调用一个方法
String methodName = "length" ;
Method m = cls_str.getMethod(methodName, null );
System.out.println( "length is " + m.invoke(str, null ));
// 相当于 System.out.println(str.length());
上面的两个例子是比较常用方法。看到上面的例子就有人要发问了:为什么要这么麻烦呢?本来一条语句就完成的事情干吗要整这么复杂?没错,在上面的例子中确实没有必要这么麻烦。不过你想像这样一个应用程序,它支持动态的功能扩展,也就是说程序不重新启动但是可以自动加载新的功能,这个功能使用一个具体类来表示。首先我们必须为这些功能定义一个接口类,然后我们要求所有扩展的功能类必须实现我指定的接口,这个规定了应用程序和可扩展功能之间的接口规则,但是怎么动态加载呢?我们必须让应用程序知道要扩展的功能类的类名,比如是 test.Func1 ,当我们把这个类名 ( 字符串 ) 告诉应用程序后,它就可以使用我们第一个例子的方法来加载并启用新的功能。这就是类的反射,请问你有别的选择吗?
关于方法的反射建议大家看我的另外一篇文章《 利用 Turbine 的事件映射来扩展 Struts 的功能 》,地址是: http://www.javayou.com/article/CSDN/extend_struts.html 。这篇文章详细介绍了如果通过反射来扩展 Struts 框架的功能。
内省
内省是 Java 语言对 Bean 类属性、事件的一种缺省处理方法。例如类 A 中有属性 name, 那我们可以通过 getName,setName 来得到其值或者设置新的值。通过 getName/setName 来访问 name 属性,这就是默认的规则。 Java 中提供了一套 API 用来访问某个属性的 getter/setter 方法,通过这些 API 可以使你不需要了解这个规则(但你最好还是要搞清楚),这些 API 存放于包 java.beans 中。
一般的做法是通过类 Introspector 来获取某个对象的 BeanInfo 信息,然后通过 BeanInfo 来获取属性的描述器( PropertyDescriptor ),通过这个属性描述器就可以获取某个属性对应的 getter/setter 方法,然后我们就可以通过反射机制来调用这些方法。下面我们来看一个例子,这个例子把某个对象的所有属性名称和值都打印出来:
引用
/*
* Created on 2004-6-29
*/
package demo;
import java.beans.BeanInfo;
import java.beans.Introspector;
import java.beans.PropertyDescriptor;
/**
* 内省演示例子
* @author liudong
*/
public class IntrospectorDemo {
String name;
public static void main(String[] args) throws Exception{
IntrospectorDemo demo = new IntrospectorDemo();
demo.setName( "Winter Lau" );
// 如果不想把父类的属性也列出来的话,
// 那 getBeanInfo 的第二个参数填写父类的信息
BeanInfo bi = Introspector.getBeanInfo(demo.getClass(), Object. class );
PropertyDescriptor[] props = bi.getPropertyDescriptors();
for ( int i=0;i<props.length;i++){
System.out.println(props[i].getName()+ "=" +
props[i].getReadMethod().invoke(demo, null ));
}
}
public String getName() {
return name;
}
public void setName(String name) {
this .name = name;
}
}
Web 开发框架 Struts 中的 FormBean 就是通过内省机制来将表单中的数据映射到类的属性上,因此要求 FormBean 的每个属性要有 getter/setter 方法。但也并不总是这样,什么意思呢?就是说对一个 Bean 类来讲,我可以没有属性,但是只要有 getter/setter 方法中的其中一个,那么 Java 的内省机制就会认为存在一个属性,比如类中有方法 setMobile ,那么就认为存在一个 mobile 的属性,这样可以方便我们把 Bean 类通过一个接口来定义而不用去关心具体实现,不用去关心 Bean 中数据的存储。比如我们可以把所有的 getter/setter 方法放到接口里定义,但是真正数据的存取则是在具体类中去实现,这样可提高系统的扩展性。
总结
将 Java 的反射以及内省应用到程序设计中去可以大大的提供程序的智能化和可扩展性。有很多项目都是采取这两种技术来实现其核心功能,例如我们前面提到的 Struts ,还有用于处理 XML 文件的 Digester 项目,其实应该说几乎所有的项目都或多或少的采用这两种技术。在实际应用过程中二者要相互结合方能发挥真正的智能化以及高度可扩展性。
另外,以下是SUN的java doc 对
Introspector的解释:
- public class Introspector
- extends Object
The Introspector class provides a standard way for tools to learn about the properties, events, and methods supported by a target Java Bean.
For each of those three kinds of information, the Introspector will separately analyze the bean's class and superclasses looking for either explicit or implicit information and use that information to build a BeanInfo object that comprehensively describes the target bean.
For each class "Foo", explicit information may be available if there exists a corresponding "FooBeanInfo" class that provides a non-null value when queried for the information. We first look for the BeanInfo class by taking the full package-qualified name of the target bean class and appending "BeanInfo" to form a new class name. If this fails, then we take the final classname component of this name, and look for that class in each of the packages specified in the BeanInfo package search path.
Thus for a class such as "sun.xyz.OurButton" we would first look for a BeanInfo class called "sun.xyz.OurButtonBeanInfo" and if that failed we'd look in each package in the BeanInfo search path for an OurButtonBeanInfo class. With the default search path, this would mean looking for "sun.beans.infos.OurButtonBeanInfo".
If a class provides explicit BeanInfo about itself then we add that to the BeanInfo information we obtained from analyzing any derived classes, but we regard the explicit information as being definitive for the current class and its base classes, and do not proceed any further up the superclass chain.
If we don't find explicit BeanInfo on a class, we use low-level reflection to study the methods of the class and apply standard design patterns to identify property accessors, event sources, or public methods. We then proceed to analyze the class's superclass and add in the information from it (and possibly on up the superclass chain).
Because the Introspector caches BeanInfo classes for better performance, take care if you use it in an application that uses multiple class loaders. In general, when you destroy a ClassLoader that has been used to introspect classes, you should use the Introspector.flushCachesIntrospector.flushFromCaches
For more information about introspection and design patterns, please consult the JavaBeans specification.
FileInputStream 和 FileReader(头ho晕 的)
的)
FileReader 会做编码转换,FileInputStream会忠实于原始文件数据。任何形式的Reader都会涉及编码。
BufferedInputStream和BufferedOutputStream
BufferedInputStream:
添加了功能,即缓冲输入和支持 mark 和 reset 方法的能力。创建 BufferedInputStream
时即创建了一个内部缓冲区数组。读取或跳过流中的各字节时,必要时可根据所包含的输入流再次填充该内部缓冲区,一次填充多个字节。mark
操作记录输入流中的某个点,reset 操作导致在从所包含的输入流中获取新的字节前,再次读取自最后一次 mark 操作以来所读取的所有字节。
BufferedOutputStream:该类实现缓冲的输出流。通过设置这种输出流,应用程序就可以将各个字节写入基础输出流中,而不必为每次字节写入调用基础系统。
BufferedReader和FileReader
BufferedReader :由Reader类扩展而来,提供通用的缓冲方式文本读取,而且提供了很实用的readLine,读取分行文本很适合,BufferedReader是针对Reader的,不直接针对文件,也不是只针对文件读取。
FileReader
是由java.io.InputStreamReade扩展来的,是针对文件读取的。实际使用时往往用 BufferedReader
bufferedreader = new BufferedReader(new
FileReader("test.conf"));先建立一个文件reader,再用BufferedReader读。
FileInputStream和Reader
FileInputStream:
扩展自java.io.InputStream,InputStream提供的是字节流的读取,而非文本读取,这是和Reader类的根本区别。用
Reader读取出来的是char数组或者String ,使用InputStream读取出来的是byte数组。
Reader:Reader
类及其子类提供的字符流的读取char(16位),InputStream及其子类提供字节流的读取byte(8位),所以FileReader类是将文
件按字符流的方式读取,FileInputStream则按字节流的方式读取文件,BufferedReader的作用是提供缓冲,
InputStreamReader可以将读如stream转换成字符流方式(即reader)是reader和stream之间的桥梁
BufferedInputStream和BufferedOutputStream的一个例子
import java.io.*;
public class BufferedStreamDemo...{
public static void main(String[] args)...{
try...{
byte[] data=new byte[1];
File srcFile=new File("BufferedStreamDemo.java");
File desFile=new File("BufferedStreamDemo.txt");
BufferedInputStream bufferedInputStream=new BufferedInputStream(new FileInputStream(srcFile));
BufferedOutputStream bufferedOutputStream=new BufferedOutputStream(new FileOutputStream(desFile));
System.out.println("复制文件: "+srcFile.length()+"字节");
while(bufferedInputStream.read(data)!=-1)...{
bufferedOutputStream.write(data);
}
//将缓冲区中的数据全部写出
bufferedOutputStream.flush();
System.out.println("复制完成");
//显示输出BufferedStreamDemo.txt文件的内容
bufferedInputStream =new BufferedInputStream(new FileInputStream(new File("BufferedStreamDemo.txt")));
while(bufferedInputStream.read(data)!=-1)...{
String str=new String(data);
System.out.print(str);
}
bufferedInputStream.close();
bufferedOutputStream.close();
}catch(ArrayIndexOutOfBoundsException e)...{
System.out.println("using: java useFileStream src des");
e.printStackTrace();
}catch(IOException e)...{
e.printStackTrace();
}
}
}
select distinct item.reportoid, item.lineoid, item.accountoid, sun.amount, mon.amount, tue.amount, wes.amount, thur.amount, fri.amount, sat.amount
from expenseitem item
left join (select reportoid, accountoid, lineoid, amount, itemDate from expenseitem
where itemDate = '2007-11-04' ) sun
on item.reportoid = sun.reportoid and
item.accountoid = sun.accountoid and
item.lineoid = sun.lineoid and
item.itemDate = sun.itemDate
left join (select reportoid, accountoid, lineoid, amount, itemDate from expenseitem
where itemDate = adddate('2007-11-04', 1) ) mon
on item.reportoid = mon.reportoid and
item.accountoid = mon.accountoid and
item.lineoid = mon.lineoid and
item.itemDate = mon.itemDate
left join (select reportoid, accountoid, lineoid,amount, itemDate from expenseitem
where itemDate = adddate('2007-11-04', 2)) tue
on item.reportoid = tue.reportoid and
item.accountoid = tue.accountoid and
item.lineoid = tue.lineoid and
item.itemDate = tue.itemDate
left join (select reportoid, accountoid, lineoid,amount, itemDate from expenseitem
where itemDate = adddate('2007-11-04', 3) ) wes
on item.reportoid = wes.reportoid and
item.accountoid = wes.accountoid and
item.lineoid = wes.lineoid and
item.itemDate = wes.itemDate
left join (select reportoid, accountoid, lineoid,amount, itemDate from expenseitem
where itemDate = adddate('2007-11-04', 4) ) thur
on item.reportoid = thur.reportoid and
item.accountoid = thur.accountoid and
item.lineoid = thur.lineoid and
item.itemDate = thur.itemDate
left join (select reportoid, accountoid, lineoid,amount, itemDate from expenseitem
where itemDate = adddate('2007-11-04', 5) ) fri
on item.reportoid = fri.reportoid and
item.accountoid = fri.accountoid and
item.lineoid = fri.lineoid and
item.itemDate = fri.itemDate
left join (select reportoid, accountoid, lineoid,amount, itemDate from expenseitem
where itemDate = adddate('2007-11-04', 6) ) sat
on item.reportoid = sat.reportoid and
item.accountoid = sat.accountoid and
item.lineoid = sat.lineoid and
item.itemDate = sat.itemDate
where item.reportoid = 3712
order by reportoid, accountoid;
SELECT REVERSE('abc') AS Expr1
SELECT ascii('c') AS Expr1 取asc码
select DATE_ADD(date('2008-01-01'),INTERVAL days DAY) days from (select 0 days union select 1 union select 2 union select 3 union select 4 union select 5 union select 6 union select 7 union select 8 union select 9 union select 10 union select 11 union select 12 union select 13 union select 14 union select 15 union select 16 union select 17 union select 18 union select 19 union select 20 union select 21 union select 22 union select 23 union select 24 union select 25 union select 26 union select 27 union select 28 union select 29 union select 30 union select 31) as b
http://www.tutorialspoint.com/wsdl/index.htm
http://www.tutorialspoint.com/
通过使用某种协议进行通信来完成分布式事务,被称为
两段式提交。从名字上看,您可能已经知道有两个阶段:
- 第一个阶段,即预提交:
- 事务协调器给每个事务管理器发送准备操作的信号。
- 事务管理器将操作(通常是数据更新)步骤(或细节)写入事务日志。如果失败,事务管理器使用这些步骤重复操作。
- 事务管理器本地创建事务并通知资源管理器对资源(例如,数据库或消息服务器)执行操作。
- 资源管理器执行操作并向事务管理器报告成功(准备提交信号)或失败(准备回滚)。
- 资源管理器等待事务管理器进一步的指令。
- 事务管理器向事务协调器报告成功或失败。
- 第二阶段,即提交阶段:在第二阶段中,第一阶段的结果将传送给所有事务管理器。如果任何事务管理器报告失败,所有的事务参与者都必须回滚。
- 事务协调器让所有事务管理器提交(或回滚)。
- 所有事务管理器将提交或回滚信息传递给其资源管理器。
- 资源管理器将成功或失败提示返回给事务管理器。
- 事务管理器向事务协调器报告成功或失败。
【IT168 技术文档】很多人对二级缓存都不太了解,或者是有错误的认识,我一直想写一篇文章介绍一下hibernate的二级缓存的,今天终于忍不住了。
我的经验主要来自hibernate2.1版本,基本原理和3.0、3.1是一样的,请原谅我的顽固不化。
hibernate的session提供了一级缓存,每个session,对同一个id进行两次load,不会发送两条sql给数据库,但是session关闭的时候,一级缓存就失效了。
二级缓存是SessionFactory级别的全局缓存,它底下可以使用不同的缓存类库,比如ehcache、oscache等,需要设置hibernate.cache.provider_class,我们这里用ehcache,在2.1中就是
hibernate.cache.provider_class=net.sf.hibernate.cache.EhCacheProvider
如果使用查询缓存,加上
hibernate.cache.use_query_cache=true
缓存可以简单的看成一个Map,通过key在缓存里面找value。
Class的缓存
对于一条记录,也就是一个PO来说,是根据ID来找的,缓存的key就是ID,value是POJO。无论list,load还是
iterate,只要读出一个对象,都会填充缓存。但是list不会使用缓存,而iterate会先取数据库select
id出来,然后一个id一个id的load,如果在缓存里面有,就从缓存取,没有的话就去数据库load。假设是读写缓存,需要设置:
<cache usage="read-write"/>
如果你使用的二级缓存实现是ehcache的话,需要配置ehcache.xml
<cache
name="com.xxx.pojo.Foo" maxElementsInMemory="500" eternal="false"
timeToLiveSeconds="7200" timeToIdleSeconds="3600" overflowToDisk="true"
/>
其中eternal表示缓存是不是永远不超时,timeToLiveSeconds是缓存中每个元素(这里也就是一个POJO)的超时时间,如果
eternal="false",超过指定的时间,这个元素就被移走了。timeToIdleSeconds是发呆时间,是可选的。当往缓存里面put
的元素超过500个时,如果overflowToDisk="true",就会把缓存中的部分数据保存在硬盘上的临时文件里面。
每个需要缓存的class都要这样配置。如果你没有配置,hibernate会在启动的时候警告你,然后使用defaultCache的配置,这样多个class会共享一个配置。
当某个ID通过hibernate修改时,hibernate会知道,于是移除缓存。
这样大家可能会想,同样的查询条件,第一次先list,第二次再iterate,就可以使用到缓存了。实际上这是很难的,因为你无法判断什么时候是第一
次,而且每次查询的条件通常是不一样的,假如数据库里面有100条记录,id从1到100,第一次list的时候出了前50个id,第二次
iterate的时候却查询到30至70号id,那么30-50是从缓存里面取的,51到70是从数据库取的,共发送1+20条sql。所以我一直认为
iterate没有什么用,总是会有1+N的问题。
(题外话:有说法说大型查询用list会把整个结果集装入内存,很慢,而iterate只select
id比较好,但是大型查询总是要分页查的,谁也不会真的把整个结果集装进来,假如一页20条的话,iterate共需要执行21条语句,list虽然选择
若干字段,比iterate第一条select
id语句慢一些,但只有一条语句,不装入整个结果集hibernate还会根据数据库方言做优化,比如使用mysql的limit,整体看来应该还是
list快。)
如果想要对list或者iterate查询的结果缓存,就要用到查询缓存了
一个b好的介绍w3c的网站。
http://www.w3school.com.cn
http://webservices.ctocio.com.cn/wsjavtec/62/7690562.shtml
通常,你需要获得当前日期和计算一些其他的日期,例如,你的程序可能需要判断一个月的第一天或者最后一天。你们大部分人大概都知道怎样把日期进行分割
(年、月、日等),然后仅仅用分割出来的年、月、日等放在几个函数中计算出自己所需要的日期!在这篇文 章里,我将告诉你如何使用DATEADD和
DATEDIFF函数来计算出在你的程序中可能你要用到的一些不同日期。
在使用本文中的例子之前,你必须注意以下的问题。大部
分可能不是所有例子在不同的机器上执行的结果可能不一样,这完全由哪一天是一个星期的第一天这个设置决定。第一天(DATEFIRST)设定决定了你的系
统使用哪一天作为一周的第一天。所有以下的例 子都是以星期天作为一周的第一天来建立,也就是第一天设置为7。假如你的第一天设置不一样,你可能需要调整
这些例子,使它和不同的第一天设置相符合。你可以通过@@DATEFIRST函数来检查第一天设置。
为了理解这些例子,
我们先复习一下DATEDIFF和DATEADD函数。DATEDIFF函数计算两个日期之间的小时、天、周、月、年等时间间隔总数。DATEADD函数
计算一个日期通过给时间间隔加减来获得一个新的日期。要了解更多的DATEDI FF和DATEADD函数以及时间间隔可以阅读微软联机帮助。
使用DATEDIFF和DATEADD函数来计算日期,和本来从当前日期转换到你需要的日期的考虑方法有点不同。你必须从时间间隔这个方面来考虑。比
如,从当前日期到你要得到的日期之间有多少时间间隔,或者,从今天到某一天(比如1900-1-1)之间有多少时间间隔,等等。理解怎样着眼于时间间隔有
助于你轻松的理解我的不同的日期计算例子。
一个月的第一天
第一个例子,我将告诉你如何从当前日期去这个月的最后一天。请注意:这个例子以及这篇文章中的其他例子都将只使用DATEDIFF和DATEADD函数来计算我们想要的日期。每一个例子都将通过计算但前的时间间隔,然后进行加减来得到想要计算的日期。
这是计算一个月第一天的SQL 脚本:
SELECT DATEADD(mm, DATEDIFF(mm,0,getdate()), 0)
我们把这个语句分开来看看它是如何工作的。最核心的函数是getdate(),大部分人都知道这个是返回当前的日期和时间的函数。下一个执行的函数
DATEDIFF(mm,0,getdate())是计算当前日期和“1900-01-01 00:00:00.000”这个日期之间的月数。记住:时期
和时间变量和毫秒一样是从“1900-01-01 00:00:00.000”开始计算的。这就是为什么你可以在DATEDIFF函数中指定第一个时间表
达式为“0”。下一个函数是DATEADD,增加当前日期到“1900-01-01”的月数。通过增加预定义的日期“1900-01-01”和当前日期的
月数,我们可以获得这个月的第一天。另外,计算出来的日期的时间部分将会是“00:00:00.000”。
这个计算的技巧是先计算当前日期到“1900-01-01”的时间间隔数,然后把它加到“1900-01-01”上来获得特殊的日期,这个技巧可以用来计算很多不同的日期。下一个例子也是用这个技巧从当前日期来产生不同的日期。
本周的星期一
这里我是用周(wk)的时间间隔来计算哪一天是本周的星期一。
SELECT DATEADD(wk, DATEDIFF(wk,0,getdate()), 0)
一年的第一天
现在用年(yy)的时间间隔来显示这一年的第一天。
SELECT DATEADD(yy, DATEDIFF(yy,0,getdate()), 0)
季度的第一天
假如你要计算这个季度的第一天,这个例子告诉你该如何做。
SELECT DATEADD(qq, DATEDIFF(qq,0,getdate()), 0)
当天的半夜
曾经需要通过getdate()函数为了返回时间值截掉时间部分,就会考虑到当前日期是不是在半夜。假如这样,这个例子使用DATEDIFF和DATEADD函数来获得半夜的时间点。
SELECT DATEADD(dd, DATEDIFF(dd,0,getdate()), 0)
深入DATEDIFF和DATEADD函数计算
你可以明白,通过使用简单的DATEDIFF和DATEADD函数计算,你可以发现很多不同的可能有意义的日期。
目前为止的所有例子只是仅仅计算当前的时间和“1900-01-01”之间的时间间隔数量,然后把它加到“1900-01-01”的时间间隔上来计算出
日期。假定你修改时间间隔的数量,或者使用不同的时间间隔来调用DATEADD函数,或者减去时间间隔而不是增加,那么通过这些小的调整你可以发现和多不
同的日期。
这里有四个例子使用另外一个DATEADD函数来计算最后一天来分别替换DATEADD函数前后两个时间间隔。
上个月的最后一天
这是一个计算上个月最后一天的例子。它通过从一个月的最后一天这个例子上减去3毫秒来获得。有一点要记住,在Sql Server中时间是精确到3毫秒。这就是为什么我需要减去3毫秒来获得我要的日期和时间。
SELECT dateadd(ms,-3,DATEADD(mm, DATEDIFF(mm,0,getdate()), 0))
计算出来的日期的时间部分包含了一个Sql Server可以记录的一天的最后时刻(“23:59:59:997”)的时间。
去年的最后一天
连接上面的例子,为了要得到去年的最后一天,你需要在今年的第一天上减去3毫秒。
SELECT dateadd(ms,-3,DATEADD(yy, DATEDIFF(yy,0,getdate()), 0))
本月的最后一天
现在,为了获得本月的最后一天,我需要稍微修改一下获得上个月的最后一天的语句。修改需要给用DATEDIFF比较当前日期和“1900-01-01”
返回的时间间隔上加1。通过加1个月,我计算出下个月的第一天,然后减去3毫秒,这样就计算出了这个月的最后一天。这是计算本月最后一天的SQL脚本。
SELECT dateadd(ms,-3,DATEADD(mm, DATEDIFF(m,0,getdate())+1, 0))
本年的最后一天
你现在应该掌握这个的做法,这是计算本年最后一天脚本
SELECT dateadd(ms,-3,DATEADD(yy, DATEDIFF(yy,0,getdate())+1, 0))。
本月的第一个星期一
好了,现在是最后一个例子。这里我要计算这个月的第一个星期一。这是计算的脚本。
select DATEADD(wk, DATEDIFF(wk,0,
dateadd(dd,6-datepart(day,getdate()),getdate())
), 0)
在这个例子里,我使用了“本周的星期一”的脚本,并作了一点点修改。修改的部分是把原来脚本中“getdate()”部分替换成计算本月的第6天,在计算中用本月的第6天来替换当前日期使得计算可以获得这个月的第一个星期一。
总结
我希望这些例子可以在你用DATEADD和DATEDIFF函数计算日期时给你一点启发。通过使用这个计算日期的时间间隔的数学方法,我发现为了显示两
个日期之间间隔的有用历法是有价值的。注意,这只是计算出这些日期的一种方法。要牢记,还有很多方法 可以得到相同的计算结果。假如你有其他的方法,那很
不错,要是你没有,我希望这些例子可以给你一些启发,当你要用DATEADD和DATEDIFF函数计算你程序可能要用到的日期时。
附录,其他日期处理方法
1)去掉时分秒
declare @ datetime
set @ = getdate() --’2003-7-1 10:00:00’
SELECT @,DATEADD(day, DATEDIFF(day,0,@), 0)
2)显示星期几
select datename(weekday,getdate())
3)如何取得某个月的天数
declare @m int
set @m=2 --月份
select datediff(day,’2003-’+cast(@m as varchar)+’-15’ ,’2003-’+cast(@m+1 as varchar)+’-15’)
另外,取得本月天数
select datediff(day,cast(month(GetDate()) as varchar)+’-’+cast(month(GetDate()) as varchar)+’-15’ ,cast(month(GetDate()) as varchar)+’-’+cast(month(GetDate())+1 as varchar)+’-15’)
或者使用计算本月的最后一天的脚本,然后用DAY函数区最后一天
SELECT Day(dateadd(ms,-3,DATEADD(mm, DATEDIFF(m,0,getdate())+1, 0)))
4)判断是否闰年:
SELECT case day(dateadd(mm, 2, dateadd(ms,-3,DATEADD(yy, DATEDIFF(yy,0,getdate()), 0)))) when 28 then ’平年’ else ’闰年’ end
或者
select case datediff(day,datename(year,getdate())+’-02-01’,dateadd(mm,1,datename(year,getdate())+’-02-01’))
when 28 then ’平年’ else ’闰年’ end
5)一个季度多少天
declare @m tinyint,@time smalldatetime
select @m=month(getdate())
select @m=case when @m between 1 and 3 then 1
when @m between 4 and 6 then 4
when @m between 7 and 9 then 7
else 10 end
select @time=datename(year,getdate())+’-’+convert(varchar(10),@m)+’-01’
select datediff(day,@time,dateadd(mm,3,@time))
The load-on-startup element indicates that this servlet should be loaded (instantiated and have its init() called) on the startup of the web application. The optional contents of these element must be an integer indicating the order in which the servlet should be loaded. If the value is a negative integer, or the element is not present, the container is free to load the servlet whenever it chooses. If the value is a positive integer or 0, the container must load and initialize the servlet as the application is deployed.
The container must guarantee that servlets marked with lower integers
are loaded before servlets marked with higher integers. The container
may choose the order of loading of servlets with the same
load-on-start-up value.
SOA现在正热得"烫手"。
对于SOA,目前我听到有两种说法:一种讲它是"颠覆性的革命架构",一种是"谨慎观望"。但无疑,SOA最近几年发展得非常快,各主要软件厂商纷纷高调跟进,关于SOA的报道可以说是不绝于耳。对"SOA热",程序员们有的兴奋和期待,有的则感到困惑,最近我在金蝶中间件于广州、上海等城市举行的"Java俱乐部"上和程序员们交流时,他们或是以一种朝圣者的表情说:"以前面向对象的技术过时了,SOA时代来了",或者一再恳切地追问我:"SOA到底是什么?作用是什么?"
那么,SOA是什么?到底能解决什么问题、解决得怎样?我们和客户都准备好了吗?我给出的答案是"Just Processing,SOA-现在进行中"。
SOA到底是什么?
SOA(Service-Oriented Architecture)的定义是面向服务的架构,就是说将软件按照功能设计成一个个服务,这些服务用标准的方式定义接口、并通过标准的协议进行调用。SOA所定义的接口和调用方式是独立于编程语言和运行平台的,广义上讲SOA可以基于不同的底层技术实现,比如CORBA和Web Services。但CORBA由于过于复杂和臃肿已很少使用,所以目前所说的SOA绝大多数是基于Web Services技术实现。在Web Services的实现方式下,SOA服务的接口用XML进行定义。
在SOA架构下,软件开发从业务流程分析开始,使用组件化业务建模的方法识别和分析各种业务模型,将各种实践融入其中,在这个基础上建立用例,用例直接产生BPEL,这些BPEL则可以被融入一个服务整合框架中,其描述了各种服务的信息,从而把ESB上的各个模块统一起来,形成一个巨大的服务仓。
这样,SOA甚至是所有软件人员的一个梦:将中间层再进行抽离,在中间层作一个跨技术架构的元数据和业务逻辑,使之成为跨技术架构的、可长期继承、并不断积累的企业业务库和最宝贵的信息资产,也就是面向服务的组件库,而且这个服务组件库也可以被其它企业复用,且不依赖于任何一种技术架构。夸张一点说,如果所有软件企业都使用SOA架构,那么世界软件业将会发生彻底的改变。显然,这样一个框架不是一种产品,也不仅仅是一种技术,而是一种解决问题的方法论。
SOA可能应用的两个场景及现有问题
那么,SOA要解决的问题是什么?我认为,从技术本质上讲,SOA可能应用于两个场景:第一种是业务互通互联;第二种是封闭交易系统,即将元数据和业务逻辑抽离,形成可复用。举个例子,在第一种场景中,当不同企业之间的业务需要相互调用,这时就可能采用SOA技术;在第二种场景中,在企业内部需要将系统进行迁移时,利用SOA技术定义的原有数据和业务流程,可以很快完成。
无疑,SOA是一个伟大的思想,它试图定义一个大家(各种软件厂商)都"认"的、都"遵循"的法则,大家都使用这样的方法来进行互联互通,从而实现无界限的联通,以及服务组件库的继承和复用,解放无效和重复劳动。打一个不那么恰当的比喻,就像人类的语言一样。SOA或许就像《圣经》中那个著名的"通天塔"的故事:人们用同一种语言交流产生的威力是如此之大,以至于他们在巴比伦几乎要修成一个"通天塔",直达上帝所在的天庭。
但是,在SOA应用的两个场景中,现存的问题同样也是明显的:
第一种场景:业务互联互通,就是应用系统互联。业务互联,与其说是技术问题,不如讲是业务问题,例如ERP、CRM的异步整合,数据层面整合都不能很好将两个系统整合,SOA仅仅是一种实现工具之一,整合效果并不会好不到那里去。我们可以说,在没有其他选项之前,SOA是一种最"不坏"的方式,但它并不能解决所有的问题,实际上EAI的牵涉面很广,而我们知道,有些问题并不是单纯靠技术就能解决的。
第二种场景:封闭交易系统,缺点是性能慢,而且基于Web Services的交易没有形成明确的规范。使用XML作信息交互比较慢是大家都承认的,性能问题将对SOA的发展造在一定的阻力。同时SOA规范本身没有完善,比如Transaction规范还在不断完善,而且Web Service多年来收效甚微。总的来说,SOA现在还处在一个发展阶段,很多标准还在制定,不同厂商间还存在不兼容的现象,因此SOA还不能说已经是一个成熟的技术,还需要时间的检验,还在"进行中"。当然,金蝶中间件作为JCP组织成员,也会推动SOA规范在J2EE平台上的实现。
中国用户的现实选择之惑
在憧憬SOA技术可能带来的前景之余,我们不得不回过头来冷静地说:SOA和我们大家的共同客户――中国企业还有距离。
中国信息化进程与欧美不同,大量的基础业务系统还没建立起来,整合需求并不如想象的那么大。从我们对客户的了解,发现很少有客户有SOA的需求。简单地总结就是,互通无基础,以新建系统为主,需求并不强烈。而欧美市场大量业务系统已建立起来需要整合,从这个角度讲,SOA是适用于他们的。同时,在成功案例极少的前提下,SOA还处于培育期,新建封闭交易系统使用SOA技术还是有一定风险的。
一项新技术需要市场的消化,大型企业出于保护企业投资,不会轻易地转移到新的技术平台;而即使像J2EE这样成熟的技术经过了这么多年的发展,也不敢说占有统治地位的市场份额。SOA还需要整个IT界的用户和供应商共同促进。
中国信息化需要什么样的技术架构、能够接受什么样的成本价位?这不仅仅是我们的客户需要考虑,我们软件厂商要比客户考虑得更清楚、更进一步。在这个充满变数的激烈竞争市场,只有冷静务实才能生存、发展。
From:http://blog.csdn.net/Apusicyuan/archive/2007/03/16/1531424.aspx
解析SOA十大设计原则 公共接口要明确界限
作者: 佚名, 出处:CSDN, 责任编辑: 包春林,
2008-04-23 05:00
日前国外网站报道介绍了面向服务架构(SOA)的基本原则,提出了公共接口与内部实现要有明确界限等原则。虽然这些原则并不是绝对的真理,但可作为一个应用开发参考。
一、明确的边界
通过跨越定义明确的边界进行显式消息传递,服务得以彼此交互。有时候,跨越服务边界可能要耗费很大的成本,这要视地理、信任或执行因素而定。边界是指服务的公共接口与其内部专用实现之间的界线。服务的边界通过 WSDL 发布,可能包括说明特定服务之期望的声明。
二、服务共享和约和架构,不是类
服务交互应当只以服务的策略、架构和基于合约的行为为基础。服务的合约通常使用 WSDL 定义,而服务聚合的合约则可以使用 BPEL 定义(进而,对聚合的每个服务使用 WSDL)。服务使用者将依靠服务的合约来调用服务及与服务交互。鉴于这种依赖性,服务合约必须长期保持稳定。在利用 XML 架构 (xsd:any) 和 SOAP 处理模型(可选标头)的可扩展性的同时,合约的设计应尽可能明确。
三、策略驱动
尽管它往往被认为是最不为人所了解的原则,但对于实现灵活的 Web 服务,它或许是最有力的。单纯依靠 WSDL 无法交流某些业务交互要求。可以使用策略表达式将结构兼容性(交流的内容)与语义兼容性(如何交流消息或者将消息交流给谁)分隔开来。
四、自治
服务是独立进行部署、版本控制和管理的实体。开发人员应避免对服务边界之间的空间进行假设,因为此空间比边界本身更容易改变。
五、采用可传输的协议格式,而不是API
通常,服务提供商基于某种传输协议(例如HTTP)提供服务,而服务消费者只能通过另一种不同的协议(比如MQ)通信。因此,也许需要在服务提供商与消费者之间建立一座异步起动同步运行的连接桥梁,超越HTTP和Java Messaging Service消息服务(JMS)等协议.从技术角度讲,Java Messaging Service消息服务(JMS)并不是一种传输协议,而是一组供应商中立(vendor-neutral)的通信APIs。
六、面向文档
消息被构造为“纯文本的”XML文档(换句话说,数据的格式只对XML有意义)。 消息通常用于传输业务文档,比如购买订单、发票和提单。这种交互类型与同步消息排队系统的兼容性很好,比如MQ Series、MSMQ、JMS、TIBCO、IMS等等。
七、松耦合
服务之间要求最小的依赖性,只要求它们之间能够相互知晓。
八、符合标准
当通过Web的服务实现时,最原始的(基本的)面向服务的架构(SOA)的模型仅仅提供了很低程度上的关于可靠性、安全性以及事务管理的标准化机制。第二代的技术条件和框架,如WS-ReliableMessaging规范、 WS-Security规范和WS-Coordination规范 (与WS-AtomicTransaction规范和WS-BusinessActivity规范相联系),它们试图以工业标准的方式定位存在的缺陷。
九、独立软件供应商
向SOA的转变正在深刻改变了经济现实。客户们会期待更合理的费用以及不必重新进行投资就能改进业务的能力。因此,独立软件供应商没有选择,只能使自己的业务更加灵活,以期让自己的客户也变得同样灵活。于是,面向服务不仅是简单的在现有的、紧耦合的、复杂的、不灵活的以及非组件化的业务功能上添加基于标准的接口。更重要的是,为了兑现SOA的承诺,独立软件供应商必须改变他们构建、打包、销售、交付、管理和支持自身产品的方式。
十、元数据驱动
开发元数据本身并不是元数据驱动应用程序的本意。使用元数据来驱动服务在系统边界的传播是一个更为正确的方法。
一个事务处理的属性有:Required,RequiresNew,Mandatory,NotSupported,Supports,Never.
1、Required:当客户端运行一个事务处理并调用EJB的一个方法,这个方法执行客户端的事务处理;当客户端没有启动一个事务处理,则EJB容器在执行这个方法之前启动一个新的事务处理.
2、RequiresNew:当客户端运行一个事务处理并调用EJB的一个方法时,容器管理器做如下操作:
(1) 悬挂客户端的事务处理;
(2) 开始一个新的事务处理;
(3) 调用方法;
(4) 当方法结束,恢复客户端的事物处理.
当客户端没有启动一个事务处理,容器管理器在执行这个方法之前启动一个新的事务处理.
3、Mandatory: 当客户端运行一个事务处理并调用EJB的一个方法,这个方法在客户端的事务处理范围内被执行; 当客户端没有启动一个事务处理,容器管理器将会抛错(TransactionRequiredException);
4、NotSupported: 当客户端运行一个事务处理并调用EJB的一个方法,容器管理器在调用方法之前终止客户端的事务处理,当方法执行完,再恢复客户端的事务处理; 当客户端没有启动一个事务处理,容器管理器在调用方法时不启动事务处理.
5、Supports: 当客户端运行一个事务处理并调用EJB的一个方法,在运行方法时执行客户端的事务处理; 当客户端没有启动一个事务处理,容器管理器在调用方法时不启动事务处理.
6、Never: 当客户端运行一个事务处理并调用EJB的一个方法,容器管理器将抛出一个错误(RemoteException); 当客户端没有启动一个事务处理,容器管理器在调用方法时不启动事务处理.
在jbuilder中,缺省是Required;
第一个ejb可以是 Required,这个ejb调用的那个ejb方法如果想在一个
事务上下文中,我觉得可能采用Mandatory,方式比较好。如果它们不在一个事务上下文中,就会抛错(TransactionRequiredException),是一个上下文,就没有问题
几乎每个做过Web开发的人都问过,到底元素的ID和Name有什么区别阿?为什么有了ID还要有Name呢?而同样我们也可以得到最classical的答案:ID就像是一个人的身份证号码,而Name就像是他的名字,ID显然是唯一的,而Name是可以重复的。
上周我也遇到了ID和Name的问题,在页面里输入了一个input type="hidden",只写了一个ID='SliceInfo',赋值后submit,在后台用Request.Params["SliceInfo"]却怎么也去不到值。后来恍然大悟因该用Name来标示,于是在input里加了个Name='SliceInfo',就一切ok了。
第一段里对于ID和Name的解答说的太笼统了,当然那个解释对于ID来说是完全对的,它就是Client端HTML元素的Identity。而Name其实要复杂的多,因为Name有很多种的用途,所以它并不能完全由ID来代替,从而将其取消掉。
具体用途有:
用途1: 作为可与服务器交互数据的HTML元素的服务器端的标示,比如input、select、textarea、和button等。我们可以在服务器端根据其Name通过Request.Params取得元素提交的值。
用途2: HTML元素Input type='radio'分组,我们知道radio button控件在同一个分组类,check操作是mutex的,同一时间只能选中一个radio,这个分组就是根据相同的Name属性来实现的。
用途3: 建立页面中的锚点,我们知道link是获得一个页面超级链接,如果不用href属性,而改用Name,如:,我们就获得了一个页面锚点。
用途4: 作为对象的Identity,如Applet、Object、Embed等元素。比如在Applet对象实例中,我们将使用其Name来引用该对象。
用途5: 在IMG元素和MAP元素之间关联的时候,如果要定义IMG的热点区域,需要使用其属性usemap,使usemap="#name"(被关联的MAP元素的Name)。
用途6: 某些特定元素的属性,如attribute,和param。例如为Object定义参数
显然这些用途都不是能简单的使用ID来代替掉的,所以HTML元素的ID和Name的却别并不是身份证号码和姓名这样的区别,它们更本就是不同作用的东西。
当然HTML元素的Name属性在页面中也可以起那么一点ID的作用,因为在DHTML对象树中,我们可以使用document.getElementsByName来获取一个包含页面中所有指定Name元素的对象数组。
在这里顺便说一下,要是页面中有n(n>1)个HTML元素的ID都相同了怎么办?在DHTML对象中怎么引用他们呢?如果我们使用ASPX页面,这样的情况是不容易发生的,因为aspnet进程在处理aspx页面时根本就不允许有ID非唯一,这是页面会被抛出异常而不能被正常的render。要是不是动态页面,我们硬要让ID重复那IE怎么搞呢?
这个时候我们还是可以继续使用document.getElementById获取对象,只不过我们只能获取ID重复的那些对象中在HTML Render时第一个出现的对象。而这时重复的ID会在引用时自动变成一个数组,ID重复的元素按Render的顺序依次存在于数组中。
程序题:我想启动一个线程执行特定的任务,任务的具体执行内容定义在TheRunnable类中(实现了java.lang.Runnable接口):
TheRunnable theRunnable = new TheRunnable();
以下哪个语句可用于启动theRunnable任务线程:_____
a) theRunnable.run();
b) theRunnable.start();
c) Thread thread = new Thread(theRunnable); thread.run();
d) Thread thread = new Thread(theRunnable); thread.start();
前言
全国青少年信息学(计算机)奥林匹克竞赛常常要用到许多经典算法,比如约瑟夫问题、螺旋方阵、汉诺塔、八皇后问题等,而 螺旋方阵问题是其中较为常用的一种。这类问题的算法分析对于计算机图形学、解析几何中的相关问题都有一定的启发性。尽管现有算法已取得了令人振奋的成绩, 但依然具有一定的片面性,或者说过于复杂。实际上,这个问题有不同的解决算法,鉴于这个问题具有一定的典型性,本文针对信息学奥林匹克竞赛这一问题进行了 全面系统的分析、归纳,从不同的角度对这个问题的算法进行分析并通过程序实现。使读者对这个问题在算法选择上有更大的余地,从而避免算法的单一性,同时对 于类似相关问题的解决也有一定的启发和帮助。
2 问题的描述与分析
关于螺旋方阵的输出主要是指将一些数据或符号按照一定的顺序输出到计算机的屏幕上或者是输出到一个指定的文件中去,输出的几种常见情况如下图(为简单起见,以输出5阶的数字螺旋方阵为例):
1 2 3 4 5
16 17 18 19 6
15 24 25 20 7
14 23 22 21 8
13 12 11 10 9
1 16 15 14 13
2 17 24 25 12
3 18 25 23 11
4 19 20 21 10
5 6 7 8 9
21 22 23 24 25
20 7 8 9 10
19 6 1 2 11
18 5 4 3 12
17 16 15 14 13
21 20 19 18 17
22 7 6 5 16
23 8 1 4 15
24 9 2 3 14
25 10 11 12 13
图1由外及里顺时针;图2由外及里逆时针;图3由里及外顺时针;图4由里及外逆时针
在实际应用中,输出的内容可以不尽相同。在上面的图1至图4中,按螺旋顺序输出的数显然有一定的规律,而实际输出的顺序往往不是按照螺旋顺序,通常是将上图中的数据按行(或按列)输出,因此这类问题的关键在于如何将有规律的数据与实际输出时的先后顺序对应起来。下面采用不同的算法来实现。
3 采用不同算法解决螺旋方阵的输出
3.1非递归算法
3.1.1 “海龟”算法(顺时针,由外及里)
参照海龟行走的做法,用一对变量A,B模拟海龟头的方向,根据屏幕坐标的特点,A、B的取值和“海龟头”方向有这样的关系:(0,1)表示向右;(0, -1)表示向左;(-1,0)表示向上;(1,0)表示向下;用另一对变量X,Y模拟海龟位置,“海龟”每前进一步,它的新位置即为X=X+A,Y=Y+B;要海龟向右转,就改变A、B的值,根据数学知识可以得出具体的变换公式是:C=A;A=B;B=-C。下面用自然语言对算法进行描述:让海龟先走n步,然后右转,再走n-1步,再右转,再走n-1步,再右转,再走n-2步,再右转,再走n-2步……如此类推,直到海龟前进的步数为0时停止;而每当“海龟”前进1步,就在它位置上显示一个数字,那么前进n步即重复执行“X:=X+A,Y:=Y+B”语句n次。但如何让下两个循环的重复次数都为n-1呢?解决的方法是:循环n次后,让n的值减少0.5,然后再转回执行同样的循环。扩展到显示n位数,则须留n列的位置,也就是说,海龟水平方向每次得前进n步,才有足够的位置显示大一点的数字方阵,需把Y=Y+B改成Y=Y+n*B就行了。“海龟”算法的优点是简洁清晰。
3.1.2 “分割”算法(逆时针,由外及里)
设螺旋方阵对应的一般二维数组如下:
a00 a01 a02 a03 a04
a10 a11 a12 a13 a14
a20 a21 a22 a23 a24
a30 a31 a32 a33 a34
a40 a41 a42 a43 a44
图5
按逆时针方向从外向内,一层层给下标变量赋值,由于阶数n的任意性,需考虑以下几个问题:层数k与阶数n的关系式,n由用户输入,k根据n来计算;定义变量value,赋值时让其自增;分析每层矩形四条边元素的下标变化规律,将方阵元素按逆时针方向分成四个部分:方阵左半边(三列),方阵下半边(二行),方阵右半边(两列),方阵上半边(二行)。
具体算法思想:以5阶方阵为例,可判断 k=[(n+1)/2]=3,用循环控制产生的层数,语句为for(k=0,k <(n+1)/2;k++)。
Step1:找出方阵左半边列规律:列下标正好是层数k的值,行下标在第一列从0变到4,第二列从1变到3,在第三列从2变到2,故推导出n阶螺旋方阵左半边由外到内的列循环结构:for(i=k;i <n-k;i++) mat[i][k]=value++;此循环执行一次,产生一列元素,循环执行的次数由外循环来控制。
Step2:找出方阵下半边行规律:行下标从4变到3,每层取值为n―k―1;列下标由外到内第一行从1变到4(a40已产生),第二行(a30 、a31已产生)从2变到3,第三行只有一个元素a22,故推导出n阶螺旋方阵下半边行循环结构:for(i=k+1;i <n-k;i++) mat[n-k-1][i]=value++;
Step3:找出方阵右半边列规律:行下标第一列从3变化到0(a44已产生),第二列从2变到1(a43、a33、a03已产生),可推断行的初值为n-k-2;列下标没变化,两列的下标分别为4、3,故推断出右半边的列可由下列循环结构完成:for(i=n-k-2;i >=k;i--) mat[i][n-k-1]=value++;
Step4:找出方阵上半边行规律:已经产生了的元素不能再重新赋值,而行下标可用层次k来表示,列下标与右半边行下标变化规律一样,由此推断出上半边的行可由下列循环结构完成:for(i=n-k-2;i >k;i--) mat[k][i]=value++。
当k取一个值时,以上四个循环依序各产生一列或一行元素,由此产生一层元素,当k在变化范围[0…(n+1)/2]内依次取值时,四个循环轮流执行,一个数字螺旋方阵就这样生成了。
3.2 递归算法
分析图五容易看出,当由外及里顺时针旋转时,最外层数据输出后,内层的图形只不过是层数减少了,即问题的规模变小了,但问题的性质没有发生变化,新问题和原问题仍然可以采用相同的解法。所以这一问题完全可以采用递归的方法来求解。具体的算法描述如下。
Step1:初始化。把需要输出的数据放入一维数组,设为b[1..n*n]。因为是n阶方阵,所以全部元素共有n2个,输出b[1]到b[n*n]的顺序是方阵顺时针旋转的顺序。
Step2:把b数组中的每个元素放入到二维数组a[i][j](图5)中去,如b[1]放入a[0][0]中,b[2]放入a[0][1]中,……,b[6]放入a[1][4]中……,其它元素依次放入。
Step3:按行输出数组元素a[i][j]即可。
上述算法中,难点在于如何将b数组放入到a[i][j]数组对应的分量中去。为此,对step2进行求精并使用递归来解决。具体做法:将数组a初始化为0。设置变量direction作为方向标志。当direction为1、2、3、4时,分别表示向右、向下、向左、向上。并编写如下的递归子程序walk(x,y,direction,k)。其中参数x,y表示数组的下标。k是计数器。当 k>n*n 为递归出口。
case direction of
{right } 1: if到右边界then 向下拐 else 向右输出;
{down} 2: if到下边界 then 向左拐 else 向下输出;
{left} 3: if到左边界 then 向上拐 else 向左输出;
{up} 4: if 到上边界 then 向右拐 else 向上输出。
end;{end case}
3.3 算法实现
限于篇幅,本文仅给出递归算法的主要程序段(pascal语言)
procedure walk(x,y,direction,k:integer);
begin
if k>n*n then 按行输出a数组;
a[x,y]:=b[k];
case direction of
{right}1: if (y=n) or (a[x,y+1]<>0) then walk(x+1,y,2,k+1) else walk(x,y+1,1,k+1);
{down}2: if (x=n) or (a[x+1,y]<>0) then walk(x,y-1,3,k+1) else walk(x+1,y,2,k+1);
{left} 3: if (y=1) or (a[x,y-1]<>0) then walk(x-1,y,4,k+1) else walk(x,y-1,3,k+1);
{up} 4: if (x=1) or (a[x-1,y]<>0) then walk(x,y+1,1,k+1) else walk(x-1,y,4,k+1)
end;
begin{main}
fillchar(a,sizeof(a),0);
writeln('please input a integer for n:');
readln(n);
walk(1,1,1,1);
end.{end main}
4 结束语
关于螺旋方阵的输出算法主要有上述几种,其他几种方阵的输出,可以仿照上述的算法分析加以实现。相对而言,递 归算法较为简洁,但是时间复杂度要高一些,对于输出高阶螺旋方阵时,时间很长。另外在空间复杂度方面,采用数组这种数据结构,显然有一定的局限性,如果使 用链表来存储,将会尽可能地避免空间不足的现象。另外,上述问题也可以使用一个模板式的子程序来完成,这时要求输入的参数要包括:从外还是从里螺旋、顺时 针还是逆时针,起点坐标等参数,对于从里向外螺旋时,还要考虑螺旋方阵的阶数是奇数还是偶数,分别给予不同的处理。
本篇文章来源于 义乌信息技术教研网 原文链接:http://www.ywhs.net/itedu/html/aosaifudao/mingshifudao/20071125/47.html
Java最初是在浏览器和客户端机器中粉墨登场的。当时,很多人质疑它是否适合做服务器端的开发。现在,随着对Java2平台企业版(J2EE)第三方支持的增多,Java被广泛接纳为开发企业级服务器端解决方案的首选平台之一。
J2EE平台由一整套服务(Services)、应用程序接口(APIs)和协议构成,它对开发基于Web的多层应用提供了功能支持。
在本文中我将解释支撑J2EE的13种核心技术:JDBC, JNDI, EJBs, RMI, JSP, Java servlets, XML, JMS, Java IDL, JTS, JTA, JavaMail 和 JAF,同时还将描述在何时、何处需要使用这些技术。当然,我还要介绍这些不同的技术之间是如何交互的。
此外,为了让您更好地感受J2EE的真实应用,我将在WebLogic应用服务器,来自BEA Systems公司的一种广为应用的产品环境下来介绍这些技术。不论对于WebLogic应用服务器和J2EE的新手,还是那些想了解J2EE能带来什么好处的项目管理者和系统分析员,相信本文一定很有参考价值。
宏观印象: 分布式结构和J2EE
过去,二层化应用 -- 通常被称为client/server应用 -- 是大家谈论的最多的。在很多情况下,服务器提供的惟一服务就是数据库服务。在这种解决方案中,客户端程序负责数据访问、实现业务逻辑、用合适的样式显示结果、弹出预设的用户界面、接受用户输入等。client/server结构通常在第一次部署的时候比较容易,但难于升级或改进,而且经常基于某种专有的协议,通常是某种数据库协议。它使得重用业务逻辑和界面逻辑非常困难。更重要的是,在Web时代,二层化应用通常不能体现出很好的伸缩性,因而很难适应Internet的要求。
Sun设计J2EE的部分起因就是想解决二层化结构的缺陷。于是,J2EE定义了一套标准来简化N层企业级应用的开发。它定义了一套标准化的组件,并为这些组件提供了完整的服务。J2EE还自动为应用程序处理了很多实现细节,如安全、多线程等。
用J2EE开发N层应用包括将二层化结构中的不同层面切分成许多层。一个N层化应用A能够为以下的每种服务提供一个分开的层:
显示:在一个典型的Web应用中,客户端机器上运行的浏览器负责实现用户界面。
动态生成显示: 尽管浏览器可以完成某些动态内容显示,但为了兼容不同的浏览器,这些动态生成工作应该放在Web服务器端进行,使用JSP、Servlets,或者XML(可扩展标记语言)和(可扩展样式表语言)。
业务逻辑:业务逻辑适合用Session EJBs(后面将介绍)来实现。
数据访问:数据访问适合用Entity EJBs(后面将介绍)和JDBC来实现。
后台系统集成: 同后台系统的集成可能需要用到许多不同的技术,至于何种最佳需要根据后台系统的特征而定。
您可能开始诧异:为什么有这么多的层?事实上,多层方式可以使企业级应用具有很强的伸缩性,它允许每层专注于特定的角色。例如,让Web服务器负责提供页面,应用服务器处理应用逻辑,而数据库服务器提供数据库服务。
由于J2EE建立在Java2平台标准版(J2SE)的基础上,所以具备了J2SE的所有优点和功能。包括“编写一次,到处可用”的可移植性、通过JDBC访问数据库、同原有企业资源进行交互的CORBA技术,以及一个经过验证的安全模型。在这些基础上,J2EE又增加了对EJB(企业级Java组件)、Java servlets、Java服务器页面(JSPs)和XML技术的支持。
分布式结构与WebLogic应用服务器
J2EE提供了一个框架--一套标准API--用于开发分布式结构的应用,这个框架的实际实现留给了第三方厂商。部分厂商只是专注于整个J2EE架构中的的特定组件,例如Apache的Tomcat提供了对JSP和servlets的支持,BEA系统公司则通过其WebLogic应用服务器产品为整个J2EE规范提供了一个较为完整的实现。
WebLogic服务器已使建立和部署伸缩性较好的分布式应用的过程大为简化。WebLogic和J2EE代你处理了大量常规的编程任务,包括提供事务服务、安全领域、可靠的消息、名字和目录服务、数据库访问和连接池、线程池、负载平衡和容错处理等。
通过以一种标准、易用的方式提供这些公共服务,象WebLogic服务器这样的产品造就了具有更好伸缩性和可维护性的应用系统,使其为大量的用户提供了增长的可用性。
J2EE技术
在接下来的部分里,我们将描述构成J2EE的各种技术,并且了解WebLogic服务器是如何在一个分布式应用中对它们进行支持的。最常用的J2EE技术应该是JDBC、JNDI、EJB、JSP和servlets,对这些我们将作更仔细的考察。
Java Database Connectivity (JDBC)
JDBC API以一种统一的方式来对各种各样的数据库进行存取。和ODBC一样,JDBC为开发人员隐藏了不同数据库的不同特性。另外,由于JDBC建立在Java的基础上,因此还提供了数据库存取的平台独立性。
JDBC定义了4种不同的驱动程序,现分述如下:
类型 1: JDBC-ODBC Bridge
在JDBC出现的初期,JDBC-ODBC桥显然是非常有实用意义的,通过JDBC-ODBC桥,开发人员可以使用JDBC来存取ODBC数据源。不足的是,他需要在客户端安装ODBC驱动程序,换句话说,必须安装Microsoft Windows的某个版本。使用这一类型你需要牺牲JDBC的平台独立性。另外,ODBC驱动程序还需要具有客户端的控制权限。
类型 2: JDBC-native driver bridge
JDBC本地驱动程序桥提供了一种JDBC接口,它建立在本地数据库驱动程序的顶层,而不需要使用ODBC。 JDBC驱动程序将对数据库的API从标准的JDBC调用转换为本地调用。使用此类型需要牺牲JDBC的平台独立性,还要求在客户端安装一些本地代码。
类型 3: JDBC-network bridge
JDBC网络桥驱动程序不再需要客户端数据库驱动程序。它使用网络上的中间服务器来存取数据库。这种应用使得以下技术的实现有了可能,这些技术包括负载均衡、连接缓冲池和数据缓存等。由于第3种类型往往只需要相对更少的下载时间,具有平台独立性,而且不需要在客户端安装并取得控制权,所以很适合于Internet上的应用。
类型 4: Pure Java driver
第4种类型通过使用一个纯Java数据库驱动程序来执行数据库的直接访问。此类型实际上在客户端实现了2层结构。要在N-层结构中应用,一个更好的做法是编写一个EJB,让它包含存取代码并提供一个对客户端具有数据库独立性的服务。
WebLogic服务器为一些通常的数据库提供了JDBC驱动程序,包括Oracle, Sybase, Microsoft SQL Server以及Informix。它也带有一种JDBC驱动程序用于Cloudscape,这是一种纯Java的DBMS,WebLogic服务器中带有该数据库的评估版本。
以下让我们看一个实例。
JDBC实例
在这个例子中我们假定你已经在Cloudscape中建立了一个PhoneBook数据库,并且包含一个表,名为 CONTACT_TABLE ,它带有2个字段:NAME 和 PHONE。 开始的时候先装载Cloudscape JDBC driver,并请求 driver manager得到一个对PhoneBook Cloudscape数据库的连接。通过这一连接,我们可以构造一个 Statement 对象并用它来执行一个简单的SQL查询。最后,用循环来遍历结果集的所有数据,并用标准输出将NAME和PHONE字段的内容进行输出。
创建新表:
create table tabname(col1 type1 [not null] [primary key],col2 type2 [not null],..)
根据已有的表创建新表:
A:create table tab_new like tab_old
B:create table tab_new as select col1,col2… from tab_old definition only
actionMessage怎么能保存到session中哪!!太占用服务器资源了。防止刷新比较好的办法是利用token来解决就可以了阿:
就你的情况来看我给你举个例子
在Action中的add方法中,我们需要将Token值明确的要求保存在页面中,只需增加一条语句:saveToken(request);,如下所示:
public ActionForward add(ActionMapping mapping, ActionForm form,
HttpServletRequest request, HttpServletResponse response)
//前面的处理省略
saveToken(request);
//转发到需要录入信息的页面
return mapping.findForward("add");
}
在Action的insert方法中,我们根据表单中的Token值与服务器端的Token值比较,如下所示:
//处理信息录入的action
public ActionForward insert(ActionMapping mapping, ActionForm form,
HttpServletRequest request, HttpServletResponse response)
if (isTokenValid(request, true)) {
// 表单不是重复提交正常执行
} else {
//表单重复提交
saveToken(request);
//给客户端提示错误,当然这里也就是你把ActionMessages保存到request范围内,然后forward到错误页面
}
}
执行的流程:add(Action)->信息录入页面(jsp)->insert(Action)
综上,其实你选择重定向到页面无非就是为了让request失效保证不能重复提交,而恰恰你的错误信息又是保存到了request范围内了,所以呵呵出现问题了,利用token来解决这个问题吧
了,至于token我再lz解释一下:
Struts的Token机制能够很好的解决表单重复提交的问题,基本原理是:服务器端在处理到达的请求之前,会将请求中包含的令牌值与保存在当前用户会话中的令牌值进行比较,看是否匹配。在处理完该请求后,且在答复发送给客户端之前,将会产生一个新的令牌,该令牌除传给客户端以外,也会将用户会话中保存的旧的令牌进行替换。这样如果用户回退到刚才的提交页面并再次提交的话,客户端传过来的令牌就和服务器端的令牌不一致,从而有效地防止了重复提交的发生。
这时其实也就是两点,第一:你需要在请求中有这个令牌值,请求中的令牌值如何保存,其实就和我们平时在页面中保存一些信息是一样的,通过隐藏字段来保存,保存的形式如: 〈input type="hidden" name="org.apache.struts.taglib.html.TOKEN" value="6aa35341f25184fd996c4c918255c3ae"〉,这个value是TokenProcessor类中的generateToken()获得的,是根据当前用户的session id和当前时间的long值来计算的。第二:在客户端提交后,我们要根据判断在请求中包含的值是否和服务器的令牌一致,因为服务器每次提交都会生成新的Token,所以,如果是重复提交,客户端的Token值和服务器端的Token值就会不一致。
http://www.oracle.com/technology/sample_code/tech/java/codesnippet/webservices/attachment/index.html
http://www.ibm.com/developerworks/xml/library/x-tippass.html
From:http://www.ibm.com/developerworks/webservices/library/ws-whichwsdl/
A Web Services Description Language (WSDL) binding style can be RPC or document. The use can be encoded or literal. How do you determine which combination of style and use to use? The author describes the WSDL and SOAP messages for each combination to help you decide.
Introduction
A WSDL document describes a Web service. A WSDL binding describes how the service is bound to a messaging protocol, particularly the SOAP messaging protocol. A WSDL SOAP binding can be either a Remote Procedure Call (RPC) style binding or a document style binding. A SOAP binding can also have an encoded use or a literal use. This gives you four style/use models:
- RPC/encoded
- RPC/literal
- Document/encoded
- Document/literal
Add to this collection a pattern which is commonly called the document/literal wrapped pattern and you have five binding styles to choose from when creating a WSDL file. Which one should you choose?
Before I go any further, let me clear up some confusion that many of us have stumbled over. The terminology here is very unfortunate: RPC versus document. These terms imply that the RPC style should be used for RPC programming models and that the document style should be used for document or messaging programming models. That is not the case at all. The style has nothing to do with a programming model. It merely dictates how to translate a WSDL binding to a SOAP message. Nothing more. You can use either style with any programming model.
Likewise, the terms encoded and literal are only meaningful for the WSDL-to-SOAP mapping, though, at least here, the traditional meanings of the words make a bit more sense.
For this discussion, let's start with the Java method in Listing 1 and apply the JAX-RPC Java-to-WSDL rules to it (see Resources for the JAX-RPC 1.1 specification).
Listing 1. Java method
public void myMethod(int x, float y);
|
RPC/encoded
Take the method in Listing 1 and run it through your favorite Java-to-WSDL tool, specifying that you want it to generate RPC/encoded WSDL. You should end up with something like the WSDL snippet in Listing 2.
Listing 2. RPC/encoded WSDL for myMethod
<message name="myMethodRequest">
            <part name="x" type="xsd:int"/>
            <part name="y" type="xsd:float"/>
            </message>
            <message name="empty"/>
            <portType name="PT">
            <operation name="myMethod">
            <input message="myMethodRequest"/>
            <output message="empty"/>
            </operation>
            </portType>
            <binding .../>
            <!-- I won't bother with the details, just assume it's RPC/encoded. -->
|
Now invoke this method with "5" as the value for parameter x and "5.0" for parameter y. That sends a SOAP message which looks something like Listing 3.
Listing 3. RPC/encoded SOAP message for myMethod
<soap:envelope>
            <soap:body>
            <myMethod>
            <x xsi:type="xsd:int">5</x>
            <y xsi:type="xsd:float">5.0</y>
            </myMethod>
            </soap:body>
            </soap:envelope>
|
 |
A note about prefixes and namespaces
For the most part, for brevity, I ignore namespaces and prefixes in the listings in this article. I do use a few prefixes that you can assume are defined with the following namespaces:
- xmlns:xsd="http://www.w3.org/2001/XMLSchema"
- xmlns:xsi="http://www.w3.org/2001/XMLSchema-instance"
- xmlns:soap="http://schemas.xmlsoap.org/soap/envelope/"
For a discussion about namespaces and the WSDL-to-SOAP mapping, see paper "Handle namespaces in SOAP messages you create by hand" (see Resources).
|
|
There are a number of things to notice about the WSDL and SOAP message for this RPC/encoded example:
Strengths
- The WSDL is about as straightforward as it's possible for WSDL to be.
- The operation name appears in the message, so the receiver has an easy time dispatching this message to the implementation of the operation.
Weaknesses
|
WS-I compliance
The various Web services specifications are sometimes inconsistent and unclear. The WS-I organization was formed to clear up the issues with the specs. It has defined a number of profiles which dictate how you should write your Web services to be interoperable. For more information on WS-I, see the WS-I links in Resources.
|
|
- The type encoding info (such as
xsi:type="xsd:int") is usually just overhead which degrades throughput performance.
- You cannot easily validate this message since only the
<x ...>5</x> and <y ...>5.0</y> lines contain things defined in a schema; the rest of the soap:body contents comes from WSDL definitions.
- Although it is legal WSDL, RPC/encoded is not WS-I compliant.
Is there a way to keep the strengths and remove the weaknesses? Possibly. Let's look at the RPC/literal style.
RPC/literal
The RPC/literal WSDL for this method looks almost the same as the RPC/encoded WSDL (see Listing 4). The use in the binding is changed from encoded to literal. That's it.
Listing 4. RPC/literal WSDL for myMethod
<message name="myMethodRequest">
            <part name="x" type="xsd:int"/>
            <part name="y" type="xsd:float"/%gt;
            </message>
            <message name="empty"/>
            <portType name="PT">
            <operation name="myMethod">
            <input message="myMethodRequest"/>
            <output message="empty"/>
            </operation>
            </portType>
            <binding .../>
            <!-- I won't bother with the details, just assume it's RPC/literal. -->
|
What about the SOAP message for RPC/literal (see Listing 5)? Here there is a bit more of a change. The type encodings have been removed.
Listing 5. RPC/literal SOAP message for myMethod
<soap:envelope>
            <soap:body>
            <myMethod>
            <x>5</x>
            <y>5.0</y>
            </myMethod>
            </soap:body>
            </soap:envelope>
|
|
A note about xsi:type and literal use
Although in normal circumstances xsi:type does not appear in a literal WSDL's SOAP message, there are still cases when type information is necessary and it will appear -- in polymorphism, for instance. If the API expects a base type and an extension instance is sent, the type of that instance must be provided for proper deserialization of the object.
|
|
Here are the strengths and weaknesses of this approach:
Strengths
- The WSDL is still about as straightforward as it is possible for WSDL to be.
- The operation name still appears in the message.
- The type encoding info is eliminated.
- RPC/literal is WS-I compliant.
Weaknesses
- You still cannot easily validate this message since only the
<x ...>5</x> and <y ...>5.0</y> lines contain things defined in a schema; the rest of the soap:body contents comes from WSDL definitions.
What about the document styles? Do they help overcome this weakness?
Document/encoded
Nobody follows this style. It is not WS-I compliant. So let's move on.
Document/literal
The WSDL for document/literal changes somewhat from the WSDL for RPC/literal. The differences are highlighted in bold in Listing 6.
Listing 6. Document/literal WSDL for myMethod
				<types>
            <schema>
            <element name="xElement" type="xsd:int"/>
            <element name="yElement" type="xsd:float"/>
            </schema>
            </types>
            <message name="myMethodRequest">
            <part name="x" element="xElement"/>
            <part name="y" element="yElement"/>
            </message>
            <message name="empty"/>
            <portType name="PT">
            <operation name="myMethod">
            <input message="myMethodRequest"/>
            <output message="empty"/>
            </operation>
            </portType>
            <binding .../>
            <!-- I won't bother with the details, just assume it's document/literal. -->
|
The SOAP message for this WSDL is in Listing 7:
Listing 7. Document/literal SOAP message for myMethod
<soap:envelope>
            <soap:body>
            <xElement>5</xElement>
            <yElement>5.0</yElement>
            </soap:body>
            </soap:envelope>
|
|
A note about the message part
I could have changed only the binding, as I did from RPC/encoded to RPC/literal. It would have been legal WSDL. However, the WS-I Basic Profile dictates that document/literal message parts refer to elements rather than types, so I'm complying with WS-I. (And using an element part here leads well into the discussion about the document/literal wrapped pattern.)
|
|
Here are the strengths and weaknesses of this approach:
Strengths
- There is no type encoding info.
- You can finally validate this message with any XML validator. Everything within the
soap:body is defined in a schema.
- Document/literal is WS-I compliant, but with restrictions (see weaknesses).
Weaknesses
- The WSDL is getting a bit more complicated. This is a very minor weakness, however, since WSDL is not meant to be read by humans.
- The operation name in the SOAP message is lost. Without the name, dispatching can be difficult, and sometimes impossible.
- WS-I only allows one child of the
soap:body in a SOAP message. As you can see in Listing 7, this example's soap:body has two children.
The document/literal style seems to have merely rearranged the strengths and weaknesses from the RPC/literal model. You can validate the message, but you lose the operation name. Is there anything you can do to improve upon this? Yes. It's called the document/literal wrapped pattern.
Document/literal wrapped
Before I describe the rules for the document/literal wrapped pattern, let me show you the WSDL and the SOAP message in Listing 8 and Listing 9.
Listing 8. Document/literal wrapped WSDL for myMethod
<types>
            <schema>
            <element name="myMethod">
            <complexType>
            <sequence>
            <element name="x" type="xsd:int"/>
            <element name="y" type="xsd:float"/>
            </sequence>
            </complexType>
            </element>
            <element name="myMethodResponse">
            <complexType/>
            </element>
            </schema>
            </types>
            <message name="myMethodRequest">
            <part name="parameters" element="myMethod"/>
            </message>
            <message name="empty">
            <part name="parameters" element="myMethodResponse"/>
            </message>
            <portType name="PT">
            <operation name="myMethod">
            <input message="myMethodRequest"/>
            <output message="empty"/>
            </operation>
            </portType>
            <binding .../>
            <!-- I won't bother with the details, just assume it's document/literal. -->
|
The WSDL schema now has a wrapper around the parameters (see Listing 9).
Listing 9. Document/literal wrapped SOAP message for myMethod
<soap:envelope>
            <soap:body>
            <myMethod>
            <x>5</x>
            <y>5.0</y>
            </myMethod>
            </soap:body>
            </soap:envelope>
|
Notice that this SOAP message looks remarkably like the RPC/literal SOAP message in Listing 5. You might say it looks exactly like the RPC/literal SOAP message, but there's a subtle difference. In the RPC/literal SOAP message, the <myMethod> child of <soap:body> was the name of the operation. In the document/literal wrapped SOAP message, the <myMethod> clause is the name of the wrapper element which the single input message's part refers to. It just so happens that one of the characteristics of the wrapped pattern is that the name of the input element is the same as the name of the operation. This pattern is a sly way of putting the operation name back into the SOAP message.
These are the basic characteristics of the document/literal wrapped pattern:
- The input message has a single part.
- The part is an element.
- The element has the same name as the operation.
- The element's complex type has no attributes.
Here are the strengths and weaknesses of this approach:
Strengths
- There is no type encoding info.
- Everything that appears in the
soap:body is defined by the schema, so you can easily validate this message.
- Once again, you have the method name in the SOAP message.
- Document/literal is WS-I compliant, and the wrapped pattern meets the WS-I restriction that the SOAP message's
soap:body has only one child.
Weaknesses
- The WSDL is even more complicated.
As you can see, there is still a weakness with the document/literal wrapped pattern, but it's minor and far outweighed by the strengths.
|
RPC/literal wrapped?
From a WSDL point of view, there's no reason the wrapped pattern is tied only to document/literal bindings. It could just as easily be applied to an RPC/literal binding. But this would be rather silly. The SOAP message would contain a myMethod element for the operation and a child myMethod element for the element name. Also, even though it's legal WSDL, an RPC/literal part should be a type; an element part is not WS-I compliant.
|
|
Where is doc/lit wrapped defined?
This wrapped style originates from Microsoft®. There is no specification that defines this style; so while this style is a good thing, unfortunately, the only choice right now, in order to interoperate with Microsoft's and other's implementations, is to make educated guesses as to how it works based on the output of the Microsoft WSDL generator. This pattern has been around for awhile, and the industry has done a good job of understanding it, but while the pattern is fairly obvious in this example, there are corner cases in which the proper thing to do is not particularly clear. Our best hope is that an independent group like the WS-I organization will help stabilize and standardize this in the future.
Why not use document/literal wrapped all the time?
So far, this article has given the impression that the document/literal wrapped style is the best approach. Very often that's true. But there are still cases where you'd be better off using another style.
Reasons to use document/literal non-wrapped
If you have overloaded operations, you cannot use the document/literal wrapped style.
Imagine that, along with the method you've been using all along, you have the additional method in Listing 10.
Listing 10. Problem methods for document/literal wrapped
public void myMethod(int x, float y);
            public void myMethod(int x);
|
|
A note about overloaded operations
WSDL 2.0 will not allow overloaded operations. This is unfortunate for languages like the Java language which do allow them. Specs like JAX-RPC will have to define a name mangling scheme to map overloaded methods to WSDL. WSDL 2.0 merely moves the problem from the WSDL-to-SOAP mapping to the WSDL-to-language mapping.
|
|
WSDL allows overloaded operations. But when you add the wrapped pattern to WSDL, you require an element to have the same name as the operation, and you cannot have two elements with the same name in XML. So you must use the document/literal, non-wrapped style or one of the RPC styles.
Reasons to use RPC/literal
Since the document/literal, non-wrapped style doesn't provide the operation name, there are cases where you'll need to use one of the RPC styles. For instance, say you have the set of methods in Listing 11.
Listing 11. Problem methods for document/literal non-wrapped
public void myMethod(int x, float y);
            public void myMethod(int x);
            public void someOtherMethod(int x, float y);
|
Now assume that your server receives the document/literal SOAP message that you saw back in Listing 7. Which method should the server dispatch to? All you know for sure is that it's not myMethod(int x) because the message has two parameters and this method requires one. It could be either of the other two methods. With the document/literal style, you have no way to know which one.
Instead of the document/literal message, assume that the server receives an RPC/literal message such as the one in Listing 5. With this message it's fairly easy for a server to decide which method to dispatch to. You know the operation name is myMethod, and you know you have two parameters, so it must be myMethod(int x, float y).
Reasons to use RPC/encoded
The primary reason to prefer the RPC/encoded style is for data graphs. Imagine that you have a binary tree whose nodes are defined in Listing 12.
Listing 12. Binary tree node schema
<complexType name="Node">
            <sequence>
            <element name="name" type="xsd:string"/>
            <element name="left" type="Node" xsd:nillable="true"/>
            <element name="right" type="Node" xsd:nillable="true"/>
            </sequence>
            </complexType>
|
With this node definition, you could construct a tree whose root node -- A -- points to node B through both its left and right links (see Figure 1).
Figure 1. Encoded tree.

The standard way to send data graphs is to use the href tag, which is part of the RPC/encoded style (Listing 13).
Listing 13. The RPC/encoded binary tree
<A>
            <name>A</name>
            <left href="12345"/>
            <right href="12345"/>
            </A>
            <B id="12345">
            <name>B</name>
            <left xsi:nil="true"/>
            <right xsi:nil="true"/>
            </B>
|
Under any literal style, the href attribute is not available, so the graph linkage is lost (see Listing 14 and Figure 2). You still have a root node, A, which points to a node B to the left and another node B to the right. These B nodes are equal, but they are not the same node. Data have been duplicated instead of being referenced twice.
Listing 14. The literal binary tree
<A>
            <name>A</name>
            <left>
            <name>B</name>
            <left xsi:nil="true"/>
            <right xsi:nil="true"/>
            </left>
            <right>
            <name>B</name>
            <left xsi:nil="true"/>
            <right xsi:nil="true"/>
            </right>
            </A>
|
Figure 2. Literal tree

There are various ways you can do graphs in literal styles, but there are no standard ways; so anything you might do would probably not interoperate with the service on the other end of the wire.
SOAP response messages
So far I have been discussing request messages. But what about response messages? What do they look like? By now it should be clear to you what the response message looks like for a document/literal message. The contents of the soap:body are fully defined by a schema, so all you have to do is look at the schema to know what the response message looks like. For instance, see Listing 15 for the response for the WSDL in Listing 8.
Listing 15. document/literal wrapped response SOAP message for myMethod
<soap:envelope>
            <soap:body>
            <myMethodResponse/>
            </soap:body>
            </soap:envelope>
|
But what is the child of the soap:body for the RPC style responses? The WSDL 1.1 specification is not clear. But WS-I comes to the rescue. WS-I's Basic Profile dictates that in the RPC/literal response message, the name of the child of soap:body is "... the corresponding wsdl:operation name suffixed with the string 'Response'." Surprise! That's exactly what the conventional wrapped pattern's response element is called. So Listing 15 applies to the RPC/literal message as well as the document/literal wrapped message. (Since RPC/encoded is not WS-I compliant, the WS-I Basic Profile doesn't mention what an RPC/encoded response looks like, but you can assume the same convention applies here that applies everywhere else.) So the contents of response messages are not so mysterious after all.
Summary
There are four binding styles (there are really five, but document/encoded is meaningless). While each style has its place, under most situations the best style is document/literal wrapped.
Resources
About the author
|
|
|
|
Russell Butek is an SOA and Web services consultant for IBM. He has been one of the developers of IBM WebSphere Web services engine. He has also been a member the JAX-RPC Java Specification Request (JSR) expert group. He was involved in the implementation of Apache's AXIS SOAP engine, driving AXIS 1.0 to comply with JAX-RPC 1.0.
|
Axis 中使用WSDL文件的详细介绍
<deployment>:告诉Axis Engine这是一个部署描述文件。一个部署描述文件可以表示一个完整的engine配置或者将要部署到一个活动active的一部分组件。
<GlobalConfiguration>:用于控制engine范围的配置。可以包含以下子元素:
· <parameter> : 用来设置Axis的各种属性,参考Global Axis Configuration,可以配置任意数量的参数元素.
· <role> : 设置一个SOAP actor/role URI,engine可以对它进行识别。这允许指向这个role的SOAP headers成功的被engine处理。任意数量.
· <requestFlow> : 全局的请求Handlers。在调用实际的服务之前调用.
· <responseFlow> : 全局响应Handlers,在调用完实际的服务后,还没有返回到客户端之前调用.
<requestFlow [name="name"] [type="type"] >可以放置任意多个<handler> or <chain>在<requestFlow>中,但是可能只有一个<requestFlow>.
<responseFlow [name="name"] [type="type"] >可以放置任意多个<handler> or <chain>在< responseFlow >中,但是可能只有一个< responseFlow >.
<undeployment>部署文档的根元素,用于指示Axis这是个卸载描述文件.
<handler [name="name"] type="type">位于顶层元素<deployment> or <undeployment>, or inside a <chain>, <requestFlow>, or <responseFlow>. 用于定义Handler,并定义handler的类型。"Type" 可以是已经定义的Handler或者是"java:class.name"形式的QName。可选的"name"属性允许将这个Handler的定义在其他部署描述部分中引用。可以包含任意数量的<parameter name="name" value="value">元素.
<service name="name" provider="provider" >部署/卸载一个Axis服务。这是最复杂的一个WSDD标签。Options可能通过以下元素来指定: <parameter name="name" value="value"/>, 一些常用的包括:· className : 后台实现的类 allowedMethods : 每个provider可以决定那些方法允许web services访问
Axis支持的providers有如下几种:
Java RPC Provider (provider="java:RPC") 默认情况下所有的public方法都可以web service方式提供Java MsgProvder (provider="java:MSG") 为了更进一步的限制上面的方法,allowedMethods选项用于指定一个以空格分隔的方法名,只有这些方法可以通过web service访问。也可以将这个值指定为”*”表示所有的方法都可以访问。同时operation元素用来更进一步的定义被提供的方法,但是它不能决定方法的可见性. 注意,发布任何web service都有安全含义.
· allowedRoles : 都好分离的允许访问服务的角色列表。注意,这些是安全角色,和SOAP角色相反。安全角色控制访问,SOAP角色控制哪些SOAPheaders会被处理。
· extraClasses : 指定一个空格或者都好分离的类名称列表,这些类的名字应该被包含在WSDL文档的类型定义部分。当服务接口引用一个基类的时候,或者希望WSDL文件包含其他类的XML Schema类型定义的时候,这个参数很有用。
如果希望为服务定义handler,可以在<service>元素中添加<requestFlow>和<responseFlow>子元素。他们的语义和<chain>元素中的定义时一样的。也就是说,它们可以包含<handler> and <chain> 元素,根据指定的顺序被调用.
通过服务的Handlers来控制角色,可以在服务声明中指定任意数量的<role>元素。
例如:
|
<service name="test">
<parameter name="className" value="test.Implementation"/>
<parameter name="allowedMethods" value="*"/>
<namespace>http://testservice/</namespace>
<role>http://testservice/MyRole</role>
<requestFlow> <!-- Run these before processing the request -->
<handler type="java:MyHandlerClass"/>"
<handler type="somethingIDefinedPreviously"/>
</requestFlow>
</service>
|
可以通过使用<operation>标签指定关于服务的特殊操作的元数据。这可以将方法的java参数名和特定的XML名进行映射,为参数指定特定的模式,并将特定的XML名字映射到特定的操作。例如
<operation name="method"> </operation>
<chain name="name"><subelement/>...</chain>
定义一个链。当chain被调用的时候,按顺序调用其中的handler。这样就可以构建一个常用功能的模块,chain元素的子元素可以是handler或者chain。handler的定义形式可以是如下两种方式:
|
<chain name="myChain">
<handler type="java:org.apache.axis.handlers.LogHandler"/>
</chain>
或者
<handler name="logger" type="java:org.apache.axis.handlers.LogHandler"/>
<chain name="myChain"/>
<handler type="logger"/>
</chain>
<transport name="name">
|
定义了一个服务器端的传输。当一个输入请求到达的时候,服务器传输被调用。服务器传输可能定义<requestFlow> and/or <responseFlow> 元素来指定handlers/chains,在请求和响应被处理的时候被调用,这个功能和service元素中的功能一样。典型的传输请求响应handler实现了关于传输的功能。例如转换协议headers等等.
对于任何种类的传输,经常是指HTTP传输,当特定的查询字符串传递到servlet的时候用户可能允许Axis servlets执行任意的动作,以plug-in的方式。 (参考Axis Servlet Query String Plug-ins).当查询字符串handler的类名被指导后,用户可以通过在<transport>中添加合适的<parameter>来启用它(插件)。
|
<transport name="http">
<parameter name="useDefaultQueryStrings" value="false" />
<parameter name="qs.name" value="class.name" />
</transport>
|
在上面的例子中,AxisServlet会处理的查询字符串是?name,它调用的类是class.name。
<parameter>元素的name属性必须加上前缀qs来表示这个元素定义了一个查询字符串handler。value属性值相实现了org.apache.axis.transport.http.QSHandler 接口的类。默认情况下,Axis提供了三个Axis servlet查询字符串handlers (?list, ?method, and ?wsdl). 查看Axis服务器配置文件来了解它们的定义。如果不希望使用默认的handlers,就设置"useDefaultQueryStrings" 为false。默认会被设置成true.
<transport name="name" pivot="handler type" >
定义了一个客户端的传输,当发送SOAP消息的时候来调用。"pivot"属性指定一个Handler来作为实际的传输sender,例如HTTPSender。请求和响应流和服务器端的设置相同. <typeMapping qname="ns:localName" classname="classname" serializer="classname" deserializer="classname"/> 每个typeMapping将一个XML qualified名字和一个Java类进行映射,使用一个序列器和反序列器。
<beanMapping qname="ns:localName" classname="classname">讲话的类型映射,使用一个预定义的序列器/反序列器来编码/解码JavaBeans。
<documentation>在<service>, <operation> 或者操作的<parameter>中使用。.是文档说明,生成wsdl的<wsdl:document>元素.
|
Example:
<operation name="echoString" >
<documentation>This operation echoes a string</documentation>
<parameter name="param">
<documentation>a string</documentation>
</parameter>
</operation>
|
全局的Axis配置参数
服务默认的是通过server-config.wsdd文件中的值来进行配置的。但是熟练的Axis用户可以写自己的配置handler,这样就可以将配置数据保存在LDAP服务器,数据库或者远程的web service等等。查看源代码来了解如何实现。也可以在web.xml文件中使自动的获取配置信息。但是Axis不推荐这样使用,因为最好将配置信息放在一个位置。
在server-config文件中,有一个全局配置部分,支持以名/值对的形式作为嵌套元素使用。
|
<globalConfiguration>
<parameter name="adminPassword" value="admin"/>
<parameter name="axis.servicesPath" value="/services/"/>
<parameter name="attachments.Directory" value="c:"temp"attachments"/>
<parameter name="sendMultiRefs" value="true"/>
<parameter name="sendXsiTypes" value="true"/>
<parameter name="attachments.implementation" value="org.apache.axis.attachments.AttachmentsImpl"/>
<parameter name="sendXMLDeclaration" value="true"/>
<parameter name="enable2DArrayEncoding" value="true"/>
<parameter name="dotNetSoapEncFix" value="false"/>
</globalConfiguration>
|
单独的Service(服务)配置
|
<service name="MyServiceName"
provider="java:RPC"
style="rpc|document|wrapped"
use="encoded|literal"
streaming="off|on"
attachment="MIME|DIME|NONE">
<parameter name="className" value="org.apache.mystuff.MyService"/>
<parameter name="allowedMethods" value="method1 method2 method3"/>
<parameter name="wsdlTargetNamespace" value="http://mystuff.apache.org/MyService"/>
<parameter name="wsdlServiceElement" value="MyService"/>
<parameter name="wsdlServicePort" value="MyServicePort"/>
<parameter name="wsdlPortType" value="MyPort"/>
<parameter name="wsdlSoapActionMode" value="NONE|DEFAULT|OPERATION"/>
<parameter name="SingleSOAPVersion" value="1.1|1.2/>
<documentation>Service level info</documentation>
<endpointURL>http://example.com:5050/my/custom/url/to/service</endpointURL>
<wsdlFile>/path/to/wsdl/file</wsdlFile>
<namespace>http://my.namespace.com/myservice</namespace>
<handlerInfoChain>handlerChainName</handlerInfoChain>
<operation ... />
<typeMapping ... />
<beanMapping ... />
</service>
|
单独的Operation(操作)配置
|
<operation name="GetQuote"
qname="operNS:GetQuote"
returnQName="GetQuoteResult"
returnType="xsd:float"
soapAction=""
returnHeader="true|false">
<documentation>Operation level documentation here</documentation>
<parameter name="ticker" type="tns:string"/>
<fault name="InvalidTickerFaultMessage"
qname="tickerSymbol"
class="test.wsdl.faults.InvalidTickerFaultMessage"
type="xsd:string"/>
</operation>
|
由于Service的配置和Operation的配置很容易理解,各个参数也都使用了self-explanation的表示,所以这里就不再赘述了。
同时Axis还定义日志配置以及一些预定义的Handler,详细内容,参考Axis的参考文档。
From:http://gocom.primeton.com/blog9288_29578.htm
http://dev.21tx.com/2005/07/14/13017.html
摘要: WSDL
<definitions
name="HelloWorld"
targetNamespace="http://xmlns.oracle.com/HelloWorld"
xmlns="http:...
阅读全文
一个 XML schema 中 elementFormDefault="?" 这一属性用来指示 XML Schema 处理程序把这个 XML schema 中定义的元素或者类型放到哪个命名空间。
一个schema中声明的元素或者类型只能归到两个命名空间中的某一个去,这两个是,无名命名空间和由targetSchema属性指明的目标命名空间。而targetSchema属性只能在xs:schema的定义中声明,因而,一个schema中的定义的元素或类型只可能归属于一个有名命名空间(但是还有可能归属于无名命名空间)。
当elementFormDefault="qualified" 时,所有全局元素的子元素将被以缺省方式放到目标命名空间,连同全局元素或者类型将被放到目标命名空间;而当elementFormDefault="unqualified" 时,所有全局元素的子元素将被以缺省方式放到无名命名空间。而属性的命名空间类似地由attributeFormDefault="?"来指明。
需要明白的是,elementFormDefault="?" 是有作用域的,并且是被继承的,除非在子定义中覆盖父定义。
下面三个例子说明了elementFormDefault的使用效果。红色表示属于已命名空间的元素,蓝色表示属于未命名空间的元素。
1.定义了目标命名空间, 全局elementFormDefault=“unqualified”。这时除了全局元素或者类型将归于目标命名空间外,局部元素将归于无名命名空间。
unqualified.xsd
<?xml version="1.0" encoding="UTF-8"?>
<xs:schema xmlns:xs="http://www.w3.org/2001/XMLSchema" targetNamespace="aaaa" elementFormDefault="unqualified" attributeFormDefault="unqualified">
<xs:element name="c">
<xs:complexType>
<xs:sequence>
<xs:element name="c1" type="xs:double"/>
<xs:element name="c2" type="xs:string"/>
</xs:sequence>
</xs:complexType>
</xs:element>
</xs:schema>
unqualified.xml
<?xml version="1.0" encoding="UTF-8"?>
<n:c xmlns:n="aaaa" xmlns:xsi="http://www.w3.org/2001/XMLSchema-instance" xsi:schemaLocation="aaaa unqualified.xsd">
<c1>3.141593E0</c1>
<c2>String</c2>
</n:c>
2. 定义了目标命名空间, 全局elementFormDefault=“qualified”。这时全局元素或者类型将归于目标命名空间,局部元素将以缺省方式归于目标命名空间。
qualified.xsd
<?xml version="1.0" encoding="UTF-8"?>
<xs:schema xmlns:xs="http://www.w3.org/2001/XMLSchema" targetNamespace="aaaa" elementFormDefault="qualified" attributeFormDefault="unqualified">
<xs:element name="c">
<xs:complexType>
<xs:sequence>
<xs:element name="c1" type="xs:double"/>
<xs:element name="c2" type="xs:string"/>
</xs:sequence>
</xs:complexType>
</xs:element>
</xs:schema>
qualified.xml
<?xml version="1.0" encoding="UTF-8"?>
<c xmlns="aaaa" xmlns:xsi="http://www.w3.org/2001/XMLSchema-instance" xsi:schemaLocation="aaaa qualified.xsd">
<c1>3.141593E0</c1>
<c2>String</c2>
</c>
3. 定义了目标命名空间, 全局elementFormDefault=“unqualified”。这时全局元素(c)或者类型将归于目标命名空间。局部元素(c1,c2)以缺省方式归于无名命名空间。局部元素(c3)在局部定义中使用form=“qualified”覆盖全局设定的 unqualified,这使得c3归于目标命名空间(如果它有子元素,子元素将以缺省方式归于目标命名空间)。
qualified2.xsd
<?xml version="1.0" encoding="UTF-8"?>
<xs:schema xmlns:xs="http://www.w3.org/2001/XMLSchema" targetNamespace="aaaa" elementFormDefault="unqualified" attributeFormDefault="unqualified">
<xs:element name="c">
<xs:complexType>
<xs:sequence>
<xs:element name="c1" type="xs:double"/>
<xs:element name="c2" type="xs:string"/>
<xs:element name="c3" type="xs:integer" form="qualified"/>
</xs:sequence>
</xs:complexType>
</xs:element>
</xs:schema>
qualified2.xml
<?xml version="1.0" encoding="UTF-8"?>
<n:c xmlns:n="aaaa" xmlns:xsi="http://www.w3.org/2001/XMLSchema-instance" xsi:schemaLocation="aaaa qualified2.xsd">
<c1>3.141593E0</c1>
<c2>String</c2>
<n:c3>0</n:c3>
</n:c>
[FROM]http://bbs.w3china.org/dispbbs.asp?BoardID=23&replyID=19004&id=25672&star=1&skin=0
我们知道,在关系数据库标准中有四个事务隔离级别:
未提交读(Read Uncommitted):允许脏读,也就是可能读取到其他会话中未提交事务修改的数据
提交读(Read Committed):只能读取到已经提交的数据。Oracle等多数数据库默认都是该级别
可重复读(Repeated Read):可重复读。在同一个事务内的查询都是事务开始时刻一致的,InnoDB默认级别。在SQL标准中,该隔离级别消除了不可重复读,但是还存在幻象读
串行读(Serializable):完全串行化的读,每次读都需要获得表级共享锁,读写相互都会阻塞
查看InnoDB系统级别的事务隔离级别:
mysql> SELECT @@global.tx_isolation;
+-----------------------+
| @@global.tx_isolation |
+-----------------------+
| REPEATABLE-READ |
+-----------------------+
1 row in set (0.00 sec)
查看InnoDB会话级别的事务隔离级别:
mysql> SELECT @@tx_isolation;
+-----------------+
| @@tx_isolation |
+-----------------+
| REPEATABLE-READ |
+-----------------+
1 row in set (0.00 sec)
修改事务隔离级别:
mysql> set global transaction isolation level read committed;
Query OK, 0 rows affected (0.00 sec)
mysql> set session transaction isolation level read committed;
Query OK, 0 rows affected (0.00 sec)
InnoDB的可重复读隔离级别和其他数据库的可重复读是有区别的,不会造成幻象读(phantom read),所谓幻象读,就是同一个事务内,多次select,可以读取到其他session insert并已经commit的数据。下面是一个小的测试,证明InnoDB的可重复读隔离级别不会造成幻象读。测试涉及两个session,分别为session 1和session 2,隔离级别都是repeateable read,关闭autocommit
mysql> select @@tx_isolation;
+-----------------+
| @@tx_isolation |
+-----------------+
| REPEATABLE-READ |
+-----------------+
1 row in set (0.00 sec)
mysql> set autocommit=off;
Query OK, 0 rows affected (0.00 sec)
session 1 创建表并插入测试数据
mysql> create table test(i int) engine=innodb;
Query OK, 0 rows affected (0.00 sec)
mysql> insert into test values(1);
Query OK, 1 row affected (0.00 sec)
session 2 查询,没有数据,正常,session1没有提交,不允许脏读
mysql> select * from test;
Empty set (0.00 sec)
session 1 提交事务
mysql> commit;
Query OK, 0 rows affected (0.00 sec)
session 2 查询,还是没有数据,没有产生幻象读
mysql> select * from test;
Empty set (0.00 sec)
以上试验版本:
mysql> select version();
+-------------------------+
| version() |
+-------------------------+
| 5.0.37-community-nt-log |
+-------------------------+
1 row in set (0.00 sec)
--EOF--
From:http://bbs.itren.cn/html/bbs41739.html
第1章 SQL语句处理的过程 在调整之前我们需要了解一些背景知识,只有知道这些背景知识,我们才能更好的去调整sql语句。
本节介绍了SQL语句处理的基本过程,主要包括:
· 查询语句处理
· DML语句处理(insert, update, delete)
· DDL 语句处理(create .. , drop .. , alter .. , )
· 事务控制(commit, rollback)
SQL 语句的执行过程(SQL Statement Execution)
图3-1 概要的列出了处理和运行一个sql语句的需要各个重要阶段。在某些情况下,Oracle运行sql的过程可能与下面列出的各个阶段的顺序有所不同。如DEFINE阶段可能在FETCH阶段之前,这主要依赖你如何书写代码。
对许多oracle的工具来说,其中某些阶段会自动执行。绝大多数用户不需要关心各个阶段的细节问题,然而,知道执行的各个阶段还是有必要的,这会帮助你写出更高效的SQL语句来,而且还可以让你猜测出性能差的SQL语句主要是由于哪一个阶段造成的,然后我们针对这个具体的阶段,找出解决的办法。
图 3-1 SQL语句处理的各个阶段
DML语句的处理
本节给出一个例子来说明在DML语句处理的各个阶段到底发生了什么事情。假设你使用Pro*C程序来为指定部门的所有职员增加工资。程序已经连到正确的用户,你可以在你的程序中嵌入如下的SQL语句:
EXEC SQL UPDATE employees
SET salary = 1.10 * salary WHERE department_id = :var_department_id; var_department_id是程序变量,里面包含部门号,我们要修改该部门的职员的工资。当这个SQL语句执行时,使用该变量的值。
每种类型的语句都需要如下阶段:
· 第1步: Create a Cursor 创建游标
· 第2步: Parse the Statement 分析语句
· 第5步: Bind Any Variables 绑定变量
· 第7步: Run the Statement 运行语句
· 第9步: Close the Cursor 关闭游标
如果使用了并行功能,还会包含下面这个阶段:
· 第6步: Parallelize the Statement 并行执行语句
如果是查询语句,则需要以下几个额外的步骤,如图 3所示:
· 第3步: Describe Results of a Query 描述查询的结果集
· 第4步: Define Output of a Query 定义查询的输出数据
· 第8步: Fetch Rows of a Query 取查询出来的行
下面具体说一下每一步中都发生了什么事情:.
第1步: 创建游标(Create a Cursor)
由程序接口调用创建一个游标(cursor)。任何SQL语句都会创建它,特别在运行DML语句时,都是自动创建游标的,不需要开发人员干预。多数应用中,游标的创建是自动的。然而,在预编译程序(pro*c)中游标的创建,可能是隐含的,也可能显式的创建。在存储过程中也是这样的。
第2步:分析语句(Parse the Statement)
在语法分析期间,SQL语句从用户进程传送到Oracle,SQL语句经语法分析后,SQL语句本身与分析的信息都被装入到共享SQL区。在该阶段中,可以解决许多类型的错误。
语法分析分别执行下列操作:
l 翻译SQL语句,验证它是合法的语句,即书写正确
l 实现数据字典的查找,以验证是否符合表和列的定义
l 在所要求的对象上获取语法分析锁,使得在语句的语法分析过程中不改变这些对象的定义
l 验证为存取所涉及的模式对象所需的权限是否满足
l 决定此语句最佳的执行计划
l 将它装入共享SQL区
l 对分布的语句来说,把语句的全部或部分路由到包含所涉及数据的远程节点
以上任何一步出现错误,都将导致语句报错,中止执行。
只有在共享池中不存在等价SQL语句的情况下,才对SQL语句作语法分析。在这种情况下,数据库内核重新为该语句分配新的共享SQL区,并对语句进行语法分析。进行语法分析需要耗费较多的资源,所以要尽量避免进行语法分析,这是优化的技巧之一。
语法分析阶段包含了不管此语句将执行多少次,而只需分析一次的处理要求。Oracle只对每个SQL语句翻译一次,在以后再次执行该语句时,只要该语句还在共享SQL区中,就可以避免对该语句重新进行语法分析,也就是此时可以直接使用其对应的执行计划对数据进行存取。这主要是通过绑定变量(bind variable)实现的,也就是我们常说的共享SQL,后面会给出共享SQL的概念。
虽然语法分析验证了SQL语句的正确性,但语法分析只能识别在SQL语句执行之前所能发现的错误(如书写错误、权限不足等)。因此,有些错误通过语法分析是抓不到的。例如,在数据转换中的错误或在数据中的错(如企图在主键中插入重复的值)以及死锁等均是只有在语句执行阶段期间才能遇到和报告的错误或情况。
查询语句的处理
查询与其它类型的SQL语句不同,因为在成功执行后作为结果将返回数据。其它语句只是简单地返回成功或失败,而查询则能返回一行或许多行数据。查询的结果均采用表格形式,结果行被一次一行或者批量地被检索出来。从这里我们可以得知批量的fetch数据可以降低网络开销,所以批量的fetch也是优化的技巧之一。
有些问题只与查询处理相关,查询不仅仅指SELECT语句,同样也包括在其它SQL语句中的隐含查询。例如,下面的每个语句都需要把查询作为它执行的一部分:
INSERT INTO table SELECT...
UPDATE table SET x = y WHERE...
DELETE FROM table WHERE...
CREATE table AS SELECT...
具体来说,查询
· 要求读一致性
· 可能使用回滚段作中间处理
· 可能要求SQL语句处理描述、定义和取数据阶段
第3步: 描述查询结果(Describe Results of a Query)
描述阶段只有在查询结果的各个列是未知时才需要;例如,当查询由用户交互地输入需要输出的列名。在这种情况要用描述阶段来决定查询结果的特征(数据类型,长度和名字)。
第4步: 定义查询的输出数据(Define Output of a Query)
在查询的定义阶段,你指定与查询出的列值对应的接收变量的位置、大小和数据类型,这样我们通过接收变量就可以得到查询结果。如果必要的话,Oracle会自动实现数据类型的转换。这是将接收变量的类型与对应的列类型相比较决定的。
第5步: 绑定变量(Bind Any Variables)
此时,Oracle知道了SQL语句的意思,但仍没有足够的信息用于执行该语句。Oracle 需要得到在语句中列出的所有变量的值。在该例中,Oracle需要得到对department_id列进行限定的值。得到这个值的过程就叫绑定变量(binding variables)
此过程称之为将变量值捆绑进来。程序必须指出可以找到该数值的变量名(该变量被称为捆绑变量,变量名实质上是一个内存地址,相当于指针)。应用的最终用户可能并没有发觉他们正在指定捆绑变量,因为Oracle 的程序可能只是简单地指示他们输入新的值,其实这一切都在程序中自动做了。因为你指定了变量名,在你再次执行之前无须重新捆绑变量。你可以改变绑定变量的值,而Oracle在每次执行时,仅仅使用内存地址来查找此值。如果Oracle 需要实现自动数据类型转换的话(除非它们是隐含的或缺省的),你还必须对每个值指定数据类型和长度。关于这些信息可以参考oracle的相关文档,如Oracle Call Interface Programmer's Guide
第6步: 并行执行语句(Parallelize the Statement )
ORACLE 可以在SELECTs, INSERTs, UPDATEs, MERGEs, DELETEs语句中执行相应并行查询操作,对于某些DDL操作,如创建索引、用子查询创建表、在分区表上的操作,也可以执行并行操作。并行化可以导致多个服务器进程(oracle server processes)为同一个SQL语句工作,使该SQL语句可以快速完成,但是会耗费更多的资源,所以除非很有必要,否则不要使用并行查询。
第7步: 执行语句(Run the Statement)
到了现在这个时候,Oracle拥有所有需要的信息与资源,因此可以真正运行SQL语句了。如果该语句为SELECT查询或INSERT语句,则不需要锁定任何行,因为没有数据需要被改变。然而,如果语句为UPDATE或DELETE语句,则该语句影响的所有行都被锁定,防止该用户提交或回滚之前,别的用户对这些数据进行修改。这保证了数据的一致性。对于某些语句,你可以指定执行的次数,这称为批处理(array processing)。指定执行N次,则绑定变量与定义变量被定义为大小为N的数组的开始位置,这种方法可以减少网络开销,也是优化的技巧之一。
第8步: 取出查询的行(Fetch Rows of a Query)
在fetch阶段,行数据被取出来,每个后续的存取操作检索结果集中的下一行数据,直到最后一行被取出来。上面提到过,批量的fetch是优化的技巧之一。
第9步: 关闭游标(Close the Cursor)
SQL语句处理的最后一个阶段就是关闭游标
DDL语句的处理(DDL Statement Processing)
DDL语句的执行不同与DML语句和查询语句的执行,这是因为DDL语句执行成功后需要对数据字典数据进行修改。对于DDL语句,语句的分析阶段实际上包括分析、查找数据字典信息和执行。事务管理语句、会话管理语句、系统管理语句只有分析与执行阶段,为了重新执行该语句,会重新分析与执行该语句。
事务控制(Control of Transactions)
一般来说,只有使用ORACLE编程接口的应用设计人员才关心操作的类型,并把相关的操作组织在一起,形成一个事务。一般来说,我门必须定义事务,这样在一个逻辑单元中的所有工作可以同时被提交或回滚,保证了数据的一致性。一个事务应该由逻辑单元中的所有必须部分组成,不应该多一个,也不应该少一个。
· 在事务开始和结束的这段时间内,所有被引用表中的数据都应该在一致的状态(或可以被回溯到一致的状态)
· 事务应该只包含可以对数据进行一致更改(one consistent change to the data)的SQL语句
例如,在两个帐号之间的转帐(这是一个事务或逻辑工作单元),应该包含从一个帐号中借钱(由一个SQL完成),然后将借的钱存入另一个帐号(由另一个SQL完成)。这2个操作作为一个逻辑单元,应该同时成功或同时失败。其它不相关的操作,如向一个帐户中存钱,不应该包含在这个转帐事务中。
在设计应用时,除了需要决定哪种类型的操作组成一个事务外,还需要决定使用BEGIN_DISCRETE_TRANSACTIO存储过程是否对提高小的、非分布式的事务的性能有作用。
[源自]http://blog.chinaunix.net/u2/61723/showart_482625.html
請教iframe和父窗口的問題。
一個頁面A.asp上含有iframe src="b.asp",在B.asp的頁面上有一個會員登入表單,要傳送到C.asp的頁面進行驗證和轉向到會員簡歷頁面。
這種佈局如果沒有特殊設置,會看到所有的動作都在A頁面上的那個IFRAME窗口,而A頁面不會動。
我想請教:
1、是否可以做到,在A頁面上按下B框架的表單提交後,連同A頁面整個轉向到會員驗證頁,而不是A不動,B頁自己轉向。
2、假如會員已登入,那麼在A頁面的iframe中顯示的是會員基本信息(佈局同上),並有退出按鈕,在另外一頁D.asp完成清空session功能。
當按下「退出」後,是否可以在B轉到D.asp頁面清空session值後,返回時能夠重整A頁面,使A顯現IFRAME內的是登入界面?
3、如果頁面上含有iframe,用光標在這個FRAME上拉來拉去,會看到這個框架頁會動,是否有辦法禁止?是不是和平時的禁止左右鍵方法一樣,在FRAME的SRC頁上設置?
謝謝!
 答1: 答1:
<form target="_top">
答2:
D.asp
[code]
<%
' 清空Session 的操作
%>
<script>top.location.reload();</script>
[/code]
答3:
把 iframe 的內容尺寸設置的比 iframe 外尺寸小即可。就是說,定義 iframe 的 src 頁內容讓它的尺寸小於 A 頁上 iframe 元素的的尺寸。 |
| 非常感謝版主! |
再請教一個問題:是否可以在b.asp頁上不做css設置,使它能和父頁面a.asp共用一個style.css文件?
謝謝! |
哦,不知道二者能不能共用一個CSS文件,而不用要分別做CSS鏈接,
再頂一下,盼高手指點,謝謝! |
| 答:不能 |
哦,真是可惜了,謝謝!
<input type=file id=meizz style="display: none" onPropertyChange="document.all.ff.value=this.value">
<input name=ff readonly><input type=button value='Browse...' onclick="document.all.meizz.click()">
MySQL的最大连接数默认是100
客户端登录:mysql -uusername -ppassword
设置新的最大连接数为200:mysql> set GLOBAL max_connections=200
显示当前运行的Query:mysql> show processlist
显示当前状态:mysql> show status
退出客户端:mysql> exit
查看当前最大连接数:mysqladmin -uusername -ppassword variables |find "max_con"
http://java.e800.com.cn/articles/2007/417/1176746498587392322_1.html
http://www.oracle.com/technology/tech/java/spring/how-to-jta-spring.html
When your not sure consult the 'Bible', 'Java™ Language Specification'
http://java.sun.com/docs/books/jls/t...ses.html#78119
8.3.1.3 transient Fields
Variables may be marked transient to indicate that they are not part of
the persistent state of an object.
If an instance of the class Point:
class Point {
int x, y;
transient float rho, theta;
}
were saved to persistent storage by a system service, then only the
fields x and y would be saved. This specification does not specify
details of such services; see the specification of java.io.Serializable
for an example of such a service.
8.3.1.4 volatile Fields
As described in §17, the Java programming language allows threads to
access shared variables. As a rule, to ensure that shared variables are
consistently and reliably updated, a thread should ensure that it has
exclusive use of such variables by obtaining a lock that,
conventionally, enforces mutual exclusion for those shared variables.
The Java programming language provides a second mechanism, volatile
fields, that is more convenient than locking for some purposes.
A field may be declared volatile, in which case the Java memory model
(§17) ensures that all threads see a consistent value for the variable.
If, in the following example, one thread repeatedly calls the method one
(but no more than Integer.MAX_VALUE times in all), and another thread
repeatedly calls the method two:
class Test {
static int i = 0, j = 0;
static void one() { i++; j++; }
static void two() {
System.out.println("i=" + i + " j=" + j);
}
}
then method two could occasionally print a value for j that is greater
than the value of i, because the example includes no synchronization
and, under the rules explained in §17, the shared values of i and j
might be updated out of order.
One way to prevent this out-or-order behavior would be to declare
methods one and two to be synchronized (§8.4.3.6):
class Test {
static int i = 0, j = 0;
static synchronized void one() { i++; j++; }
static synchronized void two() {
System.out.println("i=" + i + " j=" + j);
}
}
This prevents method one and method two from being executed
concurrently, and furthermore guarantees that the shared values of i and
j are both updated before method one returns. Therefore method two never
observes a value for j greater than that for i; indeed, it always
observes the same value for i and j.
Another approach would be to declare i and j to be volatile:
class Test {
static volatile int i = 0, j = 0;
static void one() { i++; j++; }
static void two() {
System.out.println("i=" + i + " j=" + j);
}
}
This allows method one and method two to be executed concurrently, but
guarantees that accesses to the shared values for i and j occur exactly
as many times, and in exactly the same order, as they appear to occur
during execution of the program text by each thread. Therefore, the
shared value for j is never greater than that for i, because each update
to i must be reflected in the shared value for i before the update to j
occurs. It is possible, however, that any given invocation of method two
might observe a value for j that is much greater than the value observed
for i, because method one might be executed many times between the
moment when method two fetches the value of i and the moment when method
two fetches the value of j.
See §17 for more discussion and examples.
A compile-time error occurs if a final variable is also declared volatile.
--
Eclipse plug in address
http://propedit.sourceforge.jp/eclipse/
http://www.geniisoft.com/showcase.nsf/WebEditors
1.简述逻辑操作(&,|,^)与条件操作(&&,||)的区别。(15分)
区别主要答两点:
a.条件操作只能操作布尔型的,而逻辑操作不仅可以操作布尔型,而且可以操作数值型
b.逻辑操作不会产生短路.如:
int a = 0;
int b = 0;
if( (a = 3) > 0 || (b = 3) > 0 ) //操后a =3,b=0.
if( (a = 3) > 0 | (b = 3) > 0 ) //操后a =3,b=3.
答对第一点得5分,答对第二点得10分.
本题考察最最基本的知识,但仍然有很多大牛级开发人员下马,任何语言在开始的部分
都会详细介绍这些基本知识,但除了学习第一种语言时,没有人在学习新的语言时愿意
花五分钟来复习一下.
2.下面程序运行会发生什么结果?如果有错误,如何改正? (15分)
interface A{
int x = 0;
}
class B{
int x =1;
}
class C
extends B implements A {
public void pX(){
System.out.println(x);
}
public static void main(String[] args) {
new C().pX();
}
}
}
本题在编译时会发生错误(错误描述不同的JVM有不同的信息,意思就是未明确的x调用,
两个x都匹配,就象在同时import java.util和java.sql两个包时直接声明Date一样)
本题主要考察对接口和类的最最基本的结构的了解.对于父类的变量,可以用super.x来
明确,而接口的属性默认隐含为 public static final.所以可以通过A.x来明确.
3.简述 Java Server Page 和 Servlet 的联系和区别。(20分)
本题不用多说,在答相同点时应该明确知道jsp编译后是"类servlet"而"不是Servlet",
答区别时应该回答出"侧重于(视图/控制逻辑)".其它可根据情况加减分值.知识很简单,
但从面试的角度看,被试者不仅要能知道它们的区别,而且要能比较准确地表达出来(以
后写文档要能让别人看得懂,不产生歧义),回答"jsp编译后就是servlet"视为错误,回答
"jsp用于视图,servlet用于控制逻辑"视为错误,应该用侧重于,主要(多数)用于等词语
表达.
4.XML文档定义有几种形式?它们之间有何本质区别?
解析XML文档有哪几种方式?(20分)
本题三个答题点:
a: 两种形式 dtd,schema
b: 本质区别:schema本身是xml的,可以被XML解析器解析(这也是从DTD上发展schema的
根本目的)
c: 两种主要方式:dom,sax.答出两种得全分,如能答出saxt,或其它(在答出dom,sax的基
础上,如果应试者认为其它方式也可以视为对xml的解析应该允许.但没有答出dom,sax把
其它方式说成是对XML的解析不得分)应该加分.
5.简述synchronized和java.util.concurrent.locks.Lock的异同 ?(15分)
主要相同点:
Lock能完成synchronized所实现的所有功能.(其它不重要)
主要不同点:
Lock有比synchronized更精确的线程语义和更好的性能(在相同点中回答此点也行)
synchronized会自动释放锁.而Lock一定要求程序员手工释放.并且必须在finally从句
中释放,如果没有答出在finally中释放不得分.就如Connection没有在finally中关闭一
样.连最基本的资源释放都做不好,还谈什么多线程编程.
6.EJB规范规定EJB中禁止的操作有哪些?(15分)
共有8点,答出下列3-4点得满分.
1.不能操作线程和线程API(线程API指非线程对象的方法如notify,wait等)
2.不能操作awt
3.不能实现服务器功能
4.不能对静态属生存取.
5.不能使用IO操作直接存取文件系统
6.不能加载本地库.
7.不能将this作为变量和返回.
8.不能循环调用.
7.请问在Java的线程里有个join()函数,这个函数有什么用呀?
是把调用join()的线程连结(join)到当前线程,什么意思呢?就是当前线程等待调用join()线程的结束.比如:当前线程是主线程,它结的时候要求一个被调用的线程a结束,如果我们不调用a.join();那只能轮询a的状态.
while(true){
if(!a.isAlive()) break;
sleep(500);
}
System.exet(1);
如果a线程isAlive,则等500ms继续下一次轮巡,如果已经不可用则结束,这种while(true)的轮询一是占用大量的CPU时间.另一是有可能在sleep(500);时,刚睡1ms时,a就已经!isAlive()了,那就多睡了499ms,浪费了时间,而如果
a.join();
System.exit(1);
则一等a线程结束就会退出.如果没有其它操作,主线程就不会占用CPU时间.
8当一个对象被当作参数传递到一个方法后,此方法可改变这个对象的属性,并可返回变化后的结果,那么这里到底是值传递还是引用传递?
是值传递。Java 编程语言只由值传递参数。当一个对象实例作为一个参数被传递到方法中时,参数的值就是对该对象的引用。对象的内容可以在被调用的方法中改变,但对象的引用是永远不会改变的。
9作用域public,private,protected,以及不写时的区别
答:区别如下:
作用域 当前类 同一package 子孙类 其他package
public √ √ √ √
protected √ √ √ ×
friendly √ √ × ×
private √ × × ×
不写时默认为friendly
10ArrayList和Vector的区别,HashMap和Hashtable的区别
答:就ArrayList与Vector主要从二方面来说.
一.同步性:Vector是线程安全的,也就是说是同步的,而ArrayList是线程序不安全的,不是同步的
二.数据增长:当需要增长时,Vector默认增长为原来一培,而ArrayList却是原来的一半
11一.静态内部类可以有静态成员,而非静态内部类则不能有静态成员。
12静态内部类的非静态成员可以访问外部类的静态变量,而不可访问外部类的非静态变量
13jsp有哪些动作?作用分别是什么?
答:JSP共有以下6种基本动作
jsp:include:在页面被请求的时候引入一个文件。
jsp:useBean:寻找或者实例化一个JavaBean。
jsp:setProperty:设置JavaBean的属性。
jsp:getProperty:输出某个JavaBean的属性。
jsp:forward:把请求转到一个新的页面。
jsp:plugin:根据浏览器类型为Java插件生成OBJECT或EMBED标记
14remote接口和home接口主要作用
remote接口定义了业务方法,用于EJB客户端调用业务方法
home接口是EJB工厂用于创建和移除查找EJB实例
15客服端调用EJB对象的几个基本步骤
一、 设置JNDI服务工厂以及JNDI服务地址系统属性
二、 查找Home接口
三、 从Home接口调用Create方法创建Remote接口
四、 通过Remote接口调用其业务方法
<html>
<head>
<meta http-equiv="Content-Type" content="text/html; charset=gb2312" />
<title>Binny.cn</title>
<script>
var obj=0;
var x=0;
var y=0;
var ie = (navigator.appVersion.indexOf("MSIE")!=-1);//IE
var ff = (navigator.userAgent.indexOf("Firefox")!=-1);//Firefox
function find(evt,objDiv){
obj = objDiv
if (ff){
x = document.documentElement.scrollLeft + evt.layerX;
y = document.documentElement.scrollTop + evt.layerY;
if (document.documentElement.scrollTop > 0){
y = evt.layerY - document.documentElement.scrollTop;
}
if (document.documentElement.scrollLeft > 0){
x = evt.layerX - document.documentElement.scrollLeft;
}
}
if (ie){
x = document.documentElement.scrollLeft + evt.offsetX;
y = document.documentElement.scrollTop + evt.offsetY;
if (document.documentElement.scrollTop > 0){
y = evt.offsetY - document.documentElement.scrollTop;
}
if (document.documentElement.scrollLeft > 0){
x = evt.offsetX - document.documentElement.scrollLeft;
}
}
}
function dragit(evt){
if(obj == 0){
return false
}
else{
obj.style.left = evt.clientX - x + "px";
obj.style.top = evt.clientY - y + "px";
}
}
</script>
</head>
<body style="margin:0" onmousemove="dragit(event)" onmouseup="obj = 0">
<div id="aaa" style="background-color:red;width:200pt;height:200pt;position:absolute">
<div id="aa" style="width:200pt;height:20pt;background:blue;position:absolute" onmousedown="find(event,document.getElementById('aaa'))"></div>
</div><BR><BR><BR><BR><BR><BR><BR><BR><BR><BR><BR><BR><BR><BR><BR><BR><BR><BR><BR><BR><BR><BR><BR><BR><BR><BR><BR><BR><BR><BR><BR><BR><BR>
</body>
</html>
摘自:http://www.binny.cn/article.asp?id=232
/*this can see the table information*/
show table status from `fortioa`;
/*this can see all the fields detail information of a table including the character set*/
show full fields from `account`
/*change the table column`s character set to utf8*/
ALTER TABLE `purchaserequest` CHANGE `justification` `justification` text CHARACTER SET utf8 COLLATE utf8_bin NOT NULL
--执行这个语句,就可以把当前库的所有表的所有者改为dbo
exec sp_msforeachtable 'sp_changeobjectowner ''?'', ''dbo'''
一般来说,程序代码中的字符串常量经过编译之后,都具有唯一性,即,内存中不会存在两份相同的字符串常量。
(通常情况下,C++,C语言程序编译之后,也具有同样的特性。)
比如,我们有如下代码。
String A = “atom”;
String B = “atom”;
我们有理由认为,A和B指向同一个字符串常量。即,A==B。
注意,声明字符串变量的代码,不符合上面的规则。
String C= new String(“atom”);
String D = new String(“atom”);
这里的C和D的声明是字符串变量的声明,所以,C != D。
简单来说,Java的序列化机制是通过在运行时判断类的serialVersionUID来验证版本一致性的。在进行反序列化时,JVM会把传来的字节流中的serialVersionUID与本地相应实体(类)的serialVersionUID进行比较,如果相同就认为是一致的,可以进行反序列化,否则就会出现序列化版本不一致的异常。
当实现java.io.Serializable接口的实体(类)没有显式地定义一个名为serialVersionUID,类型为long的变量时,Java序列化机制会根据编译的class自动生成一个serialVersionUID作序列化版本比较用,这种情况下,只有同一次编译生成的class才会生成相同的serialVersionUID 。
如果我们不希望通过编译来强制划分软件版本,即实现序列化接口的实体能够兼容先前版本,未作更改的类,就需要显式地定义一个名为serialVersionUID,类型为long的变量,不修改这个变量值的序列化实体都可以相互进行串行化和反串行化。
源自:http://sharajava.javaeye.com/blog/102886
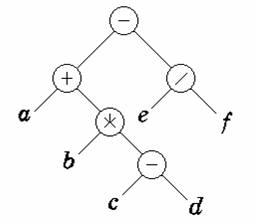
前序遍历二叉树算法的框架是
若二叉树为空,则空操作;
否则
访问根结点 (V);
前序遍历左子树 (L);
前序遍历右子树 (R)。
遍历结果
- + a * b - c d / e f
中序遍历二叉树算法的框架是:
若二叉树为空,则空操作;
否则
中序遍历左子树 (L);
访问根结点 (V);
中序遍历右子树 (R)。
遍历结果
a + b * c - d - e / f
后序遍历二叉树算法的框架是
若二叉树为空,则空操作;
否则
后序遍历左子树 (L);
后序遍历右子树 (R);
访问根结点 (V)。
遍历结果
a b c d - * + e f / -
参考文档:http://51zk.csai.cn/sjjg/200608291542281644.htm
http://faculty.math.tsinghua.edu.cn/faculty/~jli/teaching/2006/Fall/ds/347,32,后序遍历 (Postorder Traversal)
是否是Opera:
is_opera = /opera/i.test(navigator.userAgent)
是否是IE:
is_ie = (/msie/i.test(navigator.userAgent) && !is_opera)
是否是ie7:
(is_ie && /msie 7\.0/i.test(navigator.userAgent));
@SuppressWarnings与前两个注释有所不同,你需要添加一个参数才能正确使用,这些参数值都是已经定义好了的,我们选择性的使用就好了,参数如下:
|
参数
|
语义
|
|
deprecation
|
使用了过时的类或方法时的警告
|
|
unchecked
|
执行了未检查的转换时的警告,例如当使用集合时没有用泛型 (Generics) 来指定集合保存的类型
|
|
fallthrough
|
当 Switch 程序块直接通往下一种情况而没有 Break 时的警告
|
|
path
|
在类路径、源文件路径等中有不存在的路径时的警告
|
|
serial
|
当在可序列化的类上缺少 serialVersionUID 定义时的警告
|
|
finally
|
任何 finally 子句不能正常完成时的警告
|
|
all
|
关于以上所有情况的警告
|
Override
Override表示,它所注释的方法应该重写超类中具有相同签名的方法:
@Override


  public int hashCode() {


  ...


  }
看上面的例子,如果没有在hashCode中将“C”大写,在编译时不会出现错误,但是在运行时将无法像期望的那样调用该方法。通过添加Override标签,编译器会提示它是否真正地执行了重写。
在超类发生改变的情况中,这也很有帮助。如果向该方法中添加一个新参数,而且方法本身也被重命名了,那么子类将突然不能编译,因为它不再重写超类的任何东西。
枚举
enum非常像public static final int声明,后者作为枚举值已经使用了很多年。对int所做的最大也是最明显的改进是类型安全――您不能错误地用枚举的一种类型代替另一种类型,这一点和int不同,所有的int对编译器来说都是一样的。除去极少数例外的情况,通常都应该用enum实例替换全部的枚举风格的int结构。
枚举提供了一些附加的特性。EnumMap和EnumSet这两个实用类是专门为枚举优化的标准集合实现。如果知道集合只包含枚举类型,那么应该使用这些专门的集合来代替HashMap或HashSet。
大部分情况下,可以使用enum对代码中的所有public static final int做插入替换。它们是可比的,并且可以静态导入,所以对它们的引用看起来是等同的,即使是对于内部类(或内部枚举类型)。注意,比较枚举类型的时候,声明它们的指令表明了它们的顺序值。
“隐藏的”静态方法
两个静态方法出现在所有枚举类型声明中。因为它们是枚举子类上的静态方法,而不是Enum本身的方法,所以它们在java.lang.Enum的javadoc中没有出现。
第一个是values(),返回一个枚举类型所有可能值的数组。
第二个是valueOf(),为提供的字符串返回一个枚举类型,该枚举类型必须精确地匹配源代码声明。
方法
关于枚举类型,我们最喜欢的一个方面是它可以有方法。过去您可能需要编写一些代码,对public static final int进行转换,把它从数据库类型转换为JDBC URL。而现在则可以让枚举类型本身带一个整理代码的方法。下面就是一个例子,包括DatabaseType枚举类型的抽象方法以及每个枚举实例中提供的实现:
  public enum  DatabaseType {


  ORACLE {


  public String getJdbcUrl() {...}


  },


  MYSQL {


  public String getJdbcUrl() {...}


  };


  public abstract String getJdbcUrl();


  }
现在枚举类型可以直接提供它的实用方法。例如:
DatabaseType dbType = ...;
String jdbcURL = dbType.getJdbcUrl();
要获取URL,必须预先知道该实用方法在哪里。
可变参数(Vararg)
Log.log(String code, String... args)
协变返回
协变返回的基本用法是用于在已知一个实现的返回类型比API更具体的时候避免进行类型强制转换。在下面这个例子中,有一个返回Animal对象的Zoo接口。我们的实现返回一个AnimalImpl对象,但是在JDK 1.5之前,要返回一个Animal对象就必须声明。:
    public interface Zoo  {


  public Animal getAnimal();


  }


  public class ZooImpl  implements Zoo {


  public Animal getAnimal(){


  return new AnimalImpl();


  }


  }

  协变返回的使用替换了三个反模式:
- 直接字段访问。为了规避API限制,一些实现把子类直接暴露为字段:
ZooImpl._animal
另一种形式是,在知道实现的实际上是特定的子类的情况下,在调用程序中执行向下转换:
((AnimalImpl)ZooImpl.getAnimal()).implMethod();
- 我看到的最后一种形式是一个具体的方法,该方法用来避免由一个完全不同的签名所引发的问题:
ZooImpl._getAnimal();
这三种模式都有它们的问题和局限性。要么是不够整洁,要么就是暴露了不必要的实现细节。
协变
协变返回模式就比较整洁、安全并且易于维护,它也不需要类型强制转换或特定的方法或字段:
public AnimalImpl getAnimal(){
return new AnimalImpl();
}
使用结果:
ZooImpl.getAnimal().implMethod();
参考:http://www.linuxpk.com/43834.html
启动mysql
nohup ./mysqld --basedir=/home/cvsadmin/mysql --datadir=/home/cvsadmin/mysql/data --port=3308 --socket=/tmp/mysqld3308.bak &
登录mysql
./mysql -uroot -p --socket=/tmp/mysqld3308.bak
sh:
variable=value
export variable
csh:
setenv variable value
SHOW TABLES LIKE '%tb_bp_d_case%';
select `TABLE_NAME` from `INFORMATION_SCHEMA`.`TABLES` where `TABLE_NAME`='res_mos_cpu_statistics'
http://developer.mozilla.org/en/docs/Core_JavaScript_1.5_Reference:Global_Objects:RegExp
http://www.ibm.com/developerworks/cn/linux/l-bugzilla.html
http://www.infoq.com/cn/articles/Simplifying-Enterprise-Apps
http://www.be10.com/vbb3.0.1/showthread.php?t=1067
在linux下需要新建一个sh脚本,基本写法和在windows下一样,唯一区别是在windows下各个jar包之间的分隔符是";",而在linux下各个jar包之间的分隔符是":"。 java -classpath /root/cmdDemo/lib/log4j-1.2.14.jar:/root/cmdDemo/lib/cmdDemo.jar ...
获得本地时区
var tzo=(new Date().getTimezoneOffset()/60)*(-1);
把其他时区的时间转化成本地:
function toLocalTime(t){
document.write(formatDate(new Date(t),'yyyy/MM/dd HH:mm:ss a'));
}
其实,new Date(原来时间),即可。
语法结构类似
DELIMITER $$;
DROP TRIGGER `log`$$
CREATE TRIGGER `log` BEFORE/AFTER INSERT/UPDATE/DELETE on `user`
FOR EACH ROW BEGIN
END$$
DELIMITER ;$$
具体例子:
删除:
DELIMITER $$;
DROP TRIGGER `log`$$
CREATE TRIGGER `log` AFTER DELETE on `user`
FOR EACH ROW BEGIN
insert into userLog (useroid,userAccount,pwd,userType,companyInfoOid,personalInfoOid,
status,regDate,email) values (old.oid,old.userAccount,old.pwd,old.userType,old.companyInfoOid,old.personalInfoOid,old.status,old.regDate,old.email);
END$$
DELIMITER ;$$
如果是修改/的话,old应该是new
http://www.stanford.edu/~bsuter/subversion-setup-guide/SVNService.zip
Step-by-Step instructions for running a Subversion repository under Windows
http://www.stanford.edu/~bsuter/subversion-setup-guide/
Unix/Linux下一般想让某个程序在后台运行,很多都是使用 & 在程序结尾来让程序自动运行。比如我们要运行mysql在后台:
/usr/local/mysql/bin/mysqld_safe --user=mysql &
但是我们很多程序并不象mysqld一样可以做成守护进程,可能我们的程序只是普通程序而已,一般这种程序即使使用 & 结尾,如果终端关闭,那么程序也会被关闭。为了能够后台运行,我们需要使用nohup这个命令,比如我们有个start.sh需要在后台运行,并且希望在后台能够一直运行,那么就使用nohup:
nohup /root/start.sh &
在shell中回车后提示:
[~]$ appending output to nohup.out
原程序的的标准输出被自动改向到当前目录下的nohup.out文件,起到了log的作用。
但是有时候在这一步会有问题,当把终端关闭后,进程会自动被关闭,察看nohup.out可以看到在关闭终端瞬间服务自动关闭。
咨询红旗Linux工程师后,他也不得其解,在我的终端上执行后,他启动的进程竟然在关闭终端后依然运行。
在第二遍给我演示时,我才发现我和他操作终端时的一个细节不同:他是在当shell中提示了nohup成功后还需要按终端上键盘任意键退回到shell输入命令窗口,然后通过在shell中输入exit来退出终端;而我是每次在nohup执行成功后直接点关闭程序按钮关闭终端.。所以这时候会断掉该命令所对应的session,导致nohup对应的进程被通知需要一起shutdown。
这个细节有人和我一样没注意到,所以在这儿记录一下了。
附:nohup命令参考
nohup 命令
用途:不挂断地运行命令。
语法:nohup Command [ Arg ... ] [ & ]
描述:nohup 命令运行由 Command 参数和任何相关的 Arg 参数指定的命令,忽略所有挂断(SIGHUP)信号。在注销后使用 nohup 命令运行后台中的程序。要运行后台中的 nohup 命令,添加 & ( 表示"and"的符号)到命令的尾部。
无论是否将 nohup 命令的输出重定向到终端,输出都将附加到当前目录的 nohup.out 文件中。如果当前目录的 nohup.out 文件不可写,输出重定向到 $HOME/nohup.out 文件中。如果没有文件能创建或打开以用于追加,那么 Command 参数指定的命令不可调用。如果标准错误是一个终端,那么把指定的命令写给标准错误的所有输出作为标准输出重定向到相同的文件描述符。
退出状态:该命令返回下列出口值:
126 可以查找但不能调用 Command 参数指定的命令。
127 nohup 命令发生错误或不能查找由 Command 参数指定的命令。
否则,nohup 命令的退出状态是 Command 参数指定命令的退出状态。
nohup命令及其输出文件
nohup命令:如果你正在运行一个进程,而且你觉得在退出帐户时该进程还不会结束,那么可以使用nohup命令。该命令可以在你退出帐户/关闭终端之后继续运行相应的进程。nohup就是不挂起的意思( n ohang up)。
该命令的一般形式为:nohup command &
使用nohup命令提交作业
如果使用nohup命令提交作业,那么在缺省情况下该作业的所有输出都被重定向到一个名为nohup.out的文件中,除非另外指定了输出文件:
nohup command > myout.file 2>&1 &
在上面的例子中,输出被重定向到myout.file文件中。
使用 jobs 查看任务。
使用 fg %n 关闭。
另外有两个常用的ftp工具ncftpget和ncftpput,可以实现后台的ftp上传和下载,这样就可以利用这些命令在后台上传和下载文件了。
from:http://einit.com/user1/11/archives/2006/3603.html
导出要用到MySQL的mysqldump工具,基本用法是:
shell> mysqldump [OPTIONS] database [tables]
如果你不给定任何表,整个数据库将被导出。
通过执行mysqldump --help,你能得到你mysqldump的版本支持的选项表。
注意,如果你运行mysqldump没有--quick或--opt选项,mysqldump将在导出结果前装载整个结果集到内存中,如果你正在导出一个大的数据库,这将可能是一个问题。
mysqldump支持下列选项:
--add-locks
在每个表导出之前增加LOCK TABLES并且之后UNLOCK TABLE。(为了使得更快地插入到MySQL)。
--add-drop-table
在每个create语句之前增加一个drop table。
--allow-keywords
允许创建是关键词的列名字。这由表名前缀于每个列名做到。
-c, --complete-insert
使用完整的insert语句(用列名字)。
-C, --compress
如果客户和服务器均支持压缩,压缩两者间所有的信息。
--delayed
用INSERT DELAYED命令插入行。
-e, --extended-insert
使用全新多行INSERT语法。(给出更紧缩并且更快的插入语句)
-#, --debug[=option_string]
跟踪程序的使用(为了调试)。
--help
显示一条帮助消息并且退出。
--fields-terminated-by=...
--fields-enclosed-by=...
--fields-optionally-enclosed-by=...
--fields-escaped-by=...
--fields-terminated-by=...
这些选择与-T选择一起使用,并且有相应的LOAD DATA INFILE子句相同的含义。
LOAD DATA INFILE语法。
-F, --flush-logs
在开始导出前,洗掉在MySQL服务器中的日志文件。
-f, --force,
即使我们在一个表导出期间得到一个SQL错误,继续。
-h, --host=..
从命名的主机上的MySQL服务器导出数据。缺省主机是localhost。
-l, --lock-tables.
为开始导出锁定所有表。
-t, --no-create-info
不写入表创建信息(CREATE TABLE语句)
-d, --no-data
不写入表的任何行信息。如果你只想得到一个表的结构的导出,这是很有用的!
--opt
同--quick --add-drop-table --add-locks --extended-insert --lock-tables。
应该给你为读入一个MySQL服务器的尽可能最快的导出。
-pyour_pass, --password[=your_pass]
与服务器连接时使用的口令。如果你不指定“=your_pass”部分,mysqldump需要来自终端的口令。
-P port_num, --port=port_num
与一台主机连接时使用的TCP/IP端口号。(这用于连接到localhost以外的主机,因为它使用 Unix套接字。)
-q, --quick
不缓冲查询,直接导出至stdout;使用mysql_use_result()做它。
-S /path/to/socket, --socket=/path/to/socket
与localhost连接时(它是缺省主机)使用的套接字文件。
-T, --tab=path-to-some-directory
对于每个给定的表,创建一个table_name.sql文件,它包含SQL CREATE 命令,和一个table_name.txt文件,它包含数据。 注意:这只有在mysqldump运行在mysqld守护进程运行的同一台机器上的时候才工作。.txt文件的格式根据--fields-xxx和--lines--xxx选项来定。
-u user_name, --user=user_name
与服务器连接时,MySQL使用的用户名。缺省值是你的Unix登录名。
-O var=option, --set-variable var=option设置一个变量的值。可能的变量被列在下面。
-v, --verbose
冗长模式。打印出程序所做的更多的信息。
-V, --version
打印版本信息并且退出。
-w, --where='where-condition'
只导出被选择了的记录;注意引号是强制的!
"--where=user='jimf'" "-wuserid>1" "-wuserid<1"
最常见的mysqldump使用可能制作整个数据库的一个备份:
mysqldump --opt database > backup-file.sql
但是它对用来自于一个数据库的信息充实另外一个MySQL数据库也是有用的:
mysqldump --opt database | mysql --host=remote-host -C database
由于mysqldump导出的是完整的SQL语句,所以用mysql客户程序很容易就能把数据导入了:
shell> mysqladmin create target_db_name
shell> mysql target_db_name < backup-file.sql
就是
shell> mysql 库名 < 文件名
摘自:
(http://www.fanqiang.com)
如何正确利用Rownum来限制查询所返回的行数?
软件环境:
1、Windows NT4.0+ORACLE 8.0.4
2、ORACLE安装路径为:C:\ORANT
含义解释:
1、rownum是oracle系统顺序分配为从查询返回的行的编号,返回的第一行分配的是1,第二行是2,
依此类推,这个伪字段可以用于限制查询返回的总行数。
2、rownum不能以任何基表的名称作为前缀。
使用方法:
现有一个商品销售表sale,表结构为:
month char(6) --月份
sell number(10,2) --月销售金额
create table sale (month char(6),sell number);
insert into sale values('200001',1000);
insert into sale values('200002',1100);
insert into sale values('200003',1200);
insert into sale values('200004',1300);
insert into sale values('200005',1400);
insert into sale values('200006',1500);
insert into sale values('200007',1600);
insert into sale values('200101',1100);
insert into sale values('200202',1200);
insert into sale values('200301',1300);
insert into sale values('200008',1000);
commit;
SQL>; select rownum,month,sell from sale where rownum=1;(可以用在限制返回记录条数的地方,保证不出错,如:隐式游标)
ROWNUM MONTH SELL
--------- ------ ---------
1 200001 1000
SQL>; select rownum,month,sell from sale where rownum=2;(1以上都查不到记录)
没有查到记录
SQL>; select rownum,month,sell from sale where rownum>;5;
(由于rownum是一个总是从1开始的伪列,Oracle 认为这种条件不成立,查不到记录)
没有查到记录
只返回前3条纪录
SQL>; select rownum,month,sell from sale where rownum<4;
ROWNUM MONTH SELL
--------- ------ ---------
1 200001 1000
2 200002 1100
3 200003 1200
如何用rownum实现大于、小于逻辑?(返回rownum在4—10之间的数据)(minus操作,速度会受影响)
SQL>; select rownum,month,sell from sale where rownum<10
2 minus
3 select rownum,month,sell from sale where rownum<5;
ROWNUM MONTH SELL
--------- ------ ---------
5 200005 1400
6 200006 1500
7 200007 1600
8 200101 1100
9 200202 1200
想按日期排序,并且用rownum标出正确序号(有小到大)
SQL>; select rownum,month,sell from sale order by month;
ROWNUM MONTH SELL
--------- ------ ---------
1 200001 1000
2 200002 1100
3 200003 1200
4 200004 1300
5 200005 1400
6 200006 1500
7 200007 1600
11 200008 1000
8 200101 1100
9 200202 1200
10 200301 1300
查询到11记录.
可以发现,rownum并没有实现我们的意图,系统是按照记录入库时的顺序给记录排的号,rowid也是顺序分配的
SQL>; select rowid,rownum,month,sell from sale order by rowid;
ROWID ROWNUM MONTH SELL
------------------ --------- ------ ---------
000000E4.0000.0002 1 200001 1000
000000E4.0001.0002 2 200002 1100
000000E4.0002.0002 3 200003 1200
000000E4.0003.0002 4 200004 1300
000000E4.0004.0002 5 200005 1400
000000E4.0005.0002 6 200006 1500
000000E4.0006.0002 7 200007 1600
000000E4.0007.0002 8 200101 1100
000000E4.0008.0002 9 200202 1200
000000E4.0009.0002 10 200301 1300
000000E4.000A.0002 11 200008 1000
查询到11记录.
正确用法,使用子查询
SQL>; select rownum,month,sell from (select month,sell from sale group by month,sell) where rownum<13;
ROWNUM MONTH SELL
--------- ------ ---------
1 200001 1000
2 200002 1100
3 200003 1200
4 200004 1300
5 200005 1400
6 200006 1500
7 200007 1600
8 200008 1000
9 200101 1100
10 200202 1200
11 200301 1300
按销售金额排序,并且用rownum标出正确序号(有小到大)
SQL>; select rownum,month,sell from (select sell,month from sale group by sell,month) where rownum<13;
ROWNUM MONTH SELL
--------- ------ ---------
1 200001 1000
2 200008 1000
3 200002 1100
4 200101 1100
5 200003 1200
6 200202 1200
7 200004 1300
8 200301 1300
9 200005 1400
10 200006 1500
11 200007 1600
查询到11记录.
利用以上方法,如在打印报表时,想在查出的数据中自动加上行号,就可以利用rownum。
返回第5—9条纪录,按月份排序
SQL>; select * from (select rownum row_id ,month,sell
2 from (select month,sell from sale group by month,sell))
3 where row_id between 5 and 9;
ROW_ID MONTH SELL
---------- ------ ----------
5 200005 1400
6 200006 1500
7 200007 1600
8 200008 1000
9 200101 1100
原文链接:http://bbs.chinaunix.net/viewthread.php?tid=261521
转载请注明作者名及原文出处
var k=window.open("about:blank", targetName, "resizable=yes,scrollbars=yes,menubar=0,location=0,personalbar=0,left=0,top=0");
if(k){
k.focus();
form.submit();
}
if(k == null){
alert("Sorry,your browser blocked the pop window,please press the 'Ctrl' button or remove the block pop window function!");
}
下面这段代码将把image调整的height和width都适合制定大小。
<img src="xxxx" border="0" onload="resizeimage(this,170,50);"/>
<script language='javascript'>
function resizeimage(img,maxHeight,maxWidth)
{
var w=img.width,h=img.height;
if (h>maxHeight)
{
img.height=maxHeight;
img.width=(maxHeight/h)*w;
w=img.width;
h=img.height;
}
if (w>maxWidth)
{
img.width=maxWidth;
img.height=(maxWidth/w)*h;
}
}
</script>
十进制转成十六进制:
Integer.toHexString(int i)
十进制转成八进制
Integer.toOctalString(int i)oBin
十进制转成二进制
Integer.taryString(int i)
十六进制转成十进制
Integer.valueOf("FFFF",16).toString()
八进制转成十进制
Integer.valueOf("876",8).toString()
二进制转十进制
Integer.valueOf("0101",2).toString()
ron命令:循环执行某一命令。at命令只能执行一次,虽然都是计划任务的命令,这是这两个命令的区别
。
用户cron:用户自己加的
组 cron:系统默认就有的
#ls /etc/crontab //显示crontab命令路径
#cat /etc/crontab //查看系统crontab
* * * * * 用户名 可执行命令
下面是每个位置的表示意义和取值范围
名称 * * * * * 用户名 可执行命令
表示 分钟 小时 日期 月份 星期
取值范围 0-59 0-23 1-31 1-12 0-6
* * * * * //代表每分钟
1 * * * * //代表每小时第1分钟
02 12 * * * //代表每天12点第2分钟(每天12:02)
0-59/2 * * * * //代表每2分钟执行一次任务
#which 命令名称:查看命令所在目录路径。
#which date //查看date命令所在目录路径
/bin/date
#crontab -e //编辑crontab命令,-e(edit)代表编辑
* * * * * /bin/date >>/root/66.txt //每分钟向/root/66.txt写入一次当前系统时间
#crontab -l //显示用户计划任务
#crontab -r //删除用户计划任务
注意:#crontab -r命令,在哪个用户下,删除的就是哪个用户的计划任务,还需要注意的是该命令是删除
所有用户的所有计划任务。还有普通用户不能删除root的计划任务的权限。
普通用户进行crontab命令计划任务操作
例:#su - text //切换到普通用户text
$crontab -e //在text普通用户中进行crontab命令计划任务编辑
* * * * * /bin/date >>/home/text/33.txt //每分钟向/home/text/33.txt写入一次当前系统时间
cat /home/text/33.txt //显示/home/text/33.txt文件内容
#crontab -u 用户名 -e //在root用户中给普通用户加计划任务编辑操作
#which crontab //查看crontab命令位置
说明:which命令是查看命令所在位置,which会在$PATH里找,在普通用户里不好用。
ll /usr/bin/crontab //查看crontab命令权限
cat /etc/crontab //显示/etc/crontab文件内容
小例子
#cd /home/aaa //进入普通用户aaa家(home)目录里
#vi 1.txt //建立1.txt文件
/sbin/init 6 //对1.txt文件进行操作,写入/sbin/init 6(重启操作),然后wq(保存退出)
#chmod 755 1.txt //把1.txt文件权限改成可执行文件
#run-parts aaa //执行该操作机器将重启(注意:执行该操作只能在/home/aaa目录外执行才有效)
#cd /var/spool/cron //建立的计划任务都存放在/var/spool/cron目录里
#ls //显示可以执行crontab命令的用户
#cat 用户名 //并可以用cat命令显示用户crontab命令的内容
#cat test //显示test用户计划任务内容
源自:http://tdhome.hlw.cn/show.php?clg_cuid=2&id=528
注意:定义完任务后可以通过以下方式启动任务
[root@node db_backup]# /etc/init.d/crond stop
Stopping crond: [ OK ]
[root@node db_backup]# /etc/init.d/crond start
Starting crond: [ OK ]
使用`date +%y%m%d`
Example: mkdir `date +%y%m%d`
tar cfvz /tmp/bak.`date +%y%m%d`.tar.gz /etc
ymdHM代表年月日时分,可以通过date --hlep查看哪些字母代表什么
注意:`这个符号是键盘上~,而不是'.
apache version:2.0.59
tomcat version:5.5.x
前言:
域名解析的作用:域名解析只能解析到ip地址,是不能够绑定到固定ip的,帮定ip的工作由web服务器来做。
一、
需注意的几点事项:
1.apache和tomcat的结合都是通过mod_jk来实现的。这个文件可以在apache的网站上下的到,本文用的mod_jk的地址为http://ossavant.org/apache/tomcat/tomcat-connectors/jk/binaries/linux/jk-1.2.24/i386/mod_jk-1.2.24-httpd-2.0.59.so这里需要注意的是:(1) mod_jk的版本号一定要和apache的版本号一致. (2) mod_jk有64位和32位之分,所以要根据机器的配置来决定选择哪个。
二、安装apache,注意一定要支持DSO,在安装时加个参数--enable-so就可以使apache支持dso。可以通过
[root@localhost bin]# httpd -l
Compiled in modules:
core.c
prefork.c
http_core.c
mod_so.c
(说明:看到mod_so.c这个模块,就说明能支持DSO
三、安装tomcat,正常安装即可
安装完tomcat和apache之后先分别测似一下,保证都正常能用了,再往下进行。
四、整和apache与tomcat(具体参考apache的官方网站)
1〉把刚才下的mod_jk考到apache2/modules文件夹下
2〉在tomcat的conf里创建一个文件workers.properties,并添加如下内容
workers.tomcat_home=/usr/local/apache-tomcat-5.5.23
workers.java_home=/usr
ps=\
worker.list=ajp13
worker.ajp13.port=8009
worker.ajp13.host=localhost
worker.ajp13.type=ajp13
worker.ajp13.lbfactor=1
3〉在apache2/conf的httpd.conf里加入如下一段话
LoadModule jk_module modules/mod_jk-1.2.24-httpd-2.0.59.so
JkWorkersFile "/usr/local/apache-tomcat-5.5.23/conf/workers.properties" //指向刚才那个文件
JkLogFile "/usr/local/apache-tomcat-5.5.23/logs/mod_jk2.log"
JkLogLevel info
五、配置虚拟主机
在httpd.conf下加入如下:
<VirtualHost *:80>
ServerName www.91yjs.com
ServerAlias 91yjs.com
DocumentRoot /usr/local/apache-tomcat-5.5.23/webapps/ROOT
DirectoryIndex index.html index.htm index.jsp
JkMount /servlet/* ajp13
JkMount /*.jsp ajp13
JkMount /*.do ajp13
</VirtualHost>
配置完后,进入apache的bin下执行 ./httpd -t
出现Syntax OK说明,你的配置没有错误,重新启动apache,应该可以了。
附录:
停止apache:./apachectl stop
启动apache:./apachectl graceful
参考:

在一个比较完整的应用系统里,经常需要有一些配置文件。简单的属性使用。properties文件即可,但要配置一些复杂对象,则应该考虑使用xml文件。一般用来读取xml文件的工具包有DOM、SAX和JDOM等,但用过的人都知道,它们属于比较底层的API,写起来代码量很大,而且如果修改了xml文件的格式,代码也要做大幅度的改动。Jakarta Commons项目里的Digester包,可以轻松实现xml文件到Java对象的转换,看下面这个例子。
在一个项目里,需要提供一些统计图,但图的内容暂时未能确定。所以我决定让图可以配置,所有定义保存在一个名为charts.xml(或国际化后的文件名如charts_zh_CN.xml,这里只考虑缺省语言)的文件内,下面是该文件的部分内容:
false
true
Bar
时间
数据
500
360
select count(c),
c.department.name
from edu.pku.pub.
aims.model.business.
Client c group
by c.department |
可以看出,我为每个图定义了id、title、legendVisible等等属性,这些属性的意义都很明显,它们将影响统计图的数据和在页面中的表现。在程序里,我需要把这个文件里的定义读到一个注册表类ChartRegistry里,该注册表维护一个java.util.List类型的registry变量,其中每个元素是一个ChartConfig类。现在Digester该显示它的价值了。
为了方便使用Digester,我们让ChartConfig也具有统计图的每个属性(id、title、legendVisible等等),名称与charts.xml里的元素的属性(子元素)一一对应,并且都具有getter和setter方法,也就是说,ChartConfig是一个bean类。在ChartRegistry类里定义一个deregister()方法,它的作用是用Digester读入并解析指定的xml文件,代码如下;还有一个register()方法用来把ChartConfig对象加到registry里。
public void deregister(URL url) throws IOException,SAXException{
  InputStream is = new FileInputStream(url.getFile());
  Digester digester = new Digester();
  digester.push(this);
  digester.setValidating(false);
  digester.addObjectCreate("charts/chart", ChartConfig.class);
  digester.addSetProperties("charts/chart");
  digester.addBeanPropertySetter("charts/chart/legendVisible");
  digester.addBeanPropertySetter("charts/chart/toolTipsVisible");
  digester.addBeanPropertySetter("charts/chart/title");
  digester.addBeanPropertySetter("charts/chart/type");
  digester.addBeanPropertySetter("charts/chart/labelx");
  digester.addBeanPropertySetter("charts/chart/labely");
  digester.addBeanPropertySetter("charts/chart/width");
  digester.addBeanPropertySetter("charts/chart/height");
  digester.addBeanPropertySetter("charts/chart/hql");
  digester.addBeanPropertySetter("charts/chart/description");
  digester.addSetNext("charts/chart","register");
  digester.parse(is);
  Collections.sort(registry);
}
|
基本上来说,Digester和SAX解析xml的过程很像,它的原理就是制定一些规则,在遍历每个节点时检查是否有匹配的规则,如果有就执行对应的操作。例如,上面的代码中,“digester.addObjectCreate("charts/chart", ChartConfig.class);”这一句的作用是告诉Digester:如果遇到匹配“charts/chart”形式的节点,就执行一个“对象创建”操作,创建什么对象呢,应该创建Class为“ChartConfig.class”的对象;类似的,addSetProperties()是告诉Digester将指定节点的属性全部映射到对象的属性,在这个例子里指的就是id属性;addBeanPropertySetter()是将子节点转换为对象的属性,这个方法还可以有第二个参数,当对象的属性名和子节点的名字不一样时用来指定对象的属性名;addSetNext()是说在遇到匹配节点后,对当前对象的父对象执行一个方法,参数是当前参数,对这个例子来说就是执行ChartConfig.register(ChartConfig)方法。因此这样构造得到的Digester会把charts.xml里的每个元素转换为一个ChartConfig对象,并register到ChartRegistry里。
顺利得到了ChartRegister对象,我就可以在程序里根据它的内容构造统计图了(统计图一般使用jfreechart来生成,这里就不赘述了)。与Digester具有类似功能的工具包其实还有不少,例如Caster、Jato等等,我没有实际使用过它们,但因为我对用过的Jakarta其他项目都很满意(例如BeanUtils、HttpClient,品牌效应?),所以一开始就选择了Digester:简单方便。
from :http://java.chinaitlab.com/WebServices/715609.html
|
在一个java的socket连接中,用ObjectInputStream 和ObjectOutputStream可以很轻松的实现对Object的发送,但是如果没有建立socket连接,如何用udp包来发送Object对象呢?
想想我们用udp发送数据的时候可以发送些什么呢?
DatagramPacket里面可以装些什么呢? byte[]
对,就是byte[], 那么我们要发送java对象的话就是想办法把一个Object转成byte[],然后再发送到目的地址,然后在接受方把byte转成Object就可以了。
如何把一个Object转化成byte[]呢?我们可以利用ByteArrayOutputStream 这个类
相信到这里,有些朋友已经知道了怎么做了。
还是贴点代码吧!^_^
|
public void SendInfo(int code, Object obj){
ByteArrayOutputStream baos = new ByteArrayOutputStream();
ObjectOutputStream oos = null;
try{
oos = new ObjectOutputStream(baos);
oos.writeInt(code);
oos.writeObject(obj);
oos.flush();
byte arr[] = baos.toByteArray();
if(arr == null)return;
SendDataToClient(arr);
if(baos != null)baos.close();
if(oos != null)oos.close();
}catch(Exception e){
FuncForServer.WriteErrMsg(
"Exception in Sending data to server.", e);
}
}
其中SendDataToClient(arr);就不用我说了吧
然后接受方接受到了这个包后呢?
接收到的数组组成对象:
ByteArrayInputStream bais = new ByteArrayInputStream(dataq);
ObjectInputStream ois = null;
byte arr[] = null;
ois = new ObjectInputStream(bais);
Object obj = ois.readObject();
obj就到了,呵呵! |
|
java.version
|
Java Runtime Environment version |
| java.vendor |
Java Runtime Environment vendor |
| java.vendor.url |
Java vendor URL |
| java.home |
Java installation directory |
| java.vm.specification.version |
Java Virtual Machine specification version |
| java.vm.specification.vendor |
Java Virtual Machine specification vendor |
| java.vm.specification.name |
Java Virtual Machine specification name |
| java.vm.version |
Java Virtual Machine implementation version |
| java.vm.vendor |
Java Virtual Machine implementation vendor |
| java.vm.name |
Java Virtual Machine implementation name |
| java.specification.version |
Java Runtime Environment specification version |
| java.specification.vendor |
Java Runtime Environment specification vendor |
| java.specification.name |
Java Runtime Environment specification name |
| java.class.version |
Java class format version number |
| java.class.path |
Java class path |
| java.library.path |
List of paths to search when loading libraries |
| java.io.tmpdir |
Default temp file path |
| java.compiler |
Name of JIT compiler to use |
| java.ext.dirs |
Path of extension directory or directories |
| os.name |
Operating system name |
| os.arch |
Operating system architecture |
| os.version |
Operating system version |
| file.separator |
File separator ("/" on UNIX) |
| path.separator |
Path separator (":" on UNIX) |
| line.separator |
Line separator ("\n" on UNIX) |
| user.name |
User's account name |
| user.home |
User's home directory |
| user.dir |
User's current working directory |
调用方法 : System.getProperty("user.dir")
一 安装服务器端
下载Apache和SVN源码包:httpd-2.0.52.tar.gz,subversion-1.1.1.tar.gz
(因为redhat 9默认安装的Apache没有并包含--enable-so选项,所以无法产生mod_dav_svn.没有这个模块,SVN就无法采用http方式运行,所以必须重新编译新的Apache)
以root身份执行:
#tar zxvf httpd-2.0.52.tar.gz
#cd httpd-2.0.52
#./configure --enable-dav --enable-so --enable-maintainer-mode
#make
#make install
此时会产生/usr/local/apache2目录
#tar zxvf subversion-1.1.1.tar.gz
#./configure --with-apxs=/usr/local/apache2/bin/apxs
#make
#make install
此时会自动在/usr/local/apache2/conf/httpd.conf添加
LoadModule dav_svn_module modules/mod_dav_svn.so
安装完成后,运行svnserver --version确认版本为1.1.1。
SVN服务器安装结束.
二 建立仓库Repository
Subversion 的档案库是个中央仓储, 用来存放任意数量项目的受版本控管数据,建立方法很简单
#svnadmin create path/to/repos
举个例子:#svnadmin create /home/mysvn
导入项目到版本中心库
#svn import /tmp/project/ file:///data/repos -m "initial import"
三 运行服务器
Subversion服务器有两种运行方式,一是可以作为Apache 2.0的一个模块,以WebDAV/DeltaV协议与外界连通;另外,也可使用Subversion 自带的小型服务器程序svnserve。该程序使用的是自带的通讯协议,可以很容易地透过SSH以
以http方式运行
在/usr/local/apache2/conf/httpd.conf中加入:
<Location /svn/repository>
DAV svn
SVNPath /home/mysvn
</Location>
在服务器的浏览器中输入网址:
http://localhost/svn/repository/
这时候,你会看到这样一副界面:
这表明服务器已经以http方式正常运行了.
以svnserve方式运行
这种方式的运行又可以分为以下两种(这和vsftp有些相似)
1) standalone mode
直接运行 #svnserve –d
运行 lsof -i :3690可以看到SVN服务器已经在运行
四 客户机访问
客户机的访问方法舆服务器的运行方式有直接关系
window客户机:
1) 服务器以http方式运行
安装完TortoiseSVN-1.1.1-UNICODE_svn-1.1.1.msi后,在你想工作的目录下点击右键,执行checkout,按上图输入即可。
2) 服务器以svnserve方式运行
同上的区别只是URL of repository变为 svn://svn服务器ip/home/mysvn
或者 svn+ssh://svn服务器ip/home/mysvn
(注意不是//svn服务器ip//svn/repository)
linux客户机:
1) 服务器以http方式运行
执行 #svn checkout http: //svn服务器ip/svn/repository
2) 服务器以svnserve方式运行
执行 #svn checkout svn://svn服务器ip/home/mysvn
或者 #svn checkout svn+ssh://svn服务器ip/home/mysvn
五 客户认证机制
这舆服务器的运行方式有关
服务器以svnserve方式运行
默认下客户可以以匿名方式通过svn://方式任意访问档案库,为了限制其权限,比如只允许读操作,可以通过修改档案库conf子目录中的svnseve.conf文件来实现。
#vi /home/mysvn/conf/svnseve.conf
修改[general]字段下内容为:
anon-access = read
如果设为anon-access = none,则匿名用户不可以通过svn://方式访问档案库
为了实现用户认证,我们一般采用svn+ssh://访问机制。
首先在svnseve.conf文件设置anon-access = none禁止匿名用户通过svn://方式访问档案库
在其后加入auth-access = write一行
auth-access 是限制有援权的使用者(使用svn+ssh:// 来登入) 的存取权限,我们设为是可以读写。
当用户通过svn+ssh://访问时,服务器会自动启动ssh认证机制,要求用户输入密码,对于window用户来说还需要安装第三方软件openssh,才可以采用这种机制
服务器以http方式运行
比如我们想给 Sally 与 Harry 送交存取档案库的权限. 首先, 我们必须把它们加入到密码档案.
# ### 第一次: 以 -c 建立档案
# htpasswd -c /etc/svn-auth-file harry
New password: *****
Re-type new password: *****
Adding password for user harry
# htpasswd /etc/svn-auth-file sally
New password: *******
Re-type new password: *******
Adding password for user sally
#
接着,在/usr/local/apache2/conf/httpd.conf的加入:
<Location /svn/repository >
DAV svn
SVNPath /home/mycvs
AuthType Basic
AuthName "Subversion repository"
AuthUserFile /etc/svn-auth-file
Require valid-user
</Location>
重新启动 Apache后,如果有人要访问SVN服务器,系统会要求他输入用户名和密码。 只有输入Sally 或Harry的用户名和相应的密码,才可以对档案库进行修改和访问
六 添加用户
打开/conf/目录,打开svnserve.conf找到一下两句:
# [general]
# password-db = passwd
去之每行开头的#,其中第二行是指定身份验证的文件名,即passwd文件
同样打开passwd文件,将
# [users]
# harry = harryssecret
# sally = sallyssecret
这几行的开头#字符去掉,这是设置用户,一行一个,存储格式为“用户名 = 密码”,如可插入一行:admin = admin888,即为系统添加一个用户名为admin,密码为admin888的用户
Java开源-Jdom对XML解析方法的使用指南
http://java.ccidnet.com/art/3565/20060313/475777_1.html XML的四种解析器原理及性能比较
http://bbs.chinacode.com/archiver/tid-352.html Java XML API 漫谈
http://blog.iyi.cn/user/david/archives/2005/01/204.html使用 dom4j 解析 XML
http://blog.iyi.cn/user/david/archives/2005/01/204.html 用dom4j建立,修改XML文档,并解决格式化输出和中文问题
http://www.5inet.net/WebPrograming/XMLXSL/070556.html 原因分析:
由于FileWriter默认的输出编码是ANSI编码,而Dom4j中的wirte方法提供的内容实际是以UTF-8保存的,因此造成了包括中文字符的XML文件无法正常阅读。
解决方法:
不能使用简单的FileWriter,而应该是使用一个能指定具体输出编码的Writer,在JDK的io包中, OutputStreamWriter可以指定输出编码。
正确的代码如下:
java.io.OutputStream out=new java.io.FileOutputStream(fileName);
java.io.Writer wr=new java.io.OutputStreamWriter(out,"UTF-8");
doc.write(wr);
wr.close();
out.close();
简化一下可以写成下面的样式:
java.io.Writer wr=new java.io.OutputStreamWriter(new java.io.FileOutputStream(fileName),"UTF-8");
doc.write(wr);
wr.close();
这篇文章主要实现的是j:通过socket传递Java对象。采用的方法就是对象序列化。方法是:通过socket建立c/s连接;通过ObjectOutputStream,ObjectOutputStream 读写对象。唯一需要留意的是传递的java 对象需要实现Serializable标记接口。代码包括:java对象类,Employee; socket client类;server类。主要代码如下:
java对象类:
import java.io.*;
import java.util.*;
public class Employee implements Serializable {
private int employeeNumber;
private String employeeName;
Employee(int num, String name) {
employeeNumber = num;
employeeName = name;
}
public int getEmployeeNumber() {
return employeeNumber;
}
public void setEmployeeNumber(int num) {
employeeNumber = num;
}
public String getEmployeeName() {
return employeeName;
}
public void setEmployeeName(String name) {
employeeName = name;
}
}
client类:
import java.io.*;
import java.net.*;
public class Client {
public static void main(String[] arg) {
try {
Employee joe = new Employee(150, "Joe");
System.out.println("employeeNumber= " + joe.getEmployeeNumber());
System.out.println("employeeName= " + joe.getEmployeeName());
Socket socketConnection = new Socket("127.0.0.1", 11111);
ObjectOutputStream clientOutputStream = new ObjectOutputStream(
socketConnection.getOutputStream());
ObjectInputStream clientInputStream = new ObjectInputStream(
socketConnection.getInputStream());
clientOutputStream.writeObject(joe);
joe = (Employee) clientInputStream.readObject();
System.out.println("employeeNumber= " + joe.getEmployeeNumber());
System.out.println("employeeName= " + joe.getEmployeeName());
clientOutputStream.close();
clientInputStream.close();
} catch (Exception e) {
System.out.println(e);
}
}
}
Server类:
public class Server {
public static void main(String[] arg) {
Employee employee = null;
try {
ServerSocket socketConnection = new ServerSocket(11111);
System.out.println("Server Waiting");
Socket pipe = socketConnection.accept();
ObjectInputStream serverInputStream = new ObjectInputStream(pipe
.getInputStream());
ObjectOutputStream serverOutputStream = new ObjectOutputStream(pipe
.getOutputStream());
employee = (Employee) serverInputStream.readObject();
employee.setEmployeeNumber(256);
employee.setEmployeeName("John");
serverOutputStream.writeObject(employee);
serverInputStream.close();
serverOutputStream.close();
} catch (Exception e) {
System.out.println(e);
}
}
}
因为图片时实时生成的,所以定时只刷新图片,好像定时执行
document.getElementById("sample").src="1.gif";
不行,没有更新,请问怎么解决呀??
缓存问题
var img = document.getElementById("sample");
img.src="1.gif?.tmp="+Math.random();
http://slacksite.com/other/ftp.html
FTP 的主動模式( active )和被動模式( passive )
FTP 是一種檔傳輸協定 (File Transfer Protocol),它的連線模式有兩種﹕
主動模式( active )和被動模式( passive )。以下說明 FTP 的連線是怎樣建立的﹕
在 active 模式下 (一般預設的模式)﹕
1. FTP client 開啟一個隨機選擇的TCP port 呼叫 FTP server 的 port 21請求連線。當順
利完成 Three-Way Handshake 之後,連線就成功建立,但這僅是命令通道的建立
。
2.當兩端需要傳送資料的時候,client 透過命令通道用一個 port command 告訴 server
,client可以用另一個TCP port 做數據通道。
3.然後 server 用 port 20 和剛才 client 所告知的 TCP port 建立數據連線。請注意:連
線方向這是從 server 到 client 的,TCP 封包會有一個 SYN flag。
4.然後 client 會返回一個帶 ACK flag的確認封包﹐並完成另一次的 Three-Way
Handshake 手續。這時候,數據通道才能成功建立。
5.開始數據傳送。
在 passive 模式下
1.FTP client 開啟一個隨機選擇的TCP port 呼叫 FTP server 的 port 21請求連線,並完
成命令通道的建立。
2.當兩端需要傳送資料的時候,client 透過命令通道送一個 PASV command 給
server,要求進入 passive 傳輸模式。
3.然後 server 像上述的正常模式之第 2 步驟那樣,挑一個TCP port ,並用命令通道
告訴 client。
4.然後 client 用另一個TCP port 呼叫剛才 server 告知的 TCP port 來建立數據通道。此
時封包帶 SYN flag。
5.server 確認後回應一個 ACK 封包。並完成所有交握手續、成功建立數據通道。
6.開始數據傳送。
在實際使用上, active mode 用來登入一些開設在主機上及沒有安裝防火牆的 FTP server,或是開設於 client side 的 FTP server!
Passive mode (簡稱 PASV)用來登入一些架設於防火牆保護下而又是開設於主機上的 FTP server!
如果您覺得太深奧而弄不清楚, 那就先用預設的 active mode 登入, 失敗改用 passive mode 登入就是了。
PS: 並不是每套 FTP 軟體都支援 passive mode 登入
http://forum.icst.org.tw/phpBB2/viewtopic.php?t=79
原PO那邊有不少的討論文章,想要多了解的人務必點選。
http://www.51swim.com/wayongjs.htm
前言
提供 CheckBox 全選與取消全選
方法
<script language="JavaScript">
function chkall(input1,input2)
{
var objForm = document.forms[input1];
var objLen = objForm.length;
for (var iCount = 0; iCount < objLen; iCount++)
{
if (input2.checked == true)
{
if (objForm.elements[iCount].type == "checkbox")
{
objForm.elements[iCount].checked = true;
}
}
else
{
if (objForm.elements[iCount].type == "checkbox")
{
objForm.elements[iCount].checked = false;
}
}
}
}
</script>
<form id="form1">
<input type="checkbox" value='全部選取' onclick='chkall("form1",this)' name=chk><BR>
<input type="checkbox" name="item_001" value="1">1<BR>
<input type="checkbox" name="item_002" value="2">2<BR>
<input type="checkbox" name="item_003" value="3">3<BR>
<input type="checkbox" name="item_003" value="4">4
</form>
由于用dwg trueview 把dwg embed在ie中有点问题,所以换了一个activex控件,下面是一个用volo view activex control 显示.dwg的例子;
<!DOCTYPE HTML PUBLIC "-//W3C//DTD HTML 4.0 Transitional//EN">
<HTML>
<HEAD>
<TITLE> New Document </TITLE>
<META NAME="Generator" CONTENT="EditPlus">
<META NAME="Author" CONTENT="">
<META NAME="Keywords" CONTENT="">
<META NAME="Description" CONTENT="">
</HEAD>
<BODY>
<object id = "dwgViewerCtrl1"
classid = "clsid:8718C658-8956-11D2-BD21-0060B0A12A50" border = "1" width = "100%" height = "100%">
<param name = "src" value="dwgView_files\\1TYB6.DWG">
</object>
</BODY>
</HTML>
http://discussion.autodesk.com/thread.jspa?threadID=261210
http://www.phpchina.com/viewnews_11459.html
、如果是以前导出的文件,导入的时候遇到错误:
Got a packet bigger than ‘max_allowed_packet’ bytes
or
ERROR 1153 (08S01) at line 616: Got a packet bigger than ‘max_allowed_packet’ by
tes
就需要修改mysql的最大允许包大小了,编辑my.ini,在[mysqld]部分(不在这部分没用)添加一句:
set-variable=max_allowed_packet=10485760
重启mysql服务就可以了,我这里设置的是大约10M。
利用AutoDesk DWF viewer 插件,可以把物理地址上的.dwf文件显示到一个html页面中,方法如下:
<object id = "viewer"
classid = "clsid:A662DA7E-CCB7-4743-B71A-D817F6D575DF">
<param name = "Src" value="D:\Drawings\Dwfs\New.dwf">
</object>
<object id = "viewer"
classid =
"clsid:A662DA7E-CCB7-4743-B71A-D817F6D575DF"CODEBASE="http://www.autodesk.com/global/dwfviewer/installer/DwfViewerSetup.cab"
border = "1"
width = "950"
height = "600">
<param name = "Src" value="my.dwf">
</object>
大多数 COM 函数以及一些接口成员函数的返回值类型均为 HRESULT 类型。HRESULT 类型的返回值反映了函数中的一些情况,其类型定义规范如下:
31 30 29 28 16 15 0
|-----|--|------------------------|-----------------------------------|
类别码 (30-31) 反映函数调用结果:
00 调用成功
01 包含一些信息
10 警告
11 错误
自定义标记(29) 反映结果是否为自定义标识,1 为是,0 则不是;
操作码 (16-28) 标识结果操作来源,在 Windows 平台上,其定义如下:
#define FACILITY_WINDOWS 8
#define FACILITY_STORAGE 3
#define FACILITY_RPC 1
#define FACILITY_SSPI 9
#define FACILITY_WIN32 7
#define FACILITY_CONTROL 10
#define FACILITY_NULL 0
#define FACILITY_INTERNET 12
#define FACILITY_ITF 4
#define FACILITY_DISPATCH 2
#define FACILITY_CERT 11
操作结果码(0-15) 反映操作的状态,WinError.h 定义了 Win32 函数所有可能返回结果。
以下是一些经常用到的返回值和宏定义:
S_OK 函数执行成功,其值为 0 (注意,其值与 TRUE 相反)
S_FALSE 函数执行成功,其值为 1
S_FAIL 函数执行失败,失败原因不确定
E_OUTOFMEMORY 函数执行失败,失败原因为内存分配不成功
E_NOTIMPL 函数执行失败,成员函数没有被实现
E_NOTINTERFACE 函数执行失败,组件没有实现指定的接口
不能简单地把返回值与 S_OK 和 S_FALSE 比较,而要用 SECCEEDED 和 FAILED 宏进行判断。
Trackback: http://tb.donews.net/TrackBack.aspx?PostId=741200
Spring 的 DataSource bean 定义如下, 把可变的变量抽出放在db.properties file中, 方便修改 db.properties file只要放在当前项目的classes路径下,或放在Tomcat 的Shared/classes下, Spring 就可以找到
<bean id="dataSource" class="com.mchange.v2.c3p0.ComboPooledDataSource" destroy-method="close">
<property name="driverClass">
<value>${jdbc.driver}</value>
</property>
<property name="jdbcUrl">
<value>${jdbc.url}</value>
</property>
<property name="acquireIncrement"><value>${hibernate.c3p0.acquire_increment}</value></property>
<property name="idleConnectionTestPeriod"><value>${hibernate.c3p0.idle_test_period}</value></property>
<property name="checkoutTimeout"><value>${hibernate.c3p0.timeout}</value></property>
<property name="maxPoolSize"><value>${hibernate.c3p0.max_size}</value></property>
<property name="minPoolSize"><value>${hibernate.c3p0.min_size}</value></property>
<property name="maxStatements"><value>${hibernate.c3p0.max_statements}</value></property>
<property name="initialPoolSize"><value>${hibernate.c3p0.min_size}</value></property>
<property name="user"><value>${jdbc.username}</value></property>
<property name="password"><value>${jdbc.password}</value></property>
</bean>
db.properties 如下
jdbc.driver=com.mysql.jdbc.Driver
jdbc.url=jdbc:mysql://localhost:3306/zyw?useUnicode=true&characterEncoding=GBK
jdbc.username=root
jdbc.password=root
hibernate.dialect=org.hibernate.dialect.MySQL5Dialect
hibernate.show_sql=true
hibernate.format_sql=false
hibernate.c3p0.min_size=80
hibernate.c3p0.max_size=80
hibernate.c3p0.timeout=3000
hibernate.c3p0.max_statements=6000
hibernate.c3p0.idle_test_period=3000
hibernate.c3p0.acquire_increment=5
下面是一些可供使用的项:
maxIdleTime:<!--最大空闲时间,60秒内未使用则连接被丢弃。若为0则永不丢弃。Default: 0 -->
acquireIncrement:<!--当连接池中的连接耗尽的时候c3p0一次同时获取的连接数。Default: 3 -->
maxStatements:<!--JDBC的标准参数,用以控制数据源内加载的PreparedStatements数量。但由于预缓存的statements
属于单个connection而不是整个连接池。所以设置这个参数需要考虑到多方面的因素。
如果maxStatements与maxStatementsPerConnection均为0,则缓存被关闭。Default: 0-->
idleConnectionTestPeriod:<!--每60秒检查所有连接池中的空闲连接。Default: 0 -->
acquireRetryAttempts: