更多博客请查看:http://www.v5cn.cn1.创建一个Web工程,添加Struts2支持。
2.创建两个实体类:
a). Mother(母亲)的Java类。
package struts.map.entity;
import java.io.Serializable;
public class Mother implements Serializable {
private static final long serialVersionUID = 1L;
private int motherId; //母亲ID
private String motherName; //母亲名字
public int getMotherId() {
return motherId;
}
public void setMotherId(int motherId) {
this.motherId = motherId;
}
public String getMotherName() {
return motherName;
}
public void setMotherName(String motherName) {
this.motherName = motherName;
}
}
b).Children(孩子)的Java类
package struts.map.entity;
import java.io.Serializable;
public class Children implements Serializable {
private static final long serialVersionUID = 1L;
private int childId; //孩子ID
private int motherId; //母亲的ID
private String childName; //孩子名字
public int getChildId() {
return childId;
}
public void setChildId(int childId) {
this.childId = childId;
}
public int getMotherId() {
return motherId;
}
public void setMotherId(int motherId) {
this.motherId = motherId;
}
public String getChildName() {
return childName;
}
public void setChildName(String childName) {
this.childName = childName;
}
}
3. 创建一个Action,并创建一位母亲和她的孩子。
package struts.map.test;
import java.util.ArrayList;
import java.util.HashMap;
import java.util.List;
import java.util.Map;
import struts.map.entity.Children;
import struts.map.entity.Mother;
import com.opensymphony.xwork2.ActionSupport;
public class Struts2_Map extends ActionSupport {
private static final long serialVersionUID = 1L;
private Map<Mother,List<Children>> motherChildn;
public Map<Mother, List<Children>> getMotherChildn() {
return motherChildn;
}
@Override
public String execute() throws Exception {
/*-------------------以对象做父节点的键,List做子节点的值,的Map-----------------------*/
Mother mother = new Mother();
mother.setMotherId(10000);
mother.setMotherName("花木兰");
Children children1 = new Children();
children1.setChildId(10000);
children1.setMotherId(10000);
children1.setChildName("小花木兰1");
Children children2 = new Children();
children2.setChildId(10001);
children2.setMotherId(10000);
children2.setChildName("小花木兰2");
Children children3 = new Children();
children3.setChildId(10002);
children3.setMotherId(10000);
children3.setChildName("小花木兰3");
motherChildn = new HashMap<Mother,List<Children>>();
List<Children> childrens = new ArrayList<Children>();
childrens.add(children1);
childrens.add(children2);
childrens.add(children3);
motherChildn.put(mother,childrens);
return SUCCESS;
}
}
struts.xml
<?xml version="1.0" encoding="UTF-8" ?>
<!DOCTYPE struts PUBLIC "-//Apache Software Foundation//DTD Struts Configuration 2.1//EN" "http://struts.apache.org/dtds/struts-2.1.dtd">
<struts>
<package name="map" extends="struts-default">
<action name="struts_map" class="struts.map.test.Struts2_Map">
<result>result.jsp</result>
</action>
</package>
</struts>
4.创建两个页面:
a).跳转页面:
<%@ page language="java" pageEncoding="UTF-8"%>
<%
String path = request.getContextPath();
%>
<!DOCTYPE HTML PUBLIC "-//W3C//DTD HTML 4.01 Transitional//EN">
<html>
<head>
<title>Struts_Map</title>
<meta http-equiv="pragma" content="no-cache">
<meta http-equiv="cache-control" content="no-cache">
<meta http-equiv="expires" content="0">
<meta http-equiv="keywords" content="keyword1,keyword2,keyword3">
<meta http-equiv="description" content="This is my page">
</head>
<body>
<a href="struts_map.action">查看Map</a>
</body>
</html>
b).最终页面,也是作重要的页面:
<%@ page language="java" pageEncoding="UTF-8"%>
<%@taglib uri="/struts-tags" prefix="s" %>
<%
String path = request.getContextPath();
%>
<!DOCTYPE HTML PUBLIC "-//W3C//DTD HTML 4.01 Transitional//EN">
<html>
<head>
<title>Struts_Map</title>
<meta http-equiv="pragma" content="no-cache">
<meta http-equiv="cache-control" content="no-cache">
<meta http-equiv="expires" content="0">
<meta http-equiv="keywords" content="keyword1,keyword2,keyword3">
<meta http-equiv="description" content="This is my page">
</head>
<body>
<div>
<h3>-----------------以对象做父节点的键,List做子节点的值,的Map--------------------</h3>
<s:iterator var="mc" value="motherChildn">
<div>
母亲名称:<s:property value="key.motherName"/>
</div>
<s:iterator var="ch" value="value">
<div>
孩子名称:<s:property value="#ch.childName"/>
</div>
</s:iterator>
</s:iterator>
</div>
</body>
</html>
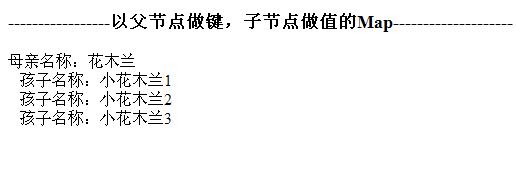
最终运行结果: