FCKeditor,作为现在功能最强大的在线HTML编辑器,网上关于他的功能介绍以及基本配置已经很多了。然而其中不少文章涉及面都比较局限。最近,笔者需要在自己项目中使用到FCKeditor,并用之于和已有的基于JSF的web应用整合。从对FCKeditor一窍不通到成功达成整合,我从网上学到了不少知识,自己也积累了不少经验,因此,也想和大家一起分析这一过程。
1.基本配置:
知之为知之,不知google之。关于FCKeditor的基本配置在网上自有高人指点,这里我也不多耽误大家时间。主要是谈下自己当初配置的问题:
a.基本路径:
注意FCKeditor的基本路径应该是/(你的web应用名称)/(放置FCKeditor文件的文件夹名)/
我的目录结构为:
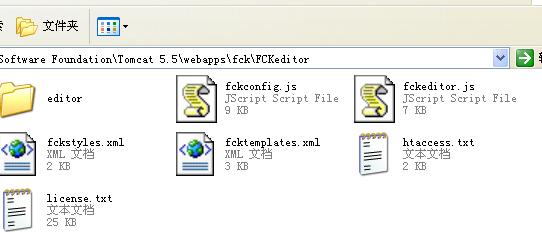
因此,我的基本路径设置为:/fck/FCKeditor/
b.文件浏览以及上传路径设置:
我个人的参考如下:
 FCKConfig.LinkBrowser = true ;
FCKConfig.LinkBrowserURL = FCKConfig.BasePath + 'filemanager/browser/default/browser.html?Connector=connectors/jsp/connector' ;
FCKConfig.LinkBrowserWindowWidth = FCKConfig.ScreenWidth * 0.7 ; // 70%
FCKConfig.LinkBrowserWindowHeight = FCKConfig.ScreenHeight * 0.7 ; // 70%
FCKConfig.ImageBrowser = true ;
FCKConfig.ImageBrowserURL = FCKConfig.BasePath + 'filemanager/browser/default/browser.html?Type=Image&Connector=connectors/jsp/connector';
FCKConfig.ImageBrowserWindowWidth = FCKConfig.ScreenWidth * 0.7 ; // 70% ;
FCKConfig.ImageBrowserWindowHeight = FCKConfig.ScreenHeight * 0.7 ; // 70% ;
FCKConfig.FlashBrowser = true ;
FCKConfig.FlashBrowserURL = FCKConfig.BasePath + 'filemanager/browser/default/browser.html?Type=Flash&Connector=connectors/jsp/connector' ;
FCKConfig.FlashBrowserWindowWidth = FCKConfig.ScreenWidth * 0.7 ; //70% ;
FCKConfig.FlashBrowserWindowHeight = FCKConfig.ScreenHeight * 0.7 ; //70% ;
FCKConfig.LinkUpload = true ;
FCKConfig.LinkUploadURL = FCKConfig.BasePath + 'filemanager/upload/simpleuploader?Type=File' ;
FCKConfig.LinkUploadAllowedExtensions = "" ; // empty for all
FCKConfig.LinkUploadDeniedExtensions = ".(php|php3|php5|phtml|asp|aspx|ascx|jsp|cfm|cfc|pl|bat|exe|dll|reg|cgi)$" ; // empty for no one
FCKConfig.ImageUpload = true ;
FCKConfig.ImageUploadURL =FCKConfig.BasePath + 'filemanager/upload/simpleuploader?Type=Image' ;
FCKConfig.ImageUploadAllowedExtensions = ".(jpg|gif|jpeg|png)$" ; // empty for all
FCKConfig.ImageUploadDeniedExtensions = "" ; // empty for no one
FCKConfig.FlashUpload = true ;
FCKConfig.FlashUploadURL = FCKConfig.BasePath + 'filemanager/upload/simpleuploader?Type=Flash' ;
FCKConfig.FlashUploadAllowedExtensions = ".(swf|fla)$" ; // empty for all
FCKConfig.FlashUploadDeniedExtensions = "" ; // empty for no one
FCKeditor与JSF整合的最大问题,在于需要从JSF环境中相应Bean读取值赋予给FCKeditor,同时从FCKeditor里面读取结果赋予给相应的数据持有Bean。由于这一过程在传统的JSF标签中是通过值绑定有框架自动完成,因此这里需要我们手动来实现这一过程。
以下要展示的demo由两部分组成:
form.jsp显示编辑内容,点击其submit按钮跳转至test.jsp,test.jsp调用FCKeditor对form.jsp中显示的已有内容进行显示和编辑。编辑完后点击submit,页面将重新跳转到form.jsp,显示修改后的内容。
其实,这就是一个很基本的编辑功能,在论坛和blog中都可以看到它的身影。
而ContextBean用于持有待编辑的内容,它的scope是session范围。ContextServlet用于读取FCKeditor修改后的内容,并赋予ContextBean中。
首先来看form.jsp
<body>
<f:view>
<h:form>
<pre>
<h:outputText value="#{td.name}" escape="false"></h:outputText>
</pre>
<br/>
<h:commandButton value="submit" action="#{td.submit}"></h:commandButton>
</h:form>
</f:view>
</body> 这个页面很简单,其中td对应的就是ContextBean,ContextBean.name用于保存编辑内容
package com.dyerac;

 public class ContextBean
  {
{
 private String name;

 public String getName() {
return name;
 }
}
public void setName(String name) {
this.name = name;
}
public String submit() {
return "edit";
}
 }
} 下面来看test.jsp
用过FCKeditor的都知道,FCKeditor可以通过三种方式来调用:
script, jsp 标签以及java代码。
这里,为了方便从ContextBean中读取name属性内容作为其初始值,我使用了第三种方法
其中
FCKeditor fck=new FCKeditor(request,"EditorDefault");初始化FCKeditor,第二个参数即为该FCKeditor实例的id,当提交后FCKeditor内的内容将以该参数为变量名保存在request中。
比如,这里我选择了
EditorDefault,所以日后读取FCKeditor内容时,可以通过以下语句:
request.getParameter("EditorDefault")
<body>
<form action="/fck/servlet/ContextServlet" method="post" target="_blank">
<%FCKeditor fck=new FCKeditor(request,"EditorDefault");
FacesContext fcg=FacesContext.getCurrentInstance();
ContextBean td=(ContextBean)fcg.getApplication().getVariableResolver().resolveVariable(fcg,"td");
fck.setBasePath("/fck/FCKeditor/");
fck.setValue(td.getName());
fck.setHeight(new Integer(600).toString());
out.print(fck.create());
%>
<input type="submit" value="Submit">
</body> 修改后的结果以post方式提交给/fck/servlet/ContextServlet,该url对应的即为ContextServlet。
ContextServlet负责读取FCKeditor里的内容,并赋予给session中的ContextBean。doPost()方法用于实现该功能
public void doPost(HttpServletRequest request, HttpServletResponse response)
throws ServletException, IOException {
FacesContext fcg = getFacesContext(request,response);
ContextBean td = (ContextBean) fcg.getApplication()
.getVariableResolver().resolveVariable(fcg, "td");
String name=new String(request.getParameter("EditorDefault").getBytes("ISO-8859-1"),"UTF-8");
td.setName(name);
RequestDispatcher rd=getServletContext().getRequestDispatcher("/form.faces");
rd.forward(request, response);
} 需要注意两个问题,
其一:FCKeditor内的中文信息读取是可能出现乱码,需要额外的处理:
String name=new String(request.getParameter("EditorDefault").getBytes("ISO-8859-1"),"UTF-8");
其二:由于servlet处于FacesContext范围外,因此不能通过FacesContext.getCurrentInstance()来得到当前FacesContext,因此ContextServlet定义了自己的方法用于获取FacesContext:
// You need an inner class to be able to call FacesContext.setCurrentInstance
// since it's a protected method
private abstract static class InnerFacesContext extends FacesContext
{
protected static void setFacesContextAsCurrentInstance(FacesContext facesContext) {
FacesContext.setCurrentInstance(facesContext);
}
}
private FacesContext getFacesContext(ServletRequest request, ServletResponse response) {
// Try to get it first
FacesContext facesContext = FacesContext.getCurrentInstance();
if (facesContext != null) return facesContext;
FacesContextFactory contextFactory = (FacesContextFactory)FactoryFinder.getFactory(FactoryFinder.FACES_CONTEXT_FACTORY);
LifecycleFactory lifecycleFactory = (LifecycleFactory)FactoryFinder.getFactory(FactoryFinder.LIFECYCLE_FACTORY);
Lifecycle lifecycle = lifecycleFactory.getLifecycle(LifecycleFactory.DEFAULT_LIFECYCLE);
// Either set a private member servletContext = filterConfig.getServletContext();
// in you filter init() method or set it here like this:
// ServletContext servletContext = ((HttpServletRequest)request).getSession().getServletContext();
// Note that the above line would fail if you are using any other protocol than http
ServletContext servletContext = ((HttpServletRequest)request).getSession().getServletContext();
// Doesn't set this instance as the current instance of FacesContext.getCurrentInstance
facesContext = contextFactory.getFacesContext(servletContext, request, response, lifecycle);
// Set using our inner class
InnerFacesContext.setFacesContextAsCurrentInstance(facesContext);
// set a new viewRoot, otherwise context.getViewRoot returns null
//UIViewRoot view = facesContext.getApplication().getViewHandler().createView(facesContext, "yourOwnID");
//facesContext.setViewRoot(view);
return facesContext;
} ContextServlet处理完了FCKeditor内容后,将跳转到form.jsp。
这样一个简单的编辑功能就完成了。
3.遗留问题:
我在上传文件时还是会出现中文乱码的问题,按照其他人说的那样把网页的charset=utf-8改成gb2312一样会有问题,还请各位高手赐教^_^
另外,关于整个demo的源代码如果大家需要,可以留言给我,我用邮箱发给您。不足之处,还请各位多多指点
posted on 2006-10-14 17:13
xzc 阅读(452)
评论(0) 编辑 收藏 所属分类:
Web