Posted on 2007-07-18 11:12
wonderer 阅读(1400)
评论(0) 编辑 收藏 所属分类:
java

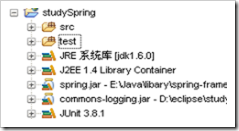
首先要导入包
1:Spring支持包:spring.jar , commons-logging.jar
2: JUnit支持包: JUnit.jar
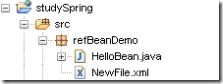
建立Bean类,
1: package refBeanDemo;
2:
3: import java.util.Date;
4:
5: public class HelloBean { 6: private String helloWorld;
7: private Date date;
8: public Date getDate() { 9: return date;
10: }
11: public void setDate(Date date) { 12: this.date = date;
13: }
14: public String getHelloWorld() { 15: return helloWorld;
16: }
17: public void setHelloWorld(String helloWorld) { 18: this.helloWorld = helloWorld;
19: }
20:
21: }
建立配置文件,和在里面进行注入
1: <?xml version="1.0" encoding="UTF-8"?>
2: <!DOCTYPE beans PUBLIC "-//SPRING/DTD BEAN/EN" "../resources/spring-beans-2.0.dtd" >
3: <beans>
4: <bean id="dateBean" class="java.util.Date"></bean>
5:
6: <bean id="helloBean" class="refBeanDemo.HelloBean">
7: <property name="helloWorld">
8: <value>你好,世界</value>
9: </property>
10: <property name="date" ref="dateBean"></property>
11: </bean>
12: </beans>
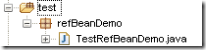
写JUnit进行测试,方便管理,把JUnit的东东放到test包里。
1: package refBeanDemo;
2:
3: import org.springframework.context.ApplicationContext;
4: import org.springframework.context.support.ClassPathXmlApplicationContext;
5:
6: import junit.framework.TestCase;
7:
8: public class TestRefBeanDemo extends TestCase { 9: private ApplicationContext context;
10:
11: public void setUp() { 12: context = new ClassPathXmlApplicationContext("refBeanDemo/NewFile.xml"); 13: }
14:
15: public void testSpring() { 16: HelloBean helloBean = (HelloBean)context.getBean("helloBean"); 17: System.out.println(helloBean.getDate());
18: assertEquals("你好,世界", helloBean.getHelloWorld()); 19:
20: }
21: }
运行JUnit测试
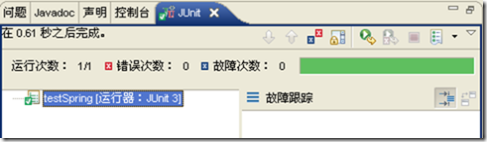
测试成功。类的分布如下: