select * from INFORMATION_SCHEMA.TABLES where TABLE_SCHEMA = 'DBNAME' order by create_time desc;
导出数据库
直接使用命令:
mysqldump -u root -p abc >abc.sql
然后回车输入密码就可以了;
mysqldump -u 数据库链接用户名 -p 目标数据库 > 存储的文件名
文件会导出到当前目录下
导入数据库(sql文件)
mysql -u 用户名 -p 数据库名 < 数据库名.sql
mysql -u abc -p abc < abc.sql
注意sql文件必须在当前目录下,如果不在当前目录下需要在< 之后加上具体sql文件路径
GBK: create database test2 DEFAULT CHARACTER SET gbk COLLATE gbk_chinese_ci;

UTF8: CREATE DATABASE `test2` DEFAULT CHARACTER SET utf8 COLLATE utf8_general_ci;
DELIMITER //
CREATE PROCEDURE proc_tmp()
BEGIN
DECLARE done INT DEFAULT 0;
DECLARE product_Id VARCHAR(255);
DECLARE yuanliao VARCHAR(255);
DECLARE miaoshu VARCHAR(255);
DECLARE shazhi VARCHAR(255);
DECLARE midu VARCHAR(255);
DECLARE mf VARCHAR(255);
DECLARE zuzhi VARCHAR(255);
DECLARE quality VARCHAR(255);
DECLARE shuliang VARCHAR(255);
DECLARE jiage VARCHAR(255);
DECLARE price_date VARCHAR(255);
DECLARE idCur CURSOR FOR SELECT productId,yl,ylms,sz,md,fk,zz,qa,amount,price,pricedate FROM sheet1;
DECLARE CONTINUE HANDLER FOR NOT FOUND SET done = 1;
OPEN idCur;
REPEAT
FETCH idCur INTO product_Id,yuanliao,miaoshu,shazhi,midu,mf,zuzhi,quality,shuliang,jiage,price_date;
IF NOT done THEN
INSERT INTO static_data(model_id,dataKey,dataVal,product_id) VALUES(3,'yl',yuanliao,product_Id);
INSERT INTO static_data(model_id,dataKey,dataVal,product_id) VALUES(3,'ylms',miaoshu,product_Id);
INSERT INTO static_data(model_id,dataKey,dataVal,product_id) VALUES(3,'sz',shazhi,product_Id);
INSERT INTO static_data(model_id,dataKey,dataVal,product_id) VALUES(3,'md',midu,product_Id);
INSERT INTO static_data(model_id,dataKey,dataVal,product_id) VALUES(3,'fk',mf,product_Id);
INSERT INTO static_data(model_id,dataKey,dataVal,product_id) VALUES(3,'zz',zuzhi,product_Id);
INSERT INTO static_data(model_id,dataKey,dataVal,product_id) VALUES(3,'qa',quality,product_Id);
INSERT INTO static_data(model_id,dataKey,dataVal,product_id) VALUES(3,'amount',shuliang,product_Id);
INSERT INTO static_data(model_id,dataKey,dataVal,product_id) VALUES(3,'price',jiage,product_Id);
INSERT INTO static_data(model_id,dataKey,dataVal,product_id) VALUES(3,'pricedate',price_date,product_Id);
END IF;
UNTIL done END REPEAT;
CLOSE idCur;
END//
DELIMITER ;
CALL proc_tmp();
DROP PROCEDURE proc_tmp;
DELETE FROM sheet1;
定义的变量不能和select里的同名
摘要: 小编整理的“宜兴市主要乡村旅游点瓜果采摘攻略”,希望能成为您瓜果采摘的好帮手!!!农家乐联系人手机采摘项目篱笆园农家乐黄亚云13815118337草莓5月-11月挖笋 野菜 采茶 制乌米饭3-5月桑葚 4月油桃 5月 杨梅 6月下旬-7月中下旬 葡萄 7月-9月 挖百合 8月 板栗 9月底-10月份 绿缘生态农业有限公司陈庆元13701539886挖笋 挖野菜 3-4月 ...
阅读全文
桑葚采
摘
好去处
芳桥
1、绿大地果桑种植基地 13063669929
2、碧园春生态园 13771359607
3、张慕果园 13812203223
4、金沙滩蔬果园 13585035093
建议采摘路线:市区→东氿大道→百合大道→芳塍路往北(详见地图指示)

西渚
◆【1】甲有农林生态园
地址:宜兴市西渚镇张戴公路白塔村部旁(近振元南路)
◆【2】白塔云芯林果专业合作社桑葚采摘园
地址:白塔村委入口斜对面张戴公路边
◆【3】小杭采摘园
自驾线路: 宜兴——横山水库
◆【4】白塔瓜果基地
自驾线路:导航即到
徐舍
◆ 苏合农产品销售专业合作联社
自驾线路:麦德龙——G104(行驶16.6公里)——徐舍镇潘东村
湖㳇
◆【1】篱笆园农家乐
地址:宜兴市湖㳇镇洑西村
◆【2】金沙湾农庄
地址:宜兴市湖㳇镇东兴村
【烧烤清单】
1‘.烧烤工具:
烧烤架、网架、木炭、烧烤叉、小毛刷、打火机、助燃剂、竹签、牙签、水果刀、报纸、
一次性筷、一次性碗、一次性盘、一次性隔热手套、纸杯、餐巾纸、湿巾纸、桌布、烧烤围裙、垃圾袋烧烤夹(夹取生食)
2.调料:
调和油、盐、酱油、烧烤酱(汁)、辣椒粉(老干妈)、孜然、五香粉、番茄酱、芝麻、胡萝卜酱、甜面酱、海鲜调料、大蒜、姜、葱花、蜂蜜、
3、食品:
荤菜:鸡翅、排骨、香肠、火腿肠、牛肉、羊肉、五花肉、各式鱼丸肉丸、鸡珍、黄花鱼、秋刀鱼、鲫鱼、鱿鱼、墨鱼仔、虾等
素菜:玉米、韭菜、蘑菇、茄子、土豆、青椒、生菜(生菜包肉)、花菜、香干、臭干子、小镘头、年糕、面包片、棉花糖、皮蛋、胡萝卜/黄瓜、藕片、等
水果:香蕉、木瓜、苹果、梨、菠萝、哈密瓜等
4、饮料:矿泉水、可乐(去油腻)、凉茶(降火)、橙汁、啤酒等

$.ajax({
url:"${base}/bosImg.xml",
dataType:"xml",
success:function(data){
$(data).find("bosPicture[wlbh='"+wlbh+"'][size='800']").find("imgs").each(function (i){
$('#showbox').empty();
$(this).children('img').each(function (ii){
$('#showbox').append('<img src="'+$(this).text()+'" width="280" height="280" />');
})
});
},
error:function(XMLHttpRequest, textStatus, errorThrown) {
alert(XMLHttpRequest.status);
alert(XMLHttpRequest.readyState);
alert(textStatus);
}
grep -rn "2002675" ./catalina.out
命令行下具体用法如下: mysqldump -u用戶名 -p密码 -d 數據库名 表名 脚本名;
1、导出數據库為dbname的表结构(其中用戶名為root,密码為dbpasswd,生成的脚本名為db.sql)
mysqldump -uroot -pdbpasswd -d dbname >db.sql;
2、导出數據库為dbname某张表(test)结构
mysqldump -uroot -pdbpasswd -d dbname test>db.sql;
3、导出數據库為dbname所有表结构及表數據(不加-d)
mysqldump -uroot -pdbpasswd dbname >db.sql;
4、导出數據库為dbname某张表(test)结构及表數據(不加-d)
mysqldump -uroot -pdbpasswd dbname test>db.sql;
D:\MyDrivers\software\mysql-5.6.26-winx64\bin>mysqldump -h192.168.2.4 -uroot -p -d dy cotton>ee.sql
可以看到solr有哪些子命令,如 start, stop, restart, status, healthcheck, create, create_core, create_collection, delete, version
启动start
bin/solr start -help 查看start帮助
bin/solr start -p 8984 指定端口启动
bin/solr start -cloud 启动分布式版本
bin/solr start -e cloud -noprompt -e表示要启动一个现有的例子,例子名称是cloud,cloud这个例子是以SolrCloud方式启动的
bin/solr restart 重启项目
create
如果是单机版要创建core,如果是分布式的要创建collection
bin/solr create -help 查看create帮助
abc目录的位置创建在solr.solr.home(默认是solr的server/solr目录)目录下
post提交数据生成索引
bin/post -c abc docs/
向名为abc的core或collection提交数据,数据源在docs/目录中
删除
bin/solr delete -c abc 删除一个core或collection
删除索引
bin/post -c abc -d "<delete><id>/home/matthewi/software/solr-5.4.1/docs/solr-morphlines-core/allclasses-noframe.html</id></delete>"
重新执行上面的搜索可以看到搜索结果的数量少了一条:numFound列
bin/post -c abc -d "<delete><query>*:*</query></delete>"
删除所有数据
状态
摘要: nginx.conf配置:location / { proxy_pass http://127.0.0.1:8080/myweb/;proxy_redirect off;proxy_set_header Host $host;proxy_set_header X-Real-IP $remote_addr;proxy_set_header X-Forwarded-For $proxy_ad...
阅读全文
package org.yla.test;
import java.net.URI;
import java.util.ArrayList;
import java.util.List;
import org.apache.commons.httpclient.HttpClient;
import org.apache.commons.httpclient.methods.GetMethod;
import org.apache.http.Header;
import org.apache.http.HttpEntity;
import org.apache.http.HttpHost;
import org.apache.http.auth.AuthScope;
import org.apache.http.auth.Credentials;
import org.apache.http.auth.UsernamePasswordCredentials;
import org.apache.http.client.CredentialsProvider;
import org.apache.http.client.entity.UrlEncodedFormEntity;
import org.apache.http.client.methods.CloseableHttpResponse;
import org.apache.http.client.methods.HttpGet;
import org.apache.http.client.methods.HttpPost;
import org.apache.http.impl.client.BasicCredentialsProvider;
import org.apache.http.impl.client.CloseableHttpClient;
import org.apache.http.impl.client.HttpClientBuilder;
import org.apache.http.impl.client.HttpClients;
import org.apache.http.message.BasicNameValuePair;
import org.apache.http.util.EntityUtils;
import org.junit.Test;
public class HttpClientTest {
String url = "xxxxxxxxxxxxxxxxxxxxxxxxx";
String ip = "202.107.233.85";
int port = 8080;
String username = "";
String password = "";
/**
* 使用HttpClient4实现代理 202.107.233.85 8080
*
* @throws Exception
*/
@Test
public void test1() throws Exception {
HttpClientBuilder build = HttpClients.custom();
HttpHost proxy = new HttpHost(ip, port);
CloseableHttpClient client = build.setProxy(proxy).build();
HttpGet request = new HttpGet(url);
CloseableHttpResponse response = client.execute(request);
HttpEntity entity = response.getEntity();
System.out.println(EntityUtils.toString(entity));
}
/**
* 使用httpclient3实现代理
*
* @throws Exception
*/
@Test
public void test2() throws Exception {
HttpClient httpClient = new HttpClient();
httpClient.getHostConfiguration().setProxy(ip, port);
GetMethod method = new GetMethod(url);
httpClient.executeMethod(method);
String result = new String(method.getResponseBody());
System.out.println(result);
}
/**
* 使用httpclient4实现代理(带密码的代理)
*
* @throws Exception
*/
@Test
public void test3() throws Exception {
HttpClientBuilder build = HttpClients.custom();
CredentialsProvider credentialsProvider = new BasicCredentialsProvider();
AuthScope authscope = new AuthScope(ip, port);
Credentials credentials = new UsernamePasswordCredentials(username,
password);
credentialsProvider.setCredentials(authscope, credentials);
CloseableHttpClient client = build.setDefaultCredentialsProvider(
credentialsProvider).build();
HttpGet request = new HttpGet(url);
CloseableHttpResponse response = client.execute(request);
HttpEntity entity = response.getEntity();
System.out.println(EntityUtils.toString(entity));
}
/**
* 使用httpclient3实现代理(带密码的代理)
*
* @throws Exception
*/
@Test
public void test4() throws Exception {
HttpClient httpClient = new HttpClient();
org.apache.commons.httpclient.auth.AuthScope authscope = new org.apache.commons.httpclient.auth.AuthScope(
ip, port);
org.apache.commons.httpclient.Credentials credentials = new org.apache.commons.httpclient.UsernamePasswordCredentials(
username, password);
httpClient.getState().setProxyCredentials(authscope, credentials);
GetMethod method = new GetMethod(url);
httpClient.executeMethod(method);
String result = new String(method.getResponseBody());
System.out.println(result);
}
/**
* 模拟登录官网(http://mis.pyc.com.cn�?
*
* @throws Exception
*/
@Test
public void testLogin() throws Exception {
HttpClientBuilder build = HttpClients.custom();
CloseableHttpClient client = build.build();
HttpPost post = new HttpPost("http://mis.pyc.com.cn/login.aspx");
List<BasicNameValuePair> params = new ArrayList<BasicNameValuePair>();
params.add(new BasicNameValuePair("__VIEWSTATE",
"/wEPDwUJNjUwNzE0MTM4ZGQzh+vF2xGjdG8Q15kIqgR0CpxhmPucdCqZOPcglRZr/w=="));
params.add(new BasicNameValuePair(
"__EVENTVALIDATION",
"/wEWBQLYtKSdCALEhISFCwKd+7qdDgKC3IeGDAK7q7GGCOqhJpRD8S8yy3ZAlPTSsmPzRUoXMK0mQvGgzlk6hm+G"));
params.add(new BasicNameValuePair("txtName", "xxxxx"));
params.add(new BasicNameValuePair("txtPwd", "xxxxxx"));
params.add(new BasicNameValuePair("btnLogin", "xxxx"));
HttpEntity entity = new UrlEncodedFormEntity(params, "UTF-8");
post.setEntity(entity);
CloseableHttpResponse response = client.execute(post);
int statusCode = response.getStatusLine().getStatusCode();
System.err.println("状态" + statusCode);
if (statusCode == 302) {
Header[] location = response.getHeaders("location");
String rediretUrl = null;
if (location.length == 1) {
rediretUrl = "http://mis.pyc.com.cn" + location[0].getValue();
System.err.println("跳转地址: " + rediretUrl);
}
Header[] allHeaders = response.getAllHeaders();
System.out.println("==================response===================");
for (Header header : allHeaders) {
System.err.println(header.getName() + ": " + header.getValue());
}
Header cookieHeader = response.getFirstHeader("Set-Cookie");
String cookie = cookieHeader.getValue();
System.out.println("cookie: " + cookie);
HttpGet httpGet = new HttpGet(rediretUrl);
httpGet.addHeader("Accept",
"text/html,application/xhtml+xml,application/xml;q=0.9,image/webp,*/*;q=0.8");
// httpGet.addHeader("Accept-Encoding", "gzip, deflate, sdch");
// httpGet.addHeader("Accept-Language", "zh-CN,zh;q=0.8");
httpGet.addHeader("Connection", "keep-alive");
httpGet.addHeader("Cookie", cookie);
httpGet.addHeader("Host", "mis.pyc.com.cn");
httpGet.addHeader("Referer", "http://mis.pyc.com.cn/login.aspx");
httpGet.addHeader(
"User-Agent",
"ozilla/5.0 (Windows NT 6.1; WOW64) AppleWebKit/537.36 (KHTML, like Gecko) Chrome/40.0.2214.115 Safari/537.36");
response = client.execute(httpGet);
HttpEntity entity2 = response.getEntity();
System.out
.println("----------------------------------------------");
System.out.println(EntityUtils.toString(entity2));
}
                  }
}
一、系统环境
yum update升级以后的系统版本为
[root@yl-web yl]# cat /etc/redhat-release CentOS Linux release 7.1.1503 (Core)
二、mysql安装
# wget http://dev.mysql.com/get/mysql-community-release-el7-5.noarch.rpm # rpm -ivh mysql-community-release-el7-5.noarch.rpm # yum install mysql-community-server
安装成功后重启mysql服务。
初次安装mysql,root账户没有密码。
[root@yl-web yl]# mysql -u root Welcome to the MySQL monitor. Commands end with ; or \g. Your MySQL connection id is 3 Server version: 5.6.26 MySQL Community Server (GPL) Copyright (c) 2000, 2015, Oracle and/or its affiliates. All rights reserved. Oracle is a registered trademark of Oracle Corporation and/or its affiliates. Other names may be trademarks of their respective owners. Type 'help;' or '\h' for help. Type '\c' to clear the current input statement. mysql> show databases; +--------------------+ | Database | +--------------------+ | information_schema | | mysql | | performance_schema | | test | +--------------------+ 4 rows in set (0.01 sec) mysql>
设置密码
mysql> set password for 'root'@'localhost' =password('password'); Query OK, 0 rows affected (0.00 sec) mysql> 不需要重启数据库即可生效。
三、配置mysql
1、编码
mysql配置文件为/etc/my.cnf
最后加上编码配置
[mysql] default-character-set =utf8
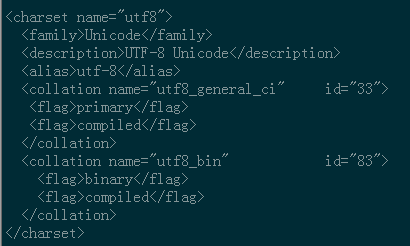
这里的字符编码必须和/usr/share/mysql/charsets/Index.xml中一致。
2、远程连接设置
把在所有数据库的所有表的所有权限赋值给位于所有IP地址的root用户。
mysql> grant all privileges on *.* to root@'%'identified by 'password';
如果是新用户而不是root,则要先新建用户
mysql>create user 'username'@'%' identified by 'password';
此时就可以进行远程连接了。