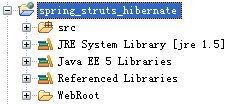
1、首先在MyEclipse创建web工程,project name 为spring_struts_hibernate
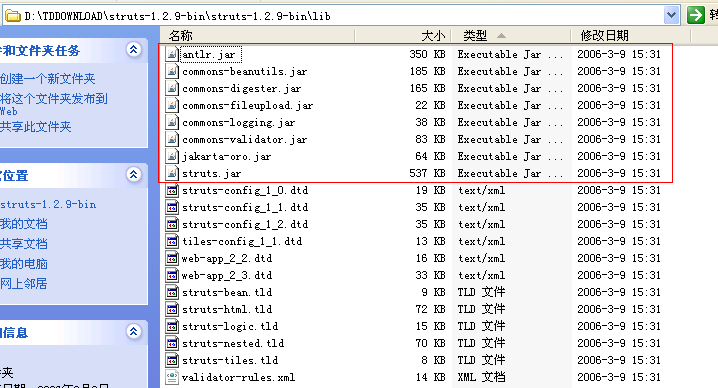
2、先加入struts的支持。拷贝struts的jar到工程里的WEB-INF下的lib中
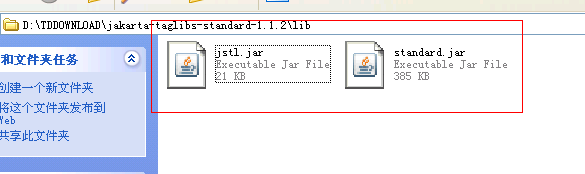
3、然后再拷贝jstl类库,核心和标准库
4、修改web.xml文件来配置ActionServlet
<servlet>
<servlet-name>action</servlet-name>
<servlet-class>
org.apache.struts.action.ActionServlet
</servlet-class>
<init-param>
<param-name>config</param-name>
<param-value>/WEB-INF/struts-config.xml</param-value>
</init-param>
<init-param>
<param-name>debug</param-name>
<param-value>2</param-value>
</init-param>
<init-param>
<param-name>detail</param-name>
<param-value>2</param-value>
</init-param>
<load-on-startup>2</load-on-startup>
</servlet>
<!-- Standard Action Servlet Mapping -->
<servlet-mapping>
<servlet-name>action</servlet-name>
<url-pattern>*.do</url-pattern>
</servlet-mapping>
5、提供struts-config.xml文件

6、提供国际化资源文件
# -- standard errors --
errors.header=<UL>
errors.prefix=<LI>
errors.suffix=</LI>
errors.footer=</UL>
# -- validator --
errors.invalid={0} is invalid.
errors.maxlength={0} can not be greater than {1} characters.
errors.minlength={0} can not be less than {1} characters.
errors.range={0} is not in the range {1} through {2}.
errors.required={0} is required.
errors.byte={0} must be an byte.
errors.date={0} is not a date.
errors.double={0} must be an double.
errors.float={0} must be an float.
errors.integer={0} must be an integer.
errors.long={0} must be an long.
errors.short={0} must be an short.
errors.creditcard={0} is not a valid credit card number.
errors.email={0} is an invalid e-mail address.
# -- other --
errors.cancel=Operation cancelled.
errors.detail={0}
errors.general=The process did not complete. Details should follow.
errors.token=Request could not be completed. Operation is not in sequence.
# -- welcome --
welcome.title=Struts Blank Application
welcome.heading=Welcome!
welcome.message=To get started on your own application, copy the struts-blank.war to a new WAR file using the name for your application. Place it in your container's "webapp" folder (or equivalent), and let your container auto-deploy the application. Edit the skeleton configuration files as needed, restart your container, and you are on your way! (You can find the application.properties file with this message in the /WEB-INF/src/java/resources folder.)
7、加入spring支持。拷贝spring类库,首先加入spring核心jar
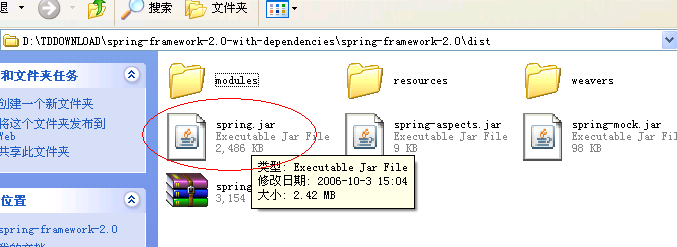
然后再加入\spring-framework-2.0-with-dependencies\spring-framework-2.0\lib下的
日志记录 log4j-1.2.14.jar
aop支持 aspectjrt.jar aspectjweaver.jar
commons-logging.jar
8、提供spring配置文件
applicationContext-action.xml 配置struts中的action
applicationContext-bean.xml 配置业务对象,service层
applicationContext-common.xml 配置sessionFactory和事务
<?xml version="1.0" encoding="UTF-8"?>
<beans xmlns="http://www.springframework.org/schema/beans"
xmlns:xsi="http://www.w3.org/2001/XMLSchema-instance"
xmlns:aop="http://www.springframework.org/schema/aop"
xmlns:tx="http://www.springframework.org/schema/tx"
xsi:schemaLocation="http://www.springframework.org/schema/beans http://www.springframework.org/schema/beans/spring-beans-2.0.xsd
http://www.springframework.org/schema/aop http://www.springframework.org/schema/aop/spring-aop-2.0.xsd
http://www.springframework.org/schema/tx http://www.springframework.org/schema/tx/spring-tx-2.0.xsd">
<!-- 配置sessionFactory -->
<bean id="sessionFactory" class="org.springframework.orm.hibernate3.LocalSessionFactoryBean">
<property name="configLocation">
<value>classpath:hibernate.cfg.xml</value>
</property>
</bean>
<!-- 配置事务管理器 -->
<bean id="transactionManager" class="org.springframework.orm.hibernate3.HibernateTransactionManager">
<property name="sessionFactory">
<ref bean="sessionFactory"/>
</property>
</bean>
<!-- 配置事务的传播特性 -->
<tx:advice id="txAdvice" transaction-manager="transactionManager">
<tx:attributes>
<tx:method name="add*" propagation="REQUIRED"/>
<tx:method name="del*" propagation="REQUIRED"/>
<tx:method name="modify*" propagation="REQUIRED"/>
<tx:method name="*" read-only="true"/>
</tx:attributes>
</tx:advice>
<!-- 那些类的哪些方法参与事务 所有类所有方法-->
<aop:config>
<aop:pointcut id="allManagerMethod" expression="execution(* com.strongit.usermgr.manager.*.*(..))"/>
<aop:advisor pointcut-ref="allManagerMethod" advice-ref="txAdvice"/>
</aop:config>
</beans>
spring与struts集成,在struts-config文件中配置action的type属性要设置为spring的代理
eg.
<action path="/login"
type="org.springframework.web.struts.DelegatingActionProxy"
name="loginForm"
scope="request"
>
<forward name="success" path="/success.jsp"/>
</action>
applicationContext-action.xml文件中配置
<bean name="/login" class="com.bjsxt.usermgr.actions.LoginAction" scope="prototype">
<property name="userManager" ref="userManager"/>
</bean>
9、修改web.xml配置spring
<context-param>
<param-name>contextConfigLocation</param-name>
<param-value>classpath*:applicationContext-*.xml</param-value>
</context-param>
<listener>
<listener-class>
org.springframework.web.context.ContextLoaderListener
</listener-class>
</listener>
10、加入hibernate的支持。把这些jar包全部拷贝带WEB-INF下lib中

11、配置hibernate的配置文件hibernate.cfg.xml
<!DOCTYPE hibernate-configuration PUBLIC
"-//Hibernate/Hibernate Configuration DTD 3.0//EN"
"http://hibernate.sourceforge.net/hibernate-configuration-3.0.dtd">
<hibernate-configuration>
<session-factory>
<property name="hibernate.connection.url">jdbc:mysql://localhost/spring_struts_hibernate</property>
<property name="hibernate.connection.driver_class">com.mysql.jdbc.Driver</property>
<property name="hibernate.connection.username">root</property>
<property name="hibernate.connection.password">root</property>
<property name="hibernate.dialect">org.hibernate.dialect.MySQLDialect</property>
<property name="hibernate.show_sql">true</property>
<property name="hibernate.hbm2ddl.auto">update</property>
</session-factory>
</hibernate-configuration>
该配置文件在applicationContext-common.xml配置中有引用到
<!-- 配置sessionFactory -->
<bean id="sessionFactory" class="org.springframework.orm.hibernate3.LocalSessionFactoryBean">
<property name="configLocation">
<value>classpath:hibernate.cfg.xml</value>
</property>
</bean>
12、至此,ssh集成基本完成,还有一些lib重复的我们可以删除,以保留新版本为准。
所有涉及到的jar包版本如下
hibernate-3.2.5.ga.rar
spring-framework-2.0-with-dependencies.zip
struts-1.2.9-bin.zip
jakarta-taglibs-standard-1.1.2.zip