|
|
| 我对 Java 关键字 Synchronized 的新理解 |
My New Understanding of Java's Synchronized Keyword |
| 说实话,我对 Java 并发编程知之不多。我曾经常用关键字 volatile 试图“强制原子操作”,结果带来的麻烦比解决的还多。Sun Java 教程中的并发课程我以前从没看完过,现在该通读一遍了。 |
To be honest, I knew only a little about concurrent programming in Java. I uesed to use keyword volatile as an attempt to "enforce atomic operations" which had brought me more troubles than solved. Time to walk through the Concurrency Trail of Sun's Java Tutorials that I never finished reading in the past. |
| 我其实知道并经常看到关键字 synchronized 的使用,但直到昨天我还没发觉就这个字消除了很多同步问题。然而,真正的答案在我第一次看这个教程时就在里面了,到这次才弄清。 |
I do know and often see the usage of keyword synchronized, but until yesterday I hadn't figured out how thie single word elimated so many synchronization problems. However, the very answer lies in those tutorials ever since I first read it and this time it has been clearly understood. |
| 每个对象都关联有一个内部锁,也被称作监视器锁或简称监视器。当一个线程调用一个同步方法时,它自动请求此方法的内部锁,并在方法返回时释放。即使是未捕获的异常造成了返回,也会发生锁的释放。而对静态同步方法,方法所在类的 Class 对象的内部锁被请求。同步语句的内部行为没什么两样,只是还需要显示指定一个需要请求其内部锁的任意对象。 |
Every boject has an intrinsic lock, which is also known as monitor lock or monitor for short, associated with it. When a thread invokes a synchronized method, it automatically acquires the intrinsic lock for that method's object and releases it when the method returns. The lock release occurs even if the return was caused by an uncaught exception. As for a static synchronized method, an intrinsic lock for the Class object of that method's Class is acquired instead. Synchronized statements internally behaves no differently except in addition to this, an arbitrary object whose intrinsic lock will be acquired can be and should be explicitly specified.
|
| 总之,synchronized 关键字是锁定对象的简单方式,也有很多局限。java.util.concurrency.locks 包支持更高深的锁定用法,也是我将要学的。 |
In conclusion, synchronized keyword is a simplified way of locking objects, and also has many limitations. More sophisticated locking idioms are supported by the java.util.concurrency.locks package which I am going to learn.
|
| 用 Java Sound API 播放 PCM 音频 |
Playing PCM Audio with Java Sound API |
| 多媒体应用程序,比如因特网电话,需要实时播放音频,于是就要处理内存中的音频数据。本文将演示如何播放 PCM(脉冲编码调制)音频。 |
Multimedia application, such as an Internet phone, requires playing sound in real time. Thus we are going to deal with in-memery audio data. This article will show how to play PCM (Pulse Code Modulation) audio. |
| 假设有一个字节数组 audioBuffer 用来保存将要播放的音频块。做以下的初始化: |
Suppose there is a byte array audioBuffer which holds a chunck of audio data to be played. Do the following initializations: |
- AudioFormat af = new AudioFormat(
- sampleRate, sampleSizeInBits, channels, signed, bigEndian);
- SourceDataLine.Info info = new DataLine.Info(
- SourceDataLine.class, af, bufferSize);
- SourceDataLine sdl = (SourceDataLine) AudioSystem.getLine(info);
- sdl.open(af);
- sdl.start();
|
| 接着只要不停地用 sdl 向混频器写入字节: |
Then just continously write bytes to mixer with sdl: |
- int offset = 0;
- while (offset < audioData.length) {
- offset += sdl.write(audioData, offset, bufferSize);
- }
|
| 因为 audioBuffer 被不断填充和播放,所以最好把上述代码放入线程。播放结束后像这样来停止 sdl: |
Since audioBuffer is filled and played on and on, it's best to put the above code in a thread. When the playing is over, stop sdl like this: |
|
|
| 用 NetBeans 开发一个简单的 Windows XP 程序 - 其三 |
Developing A simple Windows XP Application with NetBeans - Part 3 |
| 新建一个名为 MyMakefile.mk 的 Makefile,内容如下: |
Create a new Makefile named MyMakefile.mk of the following content: |
- PRJ=dist/Release/WinHello.exe
- OBJ=build/Release/WinHello.o build/Release/Resource.o
- CC=gcc
- CFLAGS=-mwindows -s
- RES=windres
- LIB=-lcomctl32
-
- $(PRJ): $(OBJ)
- mkdir -p dist/Release
- $(CC) $(CFLAGS) -o dist/Release/WinHello $(OBJ) $(LIB)
-
- build/Release/WinHello.o: WinHello.c
- mkdir -p build/Release
- $(CC) $(CFLAGS) -c -O4 -o build/Release/WinHello.o WinHello.c
-
- build/Release/Resource.o: Resource.rc
- mkdir -p build/Release
- $(RES) -o build/Release/Resource.o Resource.rc
-
- .PHONY: clean
- clean:
- ${RM} $(OBJ) $(PRJ)
|
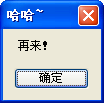
| 注意由于排版问题,制表符被扩展成了空格。把这个 Makefile 添加进项目,在上面右键选择“make”,就能得到如下的预期效果了: |
Note that because of typesetting, tabs are expanded to spaces. Add this Makefile to the project, right click and select "make", and the following result is shown as expected: |
 |
| 用 NetBeans 开发一个简单的 Windows XP 程序 - 其二 |
Developing A simple Windows XP Application with NetBeans - Part 2 |
| 在项目节点上右键转到“属性 → C/C++ → C 编译器”节点,在“命令行”中设置“其他选项”为 -mwindows;再转到“链接器 → 库”,单击“库”右边的省略号按钮,接着单击“添加选项”,设置“其他选项”为 -lcomctl32。 |
Right click the project node and go to "Properties → C/C++ → C Compiler" node, in "Command Line" set "Additonal Options" to -mwindows; then go to "Linker → Libraries", click the ellipsis button to the right of "Libraries", click "Add Option" and set "Other Option" to -lcomctl32. |
| 这时如果直接执行“生成项目”,则会输出以下错误: |
If we directly execute "Build Project" right now, the following errors will be complained: |
- WinHello.c:6: error: `INITCOMMONCONTROLSEX' undeclared (first use in this function)
- WinHello.c:6: error: (Each undeclared identifier is reported only once
- WinHello.c:6: error: for each function it appears in.)
- WinHello.c:6: error: parse error before "init"
- WinHello.c:7: error: `init' undeclared (first use in this function)
- WinHello.c:8: error: `ICC_STANDARD_CLASSES' undeclared (first use in this function)
|
| 结构体 INITCOMMONCONTROLSEX 在 commctrl.h 中声明,commctrl.h 位于 mingw\include。打开这个头文件,查找 INITCOMMONCONTROLSEX,发现它包含在一段预处理指令中: |
Constuct INITCOMMONCONTROLSEX is decleared in commctrl.h, which is inside mingw\include. Open this header file and search INITCOMMONCONTROLSEX, and the following segment of preprocessed commands will be found: |
- #if
(_WIN32_IE >= 0x0300)
typedef struct tagINITCOMMONCONTROLSEX {
DWORD dwSize;
DWORD dwICC;
} INITCOMMONCONTROLSEX,*LPINITCOMMONCONTROLSEX;
#endif
|
| 再查找 _WIN32_IE,找到: |
Then search _WIN32_IE and find: |
- #if
0
#define _WIN32_IE 0x0300
#endif
|
| #if 0 表示在默认情况下,永远不会定义 _WIN32_IE。注释掉行 1 和行 3,再编译,仍然出错: |
#if 0 means _WIN32_IE would never be definded by default. Comment line 1 and line 3, compile and still gets errors: |
- WinHello.c:8: error: `ICC_STANDARD_CLASSES' undeclared (first use in this function)
- WinHello.c:8: error: (Each undeclared identifier is reported only once
- WinHello.c:8: error: for each function it appears in.)
|
| 像上面一样去查找 ICC_STANDARD_CLASSES,这次要把 windef.h 中的 WINVER 改为 0x0501。我觉得不必担心改了这些会带来什么坏处。这些变量存在的意义是定义或不定义一些 API,以便为不同版本的 Windows 开发程序。如今 Windows Vista 已经出来了,世界进步很快,有新东西为什么不用呢? |
Search ICC_STANDARD_CLASSES as above, and this time modify WINVER in windef.h to 0x0501. I don't think it necessary to warry that these modifications do any thing bad. The purpose of the existance of these variables is to define some APLs or not, for the sake of developing applications for various versions of Windows. Windows Vista has been present, and the world is rapidly progressing, so why not use new things? |
| 现在编译运行,不会出错了,但风格是 9x/2000 那种老土的,这是因为默认情况下 NetBeans 不知道如何编译 rc 文件。解决这一问题的办法是自定义一个 Makefile。 |
Compile, run, and no error now, but the style is ugly as 9x/2000's, that's because by default NetBeans dosen't know how to compile rc files. The solution to this peoblem is to write a custom Makefile. |
| 好像差不多长了,下次继续。 |
This seems long enough and is to be continued next time. |
| 用 NetBeans 开发一个简单的 Windows XP 程序 - 其一 |
Developing A simple Windows XP Application with NetBeans - Part 1 |
| 首先创建一个名为 WinHello 的项目,在“源代码”节点下新建 WinHello.c,代码的内容如下: |
First create a project with the name WinHello, and then create a new WinHello.c under "Source Files" node with the following code: |
- #include <windows.h>
- #include <commctrl.h>
-
- int WINAPI WinMain(HINSTANCE hInstance, HINSTANCE hPrevInstance,
- PSTR szCmdLine, int iCmdShow) {
- INITCOMMONCONTROLSEX init;
- init.dwSize = sizeof(init);
- init.dwICC = ICC_STANDARD_CLASSES;
- InitCommonControlsEx(&init);
- MessageBox(NULL, TEXT("再来!"), TEXT("哈哈~"), 0);
- return 0;
- }
|
| 注意末尾处最好再加上一个回车符,因为我们将用 MinGW GCC 来编译,遵循 UNIX 的规矩总是好的。行 6~9 指明用 Windows XP 风格初始化程序,但这还不够,我们还需要一个资源脚本和一个清单文件来显示调用 Comctl32.dll 版本 6(默认状态下自动调用版本 5,也就是 Windows 9x/2000 风格)。在“资源文件”节点下新建资源脚本 resource.rc 和清单文件 WinHello.exe.manifest。resource.rc 的内容如下: |
Attention it's best to add a CR in the end, because we'll compile it with MinGW GCC, so it's always good to follow the UNIX conventions. Line 6~9 indicates Windows XP style will be used to initialize the application, but that's not enough. We still need a resource script and a manifest file to explicitly invoke Comctl32.dll version 6 (version 5 is automatically invoked by default which is Windows 9x/2000 style). Create a new resource script resource.rc and a manifest file WinHello.exe.manifest. The content of resource.rc is as below: |
- #include <windows.h>
-
- CREATEPROCESS_MANIFEST_RESOURCE_ID RT_MANIFEST "Winhello.exe.manifest"
|
| WinHello.exe.manifest 的内容如下: |
The content of WinHello.exe.manifest is as below: |
- <?xml version="1.0" encoding="UTF-8" standalone="yes"?>
- <assembly xmlns="urn:schemas-microsoft-com:asm.v1" manifestVersion="1.0">
- <assemblyIdentity
- version="1.0.0.0"
- processorArchitecture="X86"
- name="zhyi.zhyi.Winhello"
- type="win32"
- />
- <description>Description.</description>
- <dependency>
- <dependentAssembly>
- <assemblyIdentity
- type="win32"
- name="Microsoft.Windows.Common-Controls"
- version="6.0.0.0"
- processorArchitecture="X86"
- publicKeyToken="6595b64144ccf1df"
- language="*"
- />
- </dependentAssembly>
- </dependency>
- </assembly>
|
| 到现在为止,所有的源文件都准备好了,接下来是编译。为避免一篇文章过长,且看下回分解。 |
By now all source files are ready, and next job is compiling. For avoiding a too long article, please read the next part. |
|