张慧的博客

张慧的博客

  BlogJava :: 首页 :: 联系 :: 聚合  :: 管理
  45 Posts :: 0 Stories :: 24 Comments :: 0 Trackbacks

2012年8月16日 #

CSS(Cascading Style Sheet) 层叠样式表,一种和Html联系非常大的标记语言,主要用户控制网页的样式,并能把样式和网页内容分离,因此能大大提高网页开发的效率。

       初识CSS,感觉这个名字有点难以理解,“样式表”理解起来比较容易,就是定义网页的样式,也可以叫风格,那层叠怎么理解呢?

       这要从CSS的继承说起,学过面向对象的话,对继承一定不陌生,CSS的继承更简单一些:


在Html中各个标签可以看作是一个个容器,例如:

  1. <span style="font-size:18px;"><p>详解CSS的<em>名称</em>含义</p></span>  

       这一句话中,<p>标签是一个大容器,里面有<em>标签 ,我们把<p>标签定义成父标签,那么<em>标签就成了子标签。当我对<p>标签(父标签)用CSS样式时,字标签会完全继承父标签的风格,当然这种关系可能会有更多层(上面的例子为两层):

这张图上,每个子标签都会继承父标签的样式,这种层层嵌套的关系,也就是CSS名称的含义。

posted @ 2012-08-16 22:29 张慧 阅读(1636) | 评论 (0)编辑 收藏

经常用到多个透明图片层叠,但又需要获取不同图片的点击事件,本文实现图片透明区域穿透点击事件。
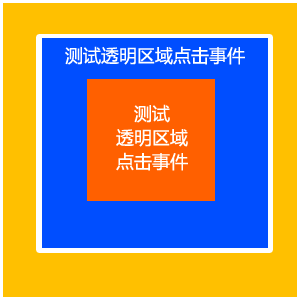
效果图:

 欢迎转载请说明转自:http://blog.csdn.net/aminfo/article/details/7872748

一、先上图片,这2张图片尺寸是一样的,放到drawable目录下:

图1:transparent.png


图2:transparent2.png


二、上布局文件,test.xml

<?xml version="1.0" encoding="utf-8"?>
<FrameLayout xmlns:android="http://schemas.android.com/apk/res/android"
   android:layout_width
="fill_parent"
   android:layout_height
="fill_parent"
   android:orientation
="vertical"
   android:gravity
="center"
   android:id
="@+id/mainLayout">
   
    <ImageView android:id="@+id/ImageView01"
        android:layout_width
="wrap_content"
        android:layout_height
="wrap_content"
        android:src
="@drawable/transparent"/>
    
    <ImageView android:id="@+id/ImageView02"
        android:layout_width
="wrap_content"
        android:layout_height
="wrap_content"
        android:src
="@drawable/transparent2"/>    
          
</FrameLayout>

package org.shuxiang.test;

import android.app.Activity;
import android.graphics.Bitmap;
import android.graphics.drawable.BitmapDrawable;
import android.os.Bundle;
import android.util.Log;
import android.view.MotionEvent;
import android.view.View;
import android.view.Window;
import android.view.View.OnClickListener;
import android.view.View.OnTouchListener;
import android.widget.ImageView;

public class MainActivity extends Activity
{
    private ImageView iv1;
    private ImageView iv2;
    private Bitmap bitmap1, bitmap2;
    private boolean iv1Transparent = false;
    private boolean iv2Transparent = false;

    @Override
    public void onCreate(Bundle savedInstanceState) {
        super.onCreate(savedInstanceState);
        requestWindowFeature(Window.FEATURE_NO_TITLE);
        setContentView(R.layout.test);

        iv1 = (ImageView) findViewById(R.id.ImageView01);
        iv2 = (ImageView) findViewById(R.id.ImageView02);
        bitmap1 = ((BitmapDrawable) (iv1.getDrawable())).getBitmap();
        bitmap2 = ((BitmapDrawable) (iv2.getDrawable())).getBitmap();
        
        iv1.setOnClickListener(new OnClickListener(){
            @Override
            public void onClick(View v) {
                // TODO Auto-generated method stub
                if(iv1Transparent)
                {
                    Log.i("test", "图1透明区域");
                }
                else
                {
                    Log.i("test", "图1点击");                    
                }
            }
            
        });
        
        iv1.setOnTouchListener(new OnTouchListener()
        {
            @Override
            public boolean onTouch(View arg0, MotionEvent arg1) 
            {
                // TODO Auto-generated method stub
                if(bitmap1.getPixel((int)(arg1.getX()),((int)arg1.getY()))==0)
                {
                    Log.i("test", "图1透明区域");
                    iv1Transparent = true;    //透明区域设置true                    
                }
                else
                {
                    Log.i("test", "图1实体区域");
                    iv1Transparent = false;
                }
                return false;
            }            
        });
        
        iv2.setOnClickListener(new OnClickListener()
        {
            @Override
            public void onClick(View v) {
                // TODO Auto-generated method stub
                if(iv2Transparent)
                {
                    Log.i("test", "图2透明区域");
                }
                else
                {
                    Log.i("test", "图2点击");                    
                }
            }
            
        });
        
        iv2.setOnTouchListener(new OnTouchListener()
        {
            @Override
            public boolean onTouch(View v, MotionEvent event) {
                // TODO Auto-generated method stub
                if(bitmap2.getPixel((int)(event.getX()),((int)event.getY()))==0)
                {
                    Log.i("test", "图2透明区域");
                    iv2Transparent = true;    //透明区域设置true
                    iv1.dispatchTouchEvent(event);
                }
                else
                {
                    Log.i("test", "图2实体区域");
                    iv2Transparent = false;
                }
                return false;
            }
        });
    }
}


posted @ 2012-08-16 22:28 张慧 阅读(3349) | 评论 (0)编辑 收藏


需求大致分为三种:
1.震动
2.系统音效(无需提供音频文件)
3.自定义音效(需提供音频文件)
我的工具类的封装:

  1. //  
  2. //  WQPlaySound.h  
  3. //  WQSound  
  4. //  
  5. //  Created by 念茜 on 12-7-20.  
  6. //  Copyright (c) 2012年 __MyCompanyName__. All rights reserved.  
  7. //  
  8.   
  9. #import <UIKit/UIKit.h>  
  10. #import <AudioToolbox/AudioToolbox.h>  
  11.   
  12. @interface WQPlaySound : NSObject  
  13. {  
  14.     SystemSoundID soundID;  
  15. }  
  16.   
  17. /** 
  18.  *  @brief  为播放震动效果初始化 
  19.  * 
  20.  *  @return self 
  21.  */  
  22. -(id)initForPlayingVibrate;  
  23.   
  24. /** 
  25.  *  @brief  为播放系统音效初始化(无需提供音频文件) 
  26.  * 
  27.  *  @param resourceName 系统音效名称 
  28.  *  @param type 系统音效类型 
  29.  * 
  30.  *  @return self 
  31.  */  
  32. -(id)initForPlayingSystemSoundEffectWith:(NSString *)resourceName ofType:(NSString *)type;  
  33.   
  34. /** 
  35.  *  @brief  为播放特定的音频文件初始化(需提供音频文件) 
  36.  * 
  37.  *  @param filename 音频文件名(加在工程中) 
  38.  * 
  39.  *  @return self 
  40.  */  
  41. -(id)initForPlayingSoundEffectWith:(NSString *)filename;  
  42.   
  43. /** 
  44.  *  @brief  播放音效 
  45.  */  
  46. -(void)play;  
  47.   
  48. @end  


  1. //  
  2. //  WQPlaySound.m  
  3. //  WQSound  
  4. //  
  5. //  Created by 念茜 on 12-7-20.  
  6. //  Copyright (c) 2012年 __MyCompanyName__. All rights reserved.  
  7. //  
  8.   
  9. #import "WQPlaySound.h"  
  10.   
  11. @implementation WQPlaySound  
  12.   
  13. -(id)initForPlayingVibrate  
  14. {  
  15.     self = [super init];  
  16.     if (self) {  
  17.         soundID = kSystemSoundID_Vibrate;  
  18.     }  
  19.     return self;      
  20. }  
  21.   
  22. -(id)initForPlayingSystemSoundEffectWith:(NSString *)resourceName ofType:(NSString *)type  
  23. {  
  24.     self = [super init];  
  25.     if (self) {  
  26.         NSString *path = [[NSBundle bundleWithIdentifier:@"com.apple.UIKit"] pathForResource:resourceName ofType:type];  
  27.         if (path) {  
  28.             SystemSoundID theSoundID;  
  29.             OSStatus error =  AudioServicesCreateSystemSoundID((__bridge CFURLRef)[NSURL fileURLWithPath:path], &theSoundID);  
  30.             if (error == kAudioServicesNoError) {  
  31.                 soundID = theSoundID;  
  32.             }else {  
  33.                 NSLog(@"Failed to create sound ");  
  34.             }  
  35.         }  
  36.           
  37.     }  
  38.     return self;  
  39. }  
  40.   
  41. -(id)initForPlayingSoundEffectWith:(NSString *)filename  
  42. {  
  43.     self = [super init];  
  44.     if (self) {  
  45.         NSURL *fileURL = [[NSBundle mainBundle] URLForResource:filename withExtension:nil];  
  46.         if (fileURL != nil)  
  47.         {  
  48.             SystemSoundID theSoundID;  
  49.             OSStatus error = AudioServicesCreateSystemSoundID((__bridge CFURLRef)fileURL, &theSoundID);  
  50.             if (error == kAudioServicesNoError){  
  51.                 soundID = theSoundID;  
  52.             }else {  
  53.                 NSLog(@"Failed to create sound ");  
  54.             }  
  55.         }  
  56.     }  
  57.     return self;  
  58. }  
  59.   
  60. -(void)play  
  61. {  
  62.     AudioServicesPlaySystemSound(soundID);  
  63. }  
  64.   
  65. -(void)dealloc  
  66. {   
  67.     AudioServicesDisposeSystemSoundID(soundID);  
  68. }  
  69. @end  


调用方法步骤:
1.加入AudioToolbox.framework到工程中
2.调用WQPlaySound工具类

2.1震动

  1. WQPlaySound *sound = [[WQPlaySound alloc]initForPlayingVibrate];  
  2. [sound play];  

2.2系统音效,以Tock为例

  1. WQPlaySound *sound = [[WQPlaySound alloc]initForPlayingSystemSoundEffectWith:@"Tock" ofType:@"aiff"];  
  2. [sound play];  

2.3自定义音效,将tap.aif音频文件加入到工程

  1. WQPlaySound *sound = [[WQPlaySound alloc]initForPlayingSoundEffectWith:@"tap.aif"];  
  2. [sound play];  

tap.aif音频文件样例下载点击

posted @ 2012-08-16 22:26 张慧 阅读(7745) | 评论 (0)编辑 收藏