上一篇将架构已经做好了,
现在使用的就是交互程序了。
如图建立:

建立一个Java程序,切换到myeclipse视图下,在src下建立。
代码:
1 package com.duduli.li;
2
3 public class Input {
4 public String display(String name,String sex,String email){
5 System.out.println("your name is " + name);
6 System.out.println("your sex is " + sex);
7 System.out.println("your email is " + email);
8 return "你的姓名是 " + name + "\t你的性别是 " + sex + "\t你的Email是 " + email;
9 }
10 }
Input类下有个display方法,接受三个参数。然后返回一个字符串。
打开webroot/web-inf/flex,找到remoting-config.xml。
在service中加入。
1 <destination id="input">
2 <properties>
3 <source>com.duduli.li.Input</source> <scope>application</scope>
4 </properties>
5 </destination>
然后就是界面的代码:
1 <?xml version="1.0" encoding = "utf-8"?>
2 <mx:Application xmlns:mx="http://www.adobe.com/2006/mxml"
3 layout="absolute">
4 <mx:Script >
5 <![CDATA[
6 import mx.rpc.events.FaultEvent;
7 import mx.rpc.events.ResultEvent;
8 [Bindable]
9 private var helloResult:String;
10 private function input():void {
11 inp.display(nam.text,sex.text,email.text);
12 }
13
14 private function resultHandler(event:ResultEvent):void {
15 helloResult=event.result as String;
16 }
17 ]]>
18 </mx:Script>
19 <mx:RemoteObject id="inp" destination="input" result="resultHandler(event)"/>
20
21 <mx:TextInput id="nam" x="275" y="54"/>
22 <mx:TextInput id="sex" x="275" y="102"/>
23 <mx:TextInput id="email" x="275" y="144"/>
24 <mx:Label x="161" y="56" text="姓名:" fontSize="14"/>
25 <mx:Label x="161" y="104" text="性别:" fontSize="14"/>
26 <mx:Label x="161" y="146" text="邮箱:" fontSize="14"/>
27 <mx:Button label = "Submit" click="input()" x="302" y="183"/>
28 <mx:Panel x="185" y="243" width="250" height="200" layout="absolute" title="你输入的信息是" fontSize="14">
29 <mx:TextArea x="0" y="0" width="230" height="155" text="{helloResult}" editable="false"/>
30 </mx:Panel>
31 </mx:Application>
代码没什么很重要的,应该看一下就能理解了。
运行效果如下:
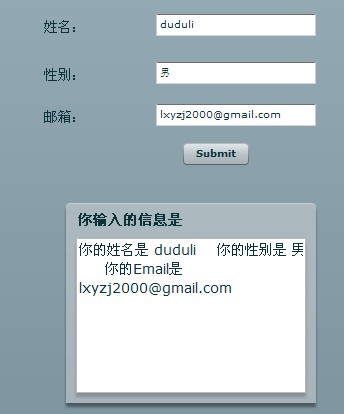
再次提交,就不会有刷新的效果了。
这也就是我喜欢flex的地方。不过第一次加载的时候可能速度有点慢。