糊言乱语

志未半斤, 才无八两. 有苦有乐, 糊涂过活。
posts - 25, comments - 7, trackbacks - 0, articles - 42
  BlogJava :: 首页 :: 新随笔 :: 联系 :: 聚合  :: 管理

EJBCA是一个全功能的CA系统软件,它基于J2EE技术,并提供了一个强大的、高性能并基于组件的CA。EJBCA兼具灵活性和平台独立性,能够独立使用,也能和任何J2EE应用程序集成。 

所需软件:

1.jdk 1.5 下载地址:http://java.sun.com/

2.jboss-4.2.0.GA 下载地址:http://www.jboss.com/

3.jce_policy-1_5_0:下载地址:http://java.sun.com/

4.apache-ant-1.7.0:http://ant.apache.org/

5.oracle 10G:

6.ojdbc14.jar:

7.ejbca 3.4.5: 下载地址:http://ejbca.sourceforge.net

安装步骤:

1.安装jdk,jboss,ant,oracle,并把jce,jdbc解压分别解压到%JAVA_HOME%\jre\lib\security\与%JBOSS_HOME%\server\default\lib\。

2.设置环境变量,我的配置为:

ANT_HOME=C:\tool\ejbca\apache-ant-1.7.0-bin\apache-ant-1.7.0
EJBCA_HOME=C:\tool\ejbca\ejbca_3_5_2\ejbca_3_5_2
JBOSS_HOME=C:\tool\ejbca\jboss-4.2.0.GA\jboss-4.2.0.GA
JAVA_HOME=C:\Program Files\Java\jdk1.6.0_03
path=%SystemRoot%\system32;%SystemRoot%;%SystemRoot%\System32\Wbem;C:\tool\ejbca\apache-ant-1.7.0-bin\apache-ant-1.7.0\bin;C:\tool\ejbca\jboss-
4.2.0.GA\jboss-4.2.0.GA\bin;C:\Program Files\Java\jdk1.6.0_03\bin
classpath=C:\Program Files\Java\jdk1.6.0_03\lib\tools.jar

3.在数据库中创建表空间并添加用户EJBCA,在ORACLE中的代码为:

  创建表空间:

  CREATE TABLESPACE EJBCA DATAFILE 'EJBCA.dbf' SIZE 100m ;

  创建用户:

CREATE user EJBCA   identified by "EJBCA"   default tablespace USERS   temporary tablespace TEMP   profile DEFAULT;
-- Grant/Revoke role privileges
grant aq_administrator_role to EJBCA with admin option;
grant dba to EJBCA with admin option;
-- Grant/Revoke system privileges
grant unlimited tablespace to EJBCA with admin option;

4.删除所有的ejbca\adminweb中的jsp(%EJBCA_HOME%\src\adminweb*.jsp)中的

<%@ page pageEncoding="ISO-8859-1"%>

  以解决中文乱码问题,下一步也是解决此类问题。 

5.把%EJBCA_HOME%\conf\ejbca.properties.sample改名为ejbca.properties,并在ejbca.properties添加如下一行:

web.contentencoding=GBK

6.把%EJBCA_HOME%\conf\database.properties.sample改名为database.properties,并更改相应的数据库配置。如下是我的配置:

datasource.jndi-name=EjbcaDS
datasource.jndi-name-prefix=java:/
database.name=oracle
datasource.mapping=Oracle9i
database.url=jdbc:oracle:thin:@127.0.0.1:1521:ORCL
database.driver=oracle.jdbc.driver.OracleDriver
database.username=ejbca
database.password=ejbca

  注:datasource.mapping需要选择与oracle实际版本最接近的版本。 

7.在%EJBCA_HOME%\bin中,通过cmd运行ant bootstrap。

8.启动jboss,在%JBOSS_HOME%\bin,通过cmd运行run。

9.在%EJBCA_HOME%\bin中,通过cmd运行ant install。

10.关闭jboss,并在在%EJBCA_HOME%\bin中,通过cmd运行ant deploy。

11.再次启动jboss,在%JBOSS_HOME%\bin,通过cmd运行run。

13.导入在%EJBCA_HOME%\p12目录中superadmin.p12,默认密码为ejbca。

注:在第7步时,如出现ANT失败,可能是由于ejbca的版本问题,推荐使用ejbca3.4.5。

访问地址:http://localhost:8080/ejbca/

posted @ 2007-12-03 16:33 Stanley Sun 阅读(1601) | 评论 (0)编辑 收藏

一般在有着1年半以上的程序员基本上都是知道这个厉害的东西的,它对字符串处理的能力可以说是生猛无比。虽然大家都在使用(有时候在开发的Code中,有时候是在我们自己心爱的Editor里),但是我相信大部分人对这里禽兽的了解程度只是停留在会用的层次上。下面我对它进行一下详细的说明。

正则表达式的“祖先”可以一直上溯至对人类神经系统如何工作的早期研究。Warren McCulloch 和 Walter Pitts 这两位神经生理学家研究出一种数学方式来描述这些神经网络。

1956 年, 一位叫 Stephen Kleene 的美国数学家在 McCulloch 和 Pitts 早期工作的基础上,发表了一篇标题为“神经网事件的表示法”的论文,引入了正则表达式的概念。正则表达式就是用来描述他称为“正则集的代数”的表达式,因此采用“正则表达式”这个术语。

随后,发现可以将这一工作应用于使用Ken Thompson 的计算搜索算法的一些早期研究,Ken Thompson是Unix 的主要发明人。正则表达式的第一个实用应用程序就是 Unix 中的qed 编辑器。

如他们所说,剩下的就是众所周知的历史了。从那时起直至现在正则表达式都是基于文本的编辑器和搜索工具中的一个重要部分。

使用正则表达式
在典型的搜索和替换操作中,必须提供要查找的确切文字。这种技术对于静态文本中的简单搜索和替换任务可能足够了,但是由于它缺乏灵活性,因此在搜索动态文本时就有困难了,甚至是不可能的。

使用正则表达式,就可以:

测试字符串的某个模式。例如,可以对一个输入字符串进行测试,看在该字符串是否存在一个电话号码模式或一个信用卡号码模式。这称为数据有效性验证。
替换文本。可以在文档中使用一个正则表达式来标识特定文字,然后可以全部将其删除,或者替换为别的文字。
根据模式匹配从字符串中提取一个子字符串。可以用来在文本或输入字段中查找特定文字。
例如,如果需要搜索整个 web 站点来删除某些过时的材料并替换某些HTML 格式化标记,则可以使用正则表达式对每个文件进行测试,看在该文件中是否存在所要查找的材料或 HTML 格式化标记。用这个方法,就可以将受影响的文件范围缩小到包含要删除或更改的材料的那些文件。然后可以使用正则表达式来删除过时的材料,最后,可以再次使用正则表达式来查找并替换那些需要替换的标记。

许多种工具都支持正则表达式(文本编辑器、文字处理软件、系统工具、数据库引擎,等等),不过,要想充分挖掘正则表达式的能力,还是应当将它作为编程语言的一部分。例如Java、JScript、Visual Basic、VBScript、JavaScript、ECMAScript、C、C++、C#、elisp、Perl、Python、Tcl、Ruby、PHP、sed和awk。事实上,在一些用上述语言编写的程序中,正则表达式扮演了极其重要的角色。
正则表达式能够得到众多语言和工具的支持是有原因的:它们极其有用。从较低的层面上来说,正则表达式描述的是一串文本(a chunk of text)的特征。大家可以用它来验证用户输入的数据,或者也可以用它来检索大量的文本。从较高的层面上来说,正则表达式容许用户掌控他们自己的数据——控制这些数据,让它们为自己服务。掌握正则表达式,就是掌握自己的数据。

可见它的重要性,难怪每款编辑器和编程语言不同程度的实现了它,使得普通用户和开发人员受益不浅。

posted @ 2007-11-07 23:02 Stanley Sun 阅读(416) | 评论 (1)编辑 收藏


treeview 

在开发B/S程序时,我们经常会使用到一些页面级的效果控件。比如:树形目录,ComboBox和一些其他的控件,由于这些控件的存在使得我们的程序异常的夺目。但是在开发这些控件的时候或多或少的都会比较麻烦。而大部分的程序员是使用发布的一些开源的JS控件来减轻工作量而且也使得自己的程序健壮。下面我介绍一个在开源社区中赫赫有名的树形控件:TreeView。

首先介绍一下TreeView,TreeView原名是FolderTree,是一款比较早就出世的树形JS控件,当时是由个人开发的,之后由公司购买了。但是现在还可以免费使用。

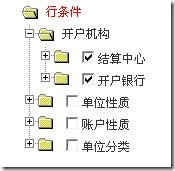
TreeView 有两个JS文件和一些资源文件组成。两个JS文件分别是:主要实现功能的ftiens4.js和实现多浏览器支持的ua.js文件。只有我们在开发的页面中加入如上两个文件的话就可以开发如上图所显示的树形目录了。代码如下:

<html>

<head>

<script type="text/javascript" src="../treeview/ftiens4.js" ></script>

<script type="text/javascript" src="../treeview/ua.js" ></script>

<script type="text/javascript">

//TreeView 环境变量

BUILDALL = 0 //创建所有的节点对象 0:延时创建 1:立即创建
GLOBALTARGET = 'R' //节点触发时的目标 'B':打开新窗口 'R':右边的Frame 'S':当前Frame 'T':当前浏览器窗口
HIGHLIGHT = 0 //高亮显示当前选中的节点 0:不高亮显示 1:高亮显示
HIGHLIGHT_BG = 'blue' //高亮显示的背景颜色
HIGHLIGHT_COLOR = 'white' //高亮显示的颜色
ICONPATH = '' //指定节点的显示图标,使用URL方式,而且必须用"/"结尾 如:http://www.x.com/y/
PRESERVESTATE = 0 //保存TreeView的状态到Cookie中,当再次显示的时候会自动的回置状态 0:不保存 1:保存
STARTALLOPEN = 0 //默认打开所有节点 0:只打开根节点 1:打开所以节点
USEFRAMES = 1 //页面是否使用了Frame,注意:如果未使用Frame一定要设置此参数 0:未使用 1:使用了
USEICONS = 1 //是否使用图标 0:不显示图标 1:显示图标
USETEXTLINKS = 0 //节点文字是否为链接 0:否 1:是
WRAPTEXT = 0 //节点显示超出一行时是否折行 0:不折行 1:折行

foldersTree = gFld("test", "") //创建一个名为"test"的根节点
foldersTree.treeID = "t1" //设置test节点的唯一编号为"t1"


aux1 = insFld(foldersTree, gFld("Day of the week", "b.html")) //在根节点中加入一个名为"Day of the week"的子节点,当点击的时候打开b.html
aux1.addChildren([["1","1.html"],["2","2.html"],["3","3.html"],["4","4.html"],["5","5.html"]])  //在aux1节点中连续加入1,2,3,4,5节点,并相应的打开1.html,2.html,3.html,4.html,5.html.

aux2 = insFld(foldersTree, gLnk("R","Day of the week2", "b.html")) //在根节点中加入名为"Day of the week2"的节点,当点击的时候在右侧的frame中打开b.html
aux3 = insDoc(foldersTree, gLnk("R","<input type=\"checkbox\">Day of the week3", "c.html")) //在根节点中加入名为"Day of the week3"并带有复选框的节点,当点击的时候在右侧的frame中打开c.html

</script>

</head>

<body>

<A style="font-size:7pt;text-decoration:none;color:silver" href="http://www.treemenu.net/" target=_blank>Javascript Tree Menu</A>

<script type="text/javascript">

       initializeDocument();//构造TreeView

</script>

</body>

</html>

TreeView中主要的方法:

gFld(Title, Link);//创建节点 例:gFld("Test A", "javascript:parent.op()")

Argument

Title
Specifies the text that appears in the folder name. This text can include simple HTML tags, such as enclosing formatting tags (i, b, div, and so on). It can even include an img tag if you want to place a small icon in the node name, such as a "new!" icon for example.

Link
Specifies an optional URL. The URL can be a simple file name like demoFramesetRightFrame.html or a string with protocol, domain, path, and file name like http://www.treeview.net/treemenu/demopics/beenthere_europe.gif.


gLnk(Target, Title, Link);//创建一个带有链接的节点 例:gLnk("B", "My File", http://www.mysite.com/MyFile.doc)

Argument

Target
Configures the target location for the link. Specify one of the following values:
"R": Open the document in the right frame (a frame named basefrm)
"B": Open the document in a new window
"T": Open the document in the current browser window, replacing the frameset if one exists
"S": Open the document in the current frame, replacing the tree
Note: This argument is case sensitive; make sure to use uppercase letters.

Title
Specifies the text that appears in the link. This text can include simple HTML tags, such as enclosing formatting tags (i, b, div, and so on). It can even include an img tag if you want to place a small icon in the node name, such as a "new!" icon for example.

Link
Specifies the URL of the document. This can be an absolute URL or a relative URL. Do not enter any other information in this string; adding a target parameter or an event handler will not work.


insFld(Parent Folder, Child Folder); //在父节点中插入一个子节点 例:aux1 = insFld(foldersTree, gFld("Europe", "http..."))

Argument

Parent Folder
Specifies the parent folder. That is, this argument specifies the folder node in which you want to place the other folder node.

Child Folder
Specifies the child folder. That is, this argument specifies the folder node that you want to place under the parent folder node.


insDoc(Parent Folder, Document Node); //在节点中加入一个Dom对象 例:insDoc(aux2, gLnk("S", "Boston", "..."))

Argument

Parent Folder
Specifies the parent folder. That is, this argument specifies the folder node in which you want to place the document node.

Document Node
Specifies the document node. That is, this argument specifies the document node that you want to place in the parent folder node


更多的参考信息到 http://www.treeview.net/tv/instructions.asp

posted @ 2007-11-07 17:59 Stanley Sun 阅读(7484) | 评论 (2)编辑 收藏

    在一年以前一个客户给我推荐一款文件管理软件,名叫Total Commander,以下简称totalcmd,据说在欧美国家相当的流行。当时给这个客户开发程序是需要打开很多个资源管理器,在这么多的管理器中相互的拷贝文件真是一件非常头疼的事情。借助totalcmd可以非常好的完成文件的管理,拷贝、删除,新建,乃至服务的管理等等。值得一提的就是totalcmd可以通过注入插件实现totalcmd本身不可以完成的功能,这也是它很大的一个亮点。

在使用的一年多的totalcmd后,也有了一些自己的使用习惯和独爱的插件,我将罗列如下:
使用习惯:
1.把F2快捷键指定到cm_RenameOnly命令上。
2.把Ctrl+G快捷键指定到cm_FocusCmdLine命令上。
3.在开始菜单下建立一个功能,实现cm_SwitchHidSys功能,可以显示隐藏/系统文件。
4.指定totalcmd只能运行一个实例。
5.最小化到系统托盘里。
6.编辑时默认打开的编辑器为ChoiceEditor。这个插件很难找。
7.把快速查找定义为Letters with search dialog
8.当改变驱动盘符的时候直接定位的驱动的根目录下

独爱插件:
1.Choice Editor:默认编辑选择器。
2.File Redirector:临时目录,这个插件非常有用,强烈推荐。不过安装的时候需要下载一个msvcr70.dll的文件放到你的c:\windows\system32目录下。文件的下载地址:http://www.dll-files.com/dllindex/dll-files.shtml?msvcr70
3.UnInstTC:集成在totalcmd中添加/删除程序,支持搜索。
4.Office:可以通过Ctrl+Q快速查看Office系列软件格式。

注:本人只是一个totalcmd的爱好者,而不是在此为他去大广告。

posted @ 2007-10-31 11:07 Stanley Sun 阅读(652) | 评论 (0)编辑 收藏


        AutoSuggest是通过AJAX技术实现的一种类似于ComboBox之类的输入框,当输入一些提示字符后,AS会自动的把输入框中的Value通过AJAX发送到Server中,Server自定义的解析发送的数据,然后把返回数据通过XMLJSON方式返回到AS中。AS再根据Server返回的标准格式的数据构建出提示候选框,当用鼠标或键盘选中候选项后填充到输入框中。在写这篇手册的时候,AutoSuggest的最新版本是autosuggest_v2.1.3。基本的运行原理如上。

AutoSuggest的主要的物理文件有:bsn.AutoSuggest_2.1.3.jsautosuggest_inquisitor.css。其他的还有一些图片资源文件,一个测试html与一个test.php的服务器段页面。结构如下:
    

│ .DS_Store

│ ._.DS_Store

│ ._bsn.AutoSuggest_2.
1.3.html

│ ._test.php

│ bsn.AutoSuggest_2.
1.3.html

│ test.php


├─css

│ │ .DS_Store

│ │ ._.DS_Store

│ │ autosuggest_inquisitor.css

│ │

│ └─img_inquisitor

│      │ .DS_Store

│      │ ._.DS_Store

│      │ ._as_pointer.gif

│      │ ._hl_corner_bl.gif

│      │ ._hl_corner_br.gif

│      │ ._hl_corner_tl.gif

│      │ ._hl_corner_tr.gif

│      │ ._ul_corner_bl.gif

│      │ ._ul_corner_br.gif

│      │ ._ul_corner_tl.gif

│      │ ._ul_corner_tr.gif

│      │ as_pointer.gif

│      │ hl_corner_bl.gif

│      │ hl_corner_br.gif

│      │ hl_corner_tl.gif

│      │ hl_corner_tr.gif

│      │ ul_corner_bl.gif

│      │ ul_corner_br.gif

│      │ ul_corner_tl.gif

│      │ ul_corner_tr.gif

│      │

│      └─_source

│              .DS_Store

│              ._.DS_Store

│              ._as_pointer.png

│              ._li_corner.png

│              ._ul_corner.png

│              as_pointer.png

│              li_corner.png

│              ul_corner.png


└─js

       .DS_Store

       ._.DS_Store

       ._bsn.AutoSuggest_2.
1.3.js

       bsn.AutoSuggest_2.
1.3.js

       bsn.AutoSuggest_2.
1.3_comp.js


AutoSuggest是一组JavaScript类库,其中主要的对象就是bsn.AutoSggest对象,基本的功能都是在这个对象中完成的。首先我们构建一个简单的示例:
    

var options_xml = {

                                script:
function(input){return"suggestAction!userName.action?signer="+input; }//(1).带有传送数据的请求路径,其中input是输入框的value。

                                varname:
"input"//(2).储存输入框value的变量名

                                delay:
800//(3).发送请求的延时时间

                                cache:
false//(4).是否缓存

                                noresults:
"无符合的记录!",//(5).当没有符合的查询结果时的提示信息

                                timeout:
10000,//(6).候选框停留时间

                                callback: 
function(record){ document.getElementById("temp").value = record.value; } //(7).选择候选项后的回调函数

}
;

var as_xml = new bsn.AutoSuggest('signer', options_xml); //(8).创建autosuggest对象,并绑定一个输入框


通过这样简单的方式我们就可以完成在页面中的autosuggest编码了。其中的参数表可以看下表:

Property

Type

Default

Description

script

String / Function

-

REQUIRED!
Either: A string containing the path to the script that returns the results in XML format. (eg, "myscript.php?")
Or: A function that accepts on attribute, the autosuggest field input as a string, and returns the path to the result script.

varname

String

"input"

Name of variable passed to script holding current input.

minchars

Integer

1

Length of input required before AutoSuggest is triggered.

className

String

"autosuggest"

Value of the class name attribute added to the generated ul.

delay

Integer

500

Number of milliseconds before an AutoSuggest AJAX request is fired.

timeout

Integer

2500

Number of milliseconds before an AutoSuggest list closes itself.

cache

Boolean

true

Whether or not a results list should be cached during typing.

offsety

Integer

-5

Vertical pixel offset from the text field.

shownoresults

Boolean

true

Whether to display a message when no results are returned.

noresults

String

No results!

No results message.

callback

Function

A function taking one argument: an object

{id:"1", value:"Foobar", info:"Cheshire"}

json

Boolean

false

Whether or not a results are returned in JSON format. If not, script assumes results are in XML.

maxentries

Integer

25

The maximum number of entries being returned by the script. (Should correspond to the LIMIT clause in the SQL query.)

之后我们只要在我的服务器中解析传入的signer参数返回,如下格式的xml就可以了。当然也可以用JSON方式,不过我在这里就不在演示了。
    

<results>

                                
<rs id="1" info="">Foobar</rs>

                                
<rs id="2" info="">Foobarfly</rs>

                                
<rs id="3" info="">Foobarnacle</rs>

</results>


AutoSuggest是比较方便的一种实现类Google Suggest的解决方式,提供的js文件也是比较精巧的,并提供的一个压缩后的js脚本文件只有8.33 KB大小。如果要查看其代码可以找到一个没有压缩的原始版本的源代码,其中的代码也是比较容易阅读,更改起来也是比较简单的。我会在以后写一篇《AutoSuggest代码解析》。

更多信息可查阅 http://www.brandspankingnew.net/archive/2007/02/ajax_auto_suggest_v2.html

posted @ 2007-10-19 18:17 Stanley Sun 阅读(2514) | 评论 (2)编辑 收藏

仅列出标题
共5页: 上一页 1 2 3 4 5 下一页